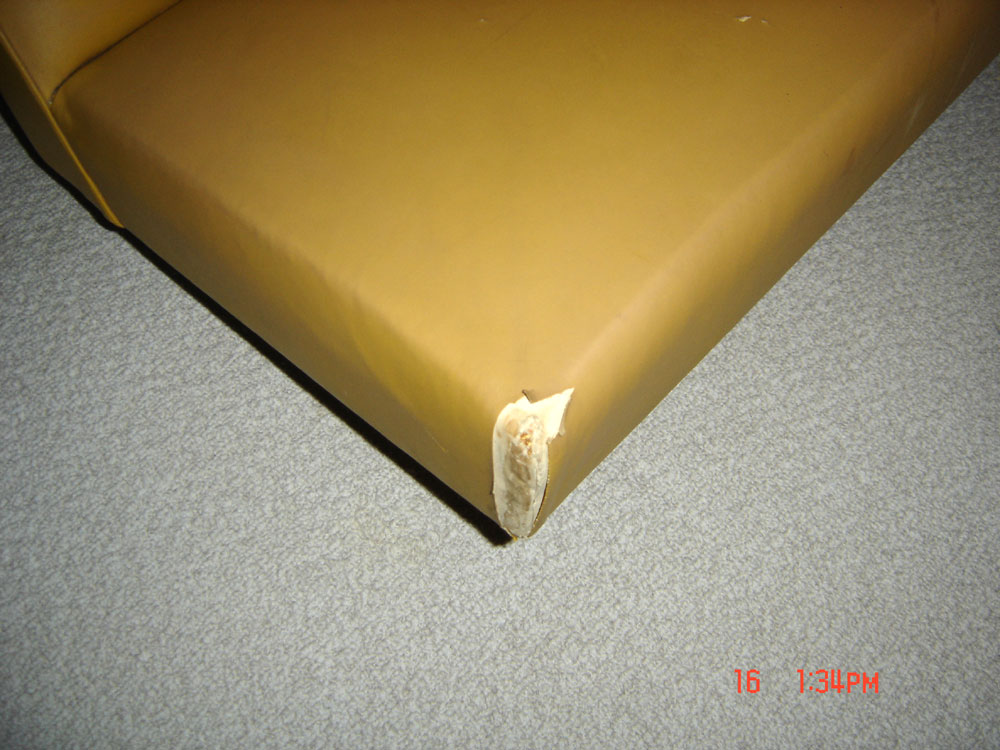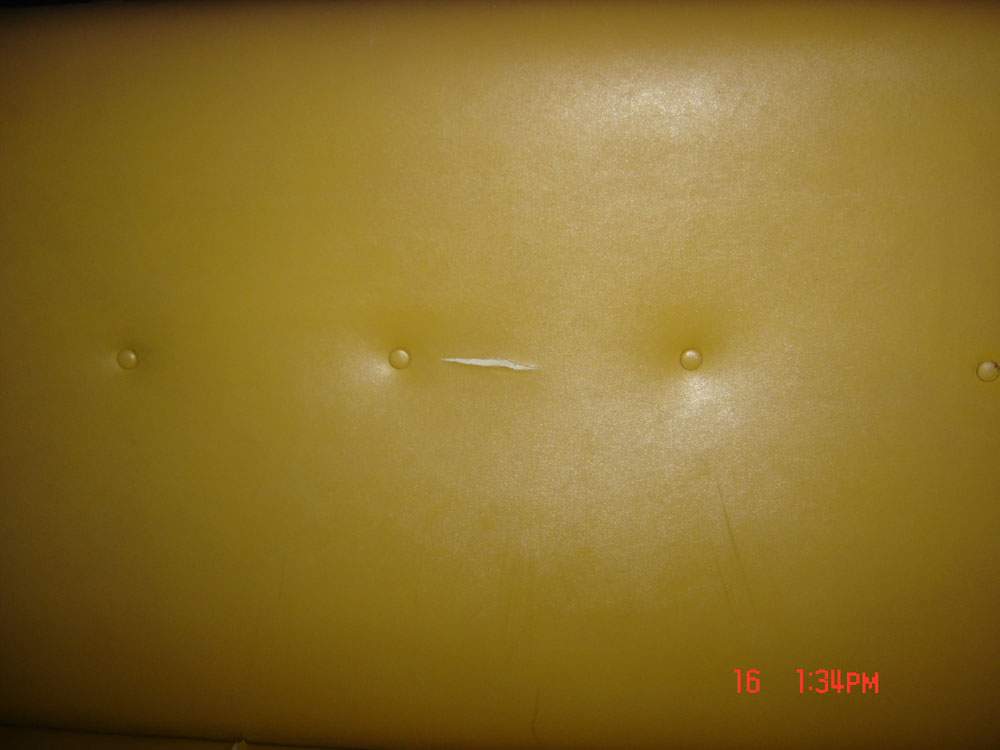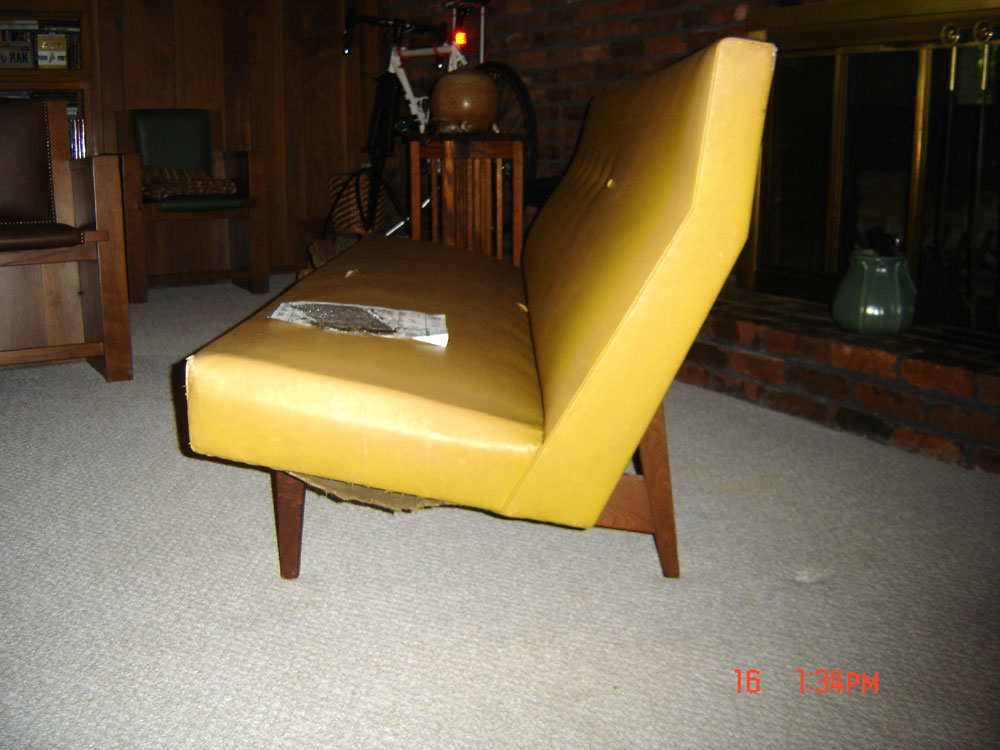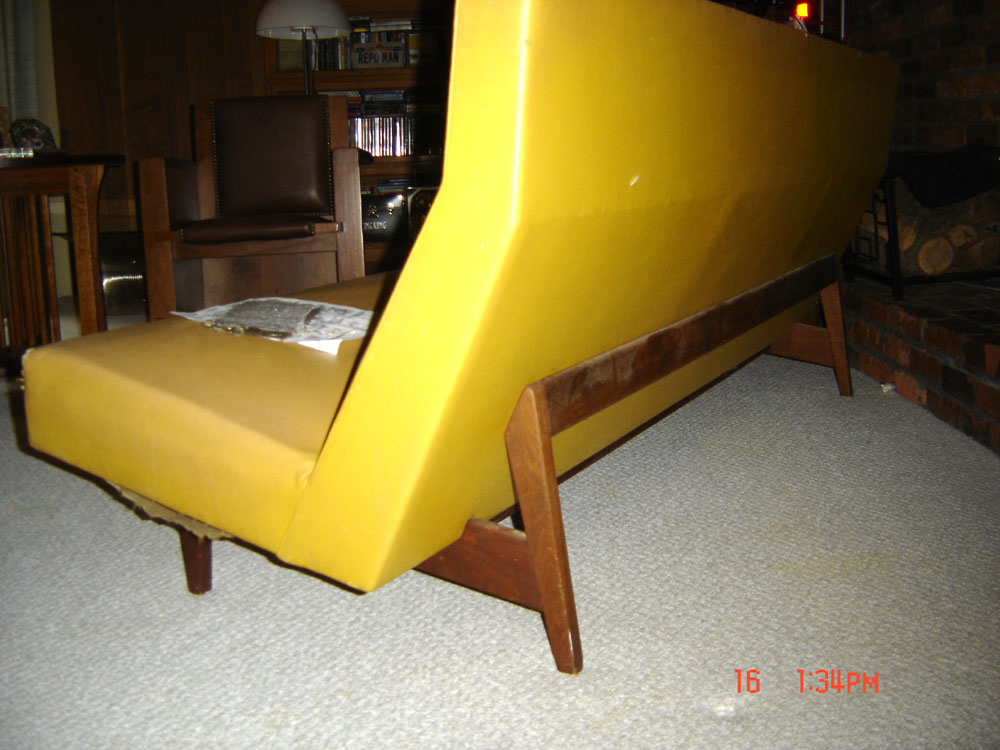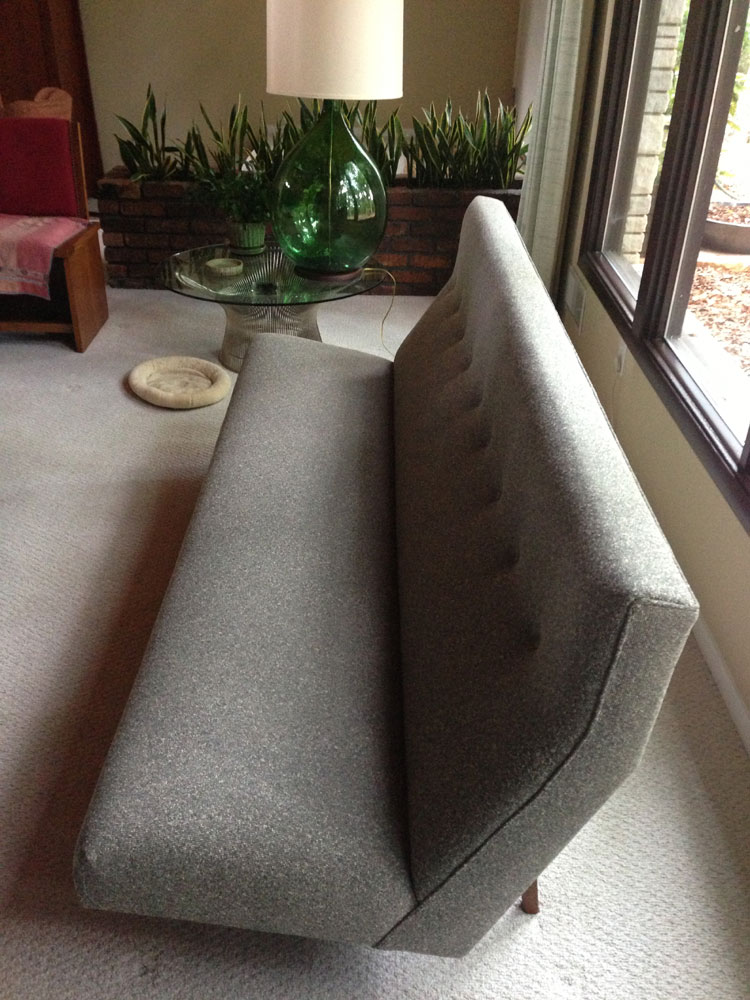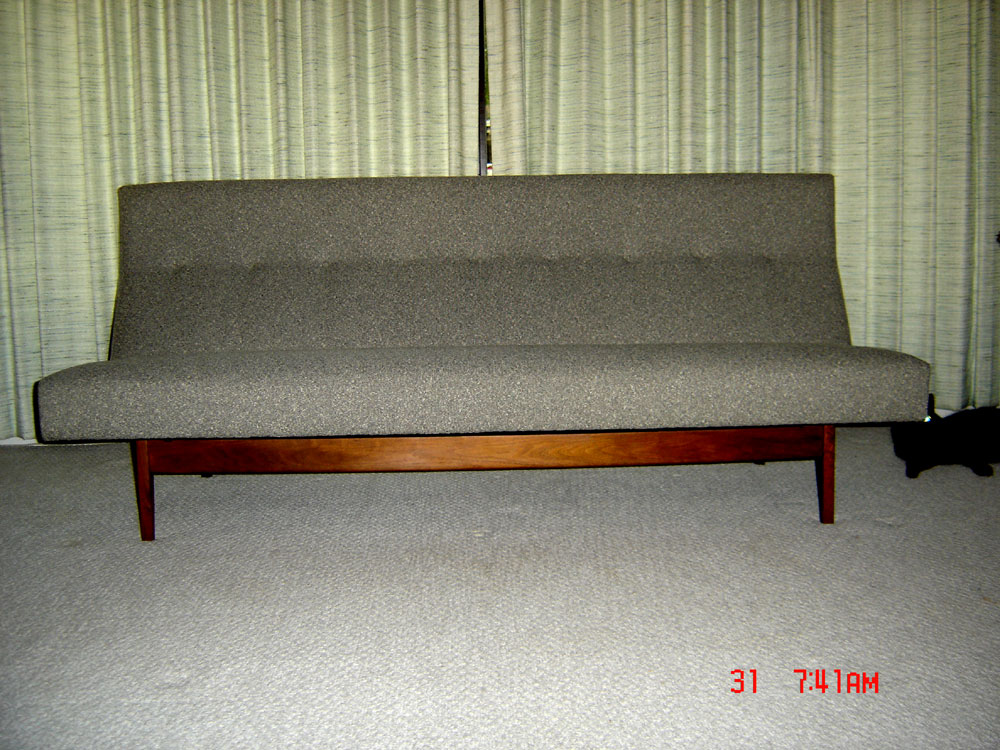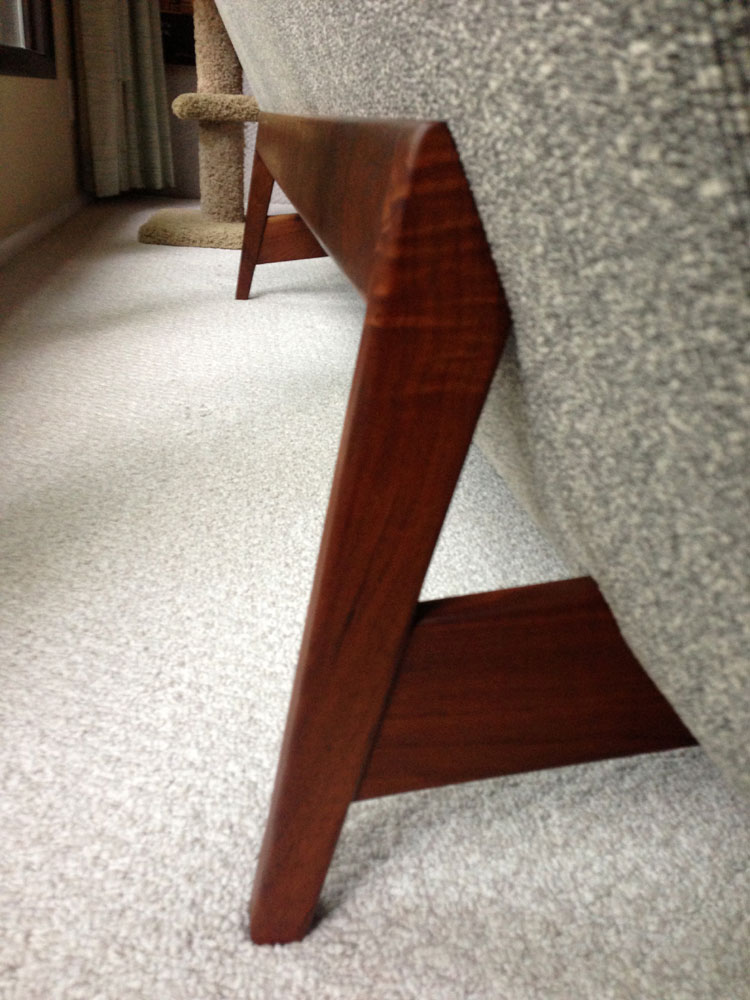
We've been looking for a while for a new couch or sofa to replace our Arts-and-Crafts seating in the living room. About a year ago we found this Jens Risom designed armless sofa on the local Craigslist. After some finagling on the price it was brought home and stored on the upper landing near the fireplace.
The sofa measures over seven feet in length and is quite comfortable - one thing we found was that much of the seating designed as part of the Mid-Century Modern esthetic is not very comfortable - usually the backs are quite low, more for looks than comfort. This design breaks that trend, slanting both the seat and back to be better form-fitting, more like a sport car seat designed by Ricarro rather than a bench designed by Jed Clampett.
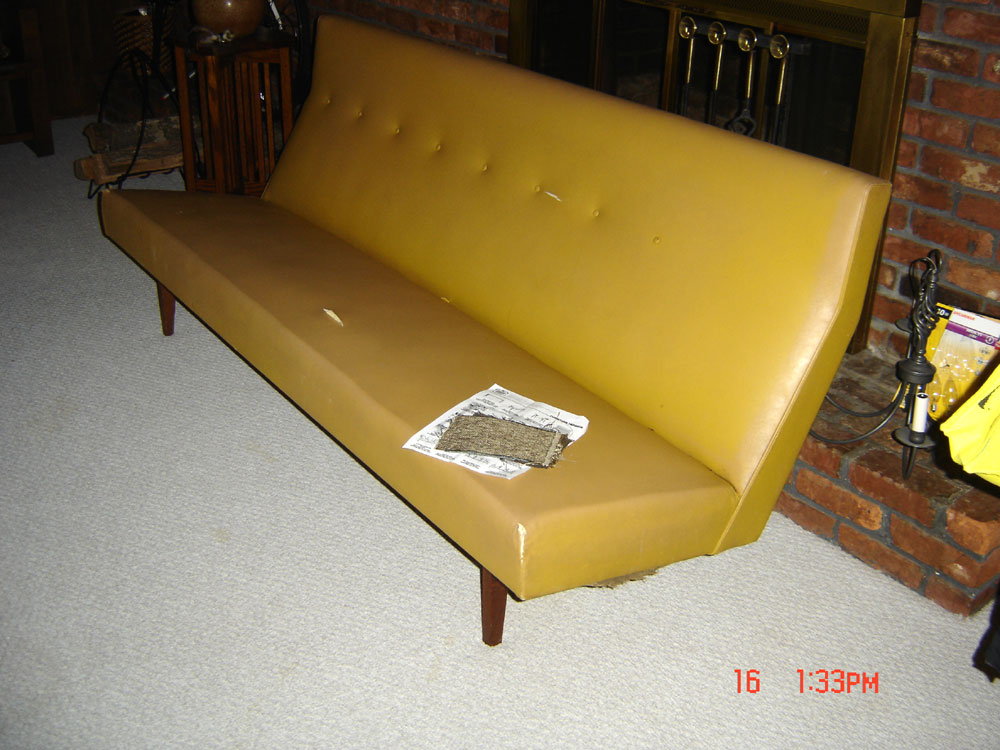
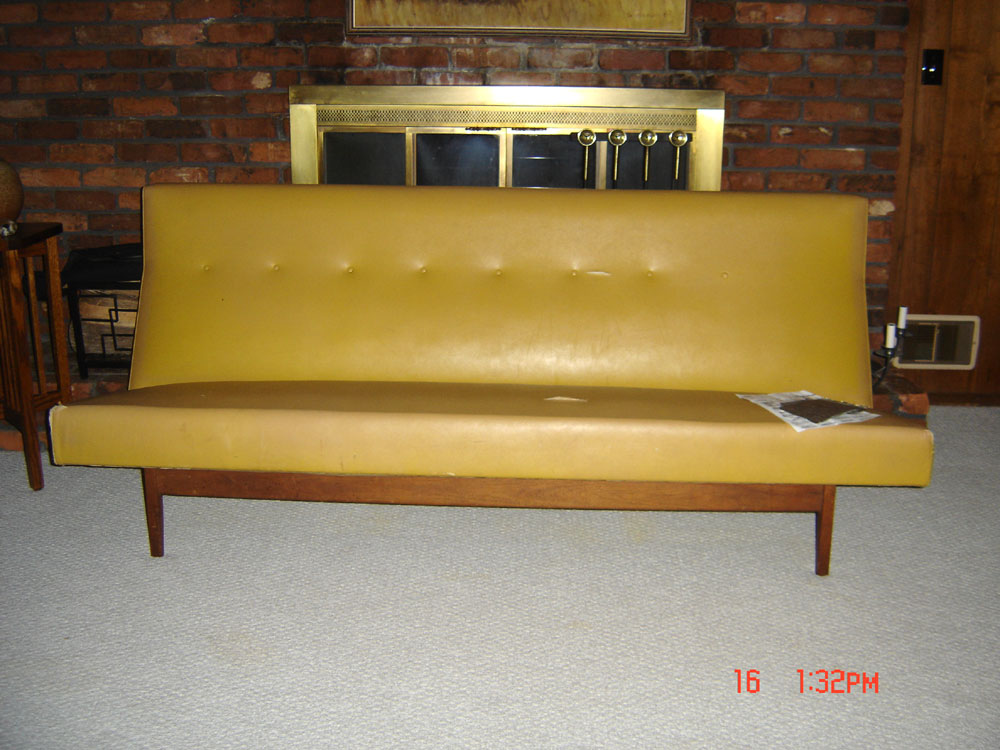
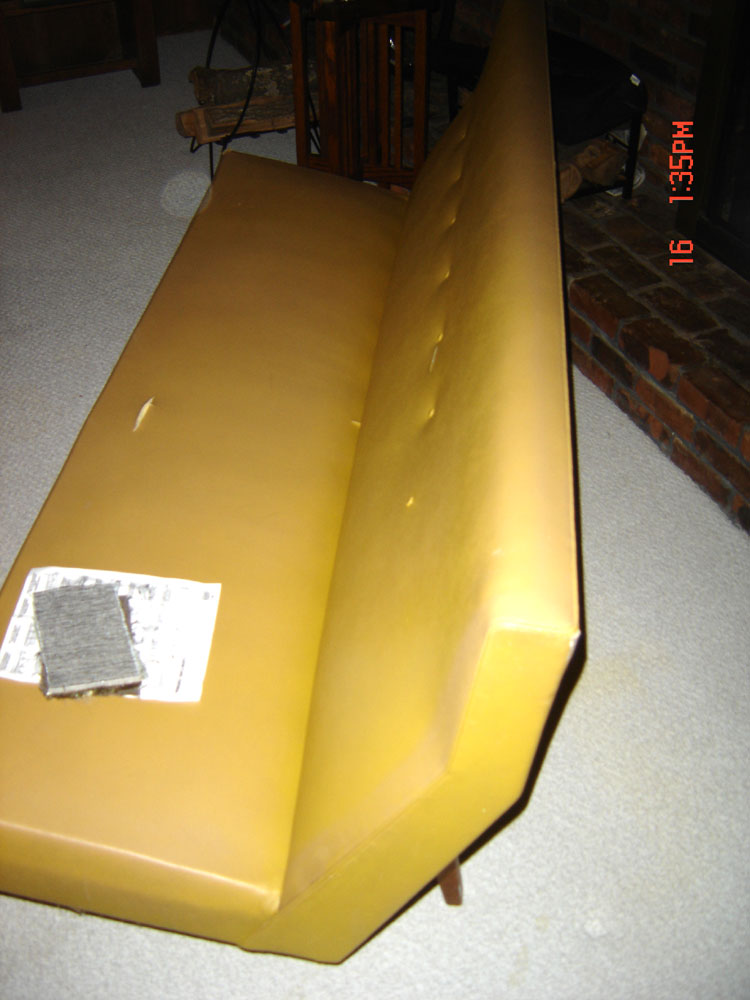
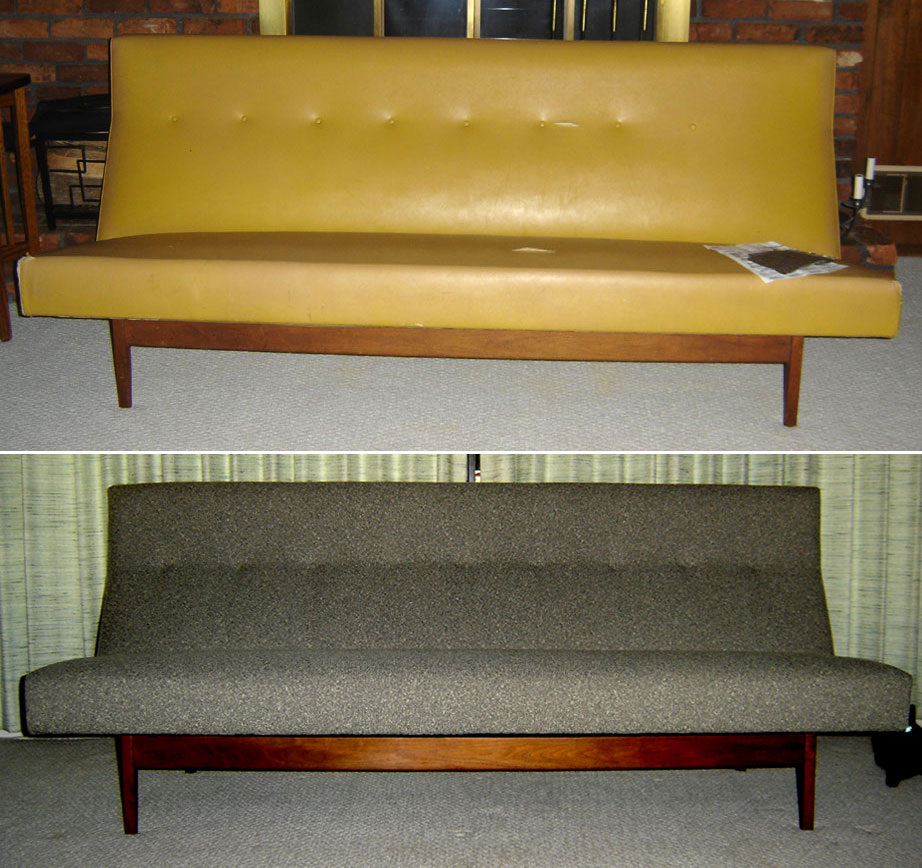
In any case, as you can see the from photo, this example still had its spectacular chartreuse-yellow or mustard Naugahyde upholstery complete with tears, holes and missing buttons.
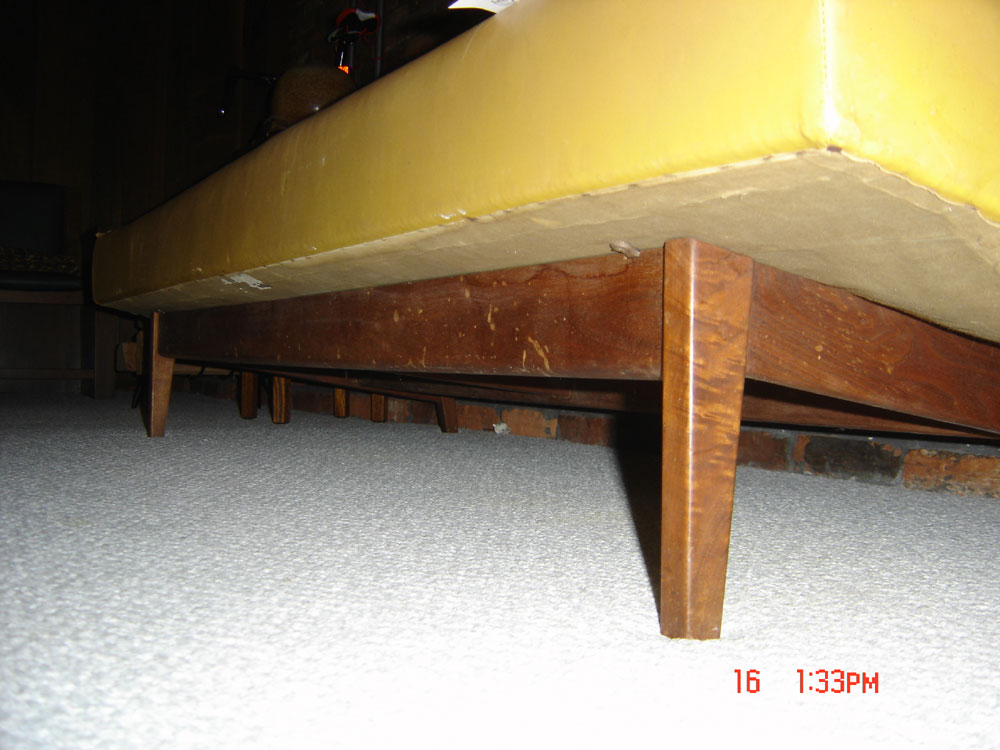
The American walnut base was still in moderately good shape, albeit stained and chipped. You can see a hint of the original label in the middle of the couch above as some white glue residue.
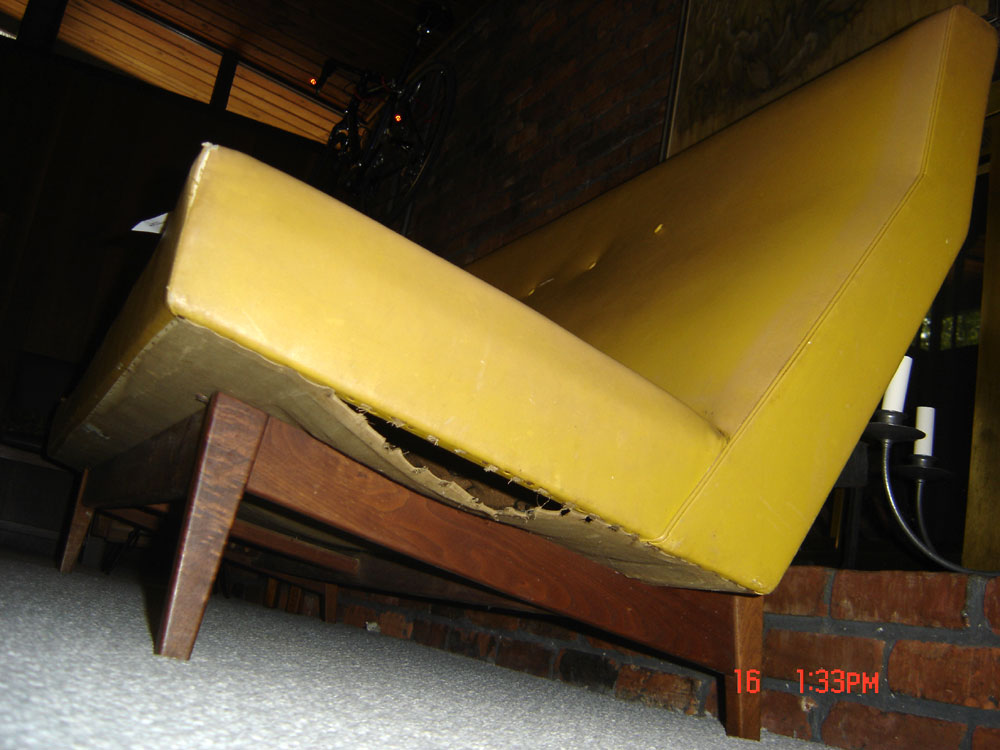
Also, the torn dust-skirt allowed all the brittle dust-of-ages to bellow out whenever someone sat on the sofa (the original cushions were brittle and basically disintegrating).
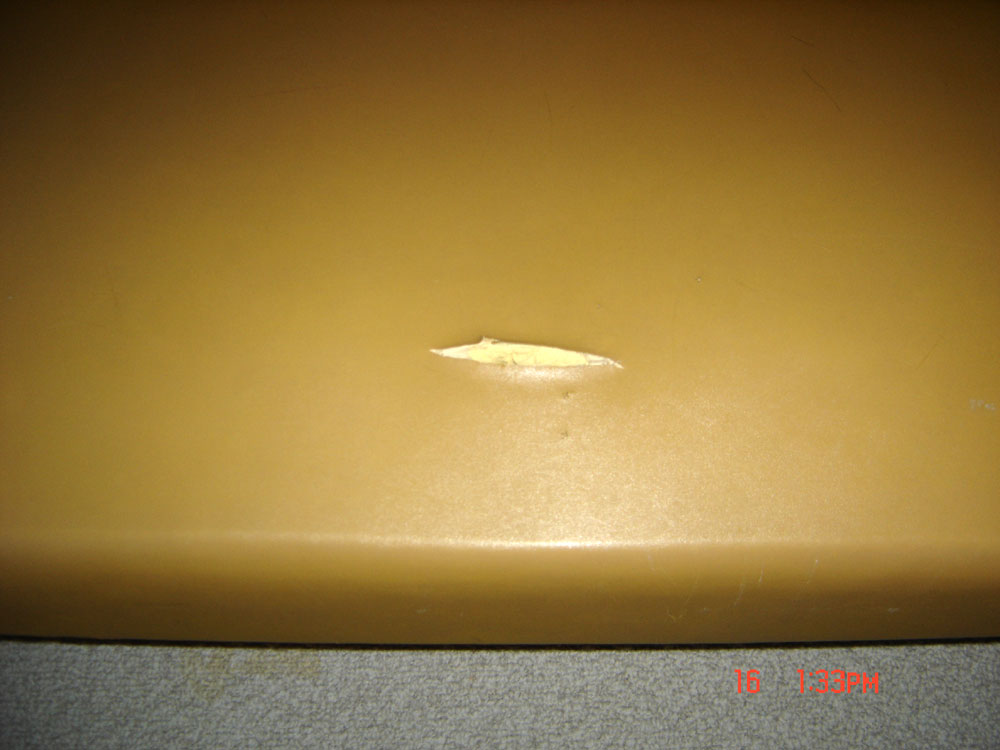
As you can see, the sofa wasn't of much use as-is - we next started on the search for an appropriate material to re-cover. You can see some swatches on the paper in the photos above and below.
Knowing that I also possess several Jens Risom strapped lounge chairs (to be restored) that would accompany the couch, we looked for a color and texture that would first "feel right" in relation to the period, and also compliment the black straps of the lounge chairs. So the sofa has sat for several months as we searched and researched, both the material and an upholsterer. We came upon a material produced by cfstinson called 62387 Flannel. We looked at many different materials including those by Knoll (wanting to keep things reasonably period-specific), but we wanted to keep the 10 or so yards of material needed to cover the sofa in a safe budgetary range. We also wanted something with a high rub-count that could withstand the cat's claws - this material has an Abrasion Resistance of 102,000 Double Rubs.
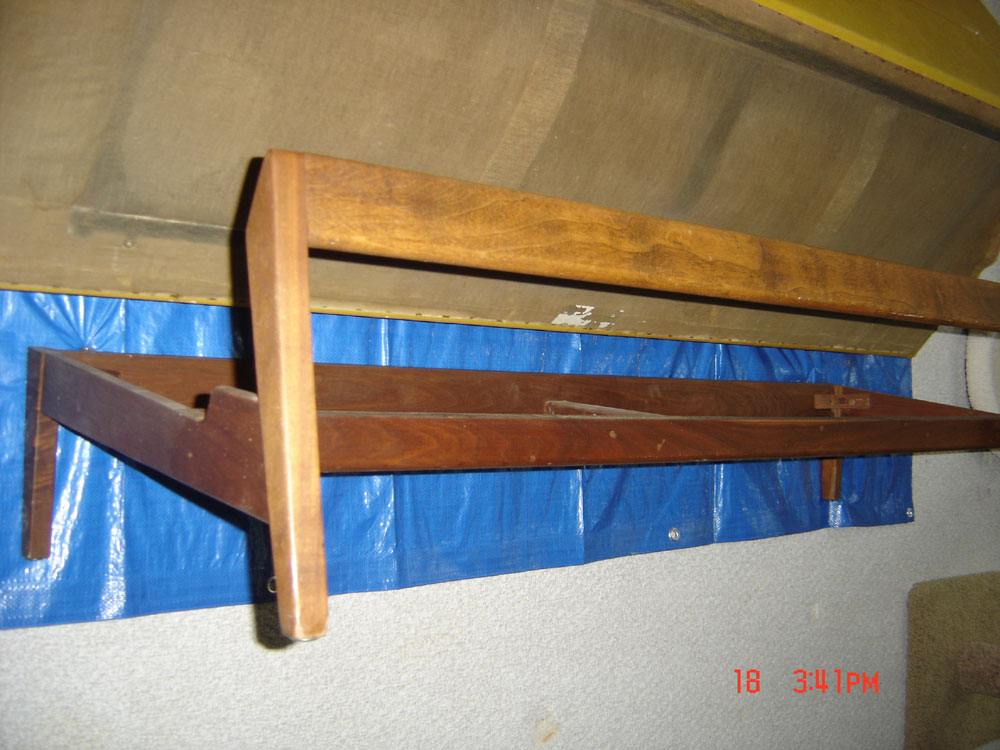
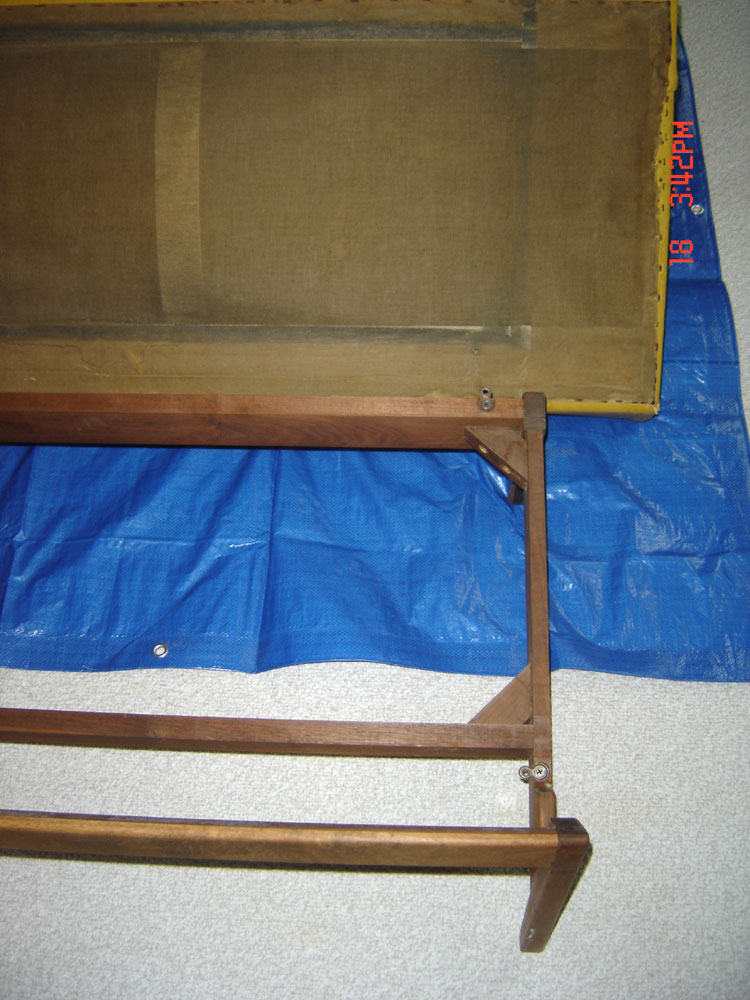
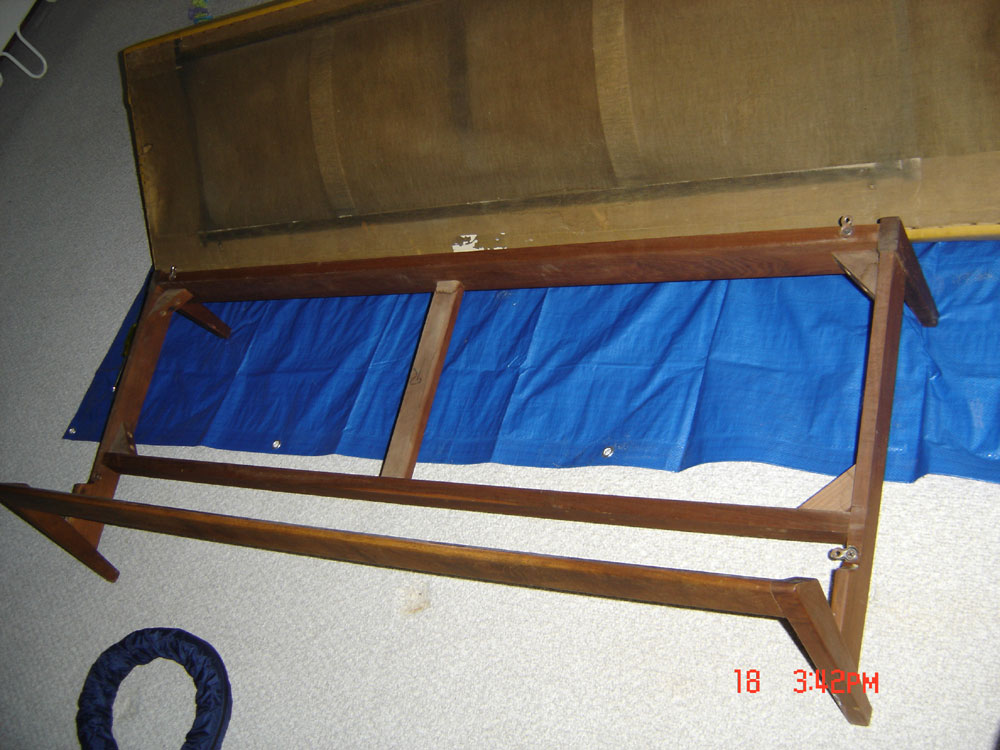
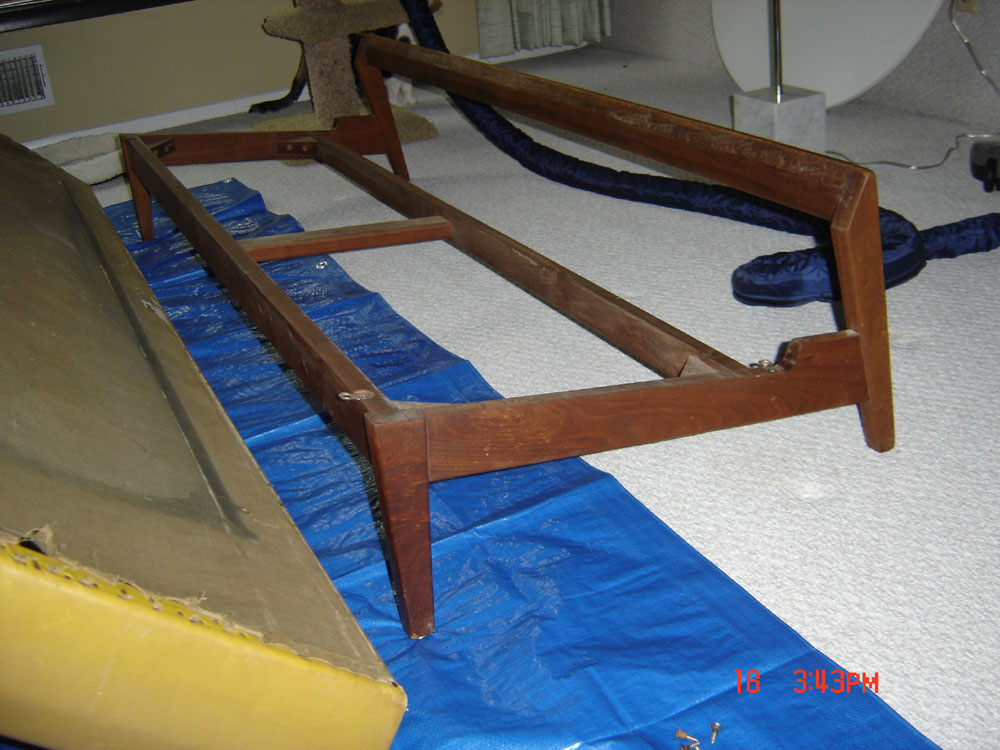
Next we decided on two different upholsterers - one a smaller shop (which we originally used) and then a larger shop (which eventually "fixed" what the first stop did!). But first we ordered the material and then I took the couch apart, using a large tarp to capture most of the crap that was falling out of the dust-shield.
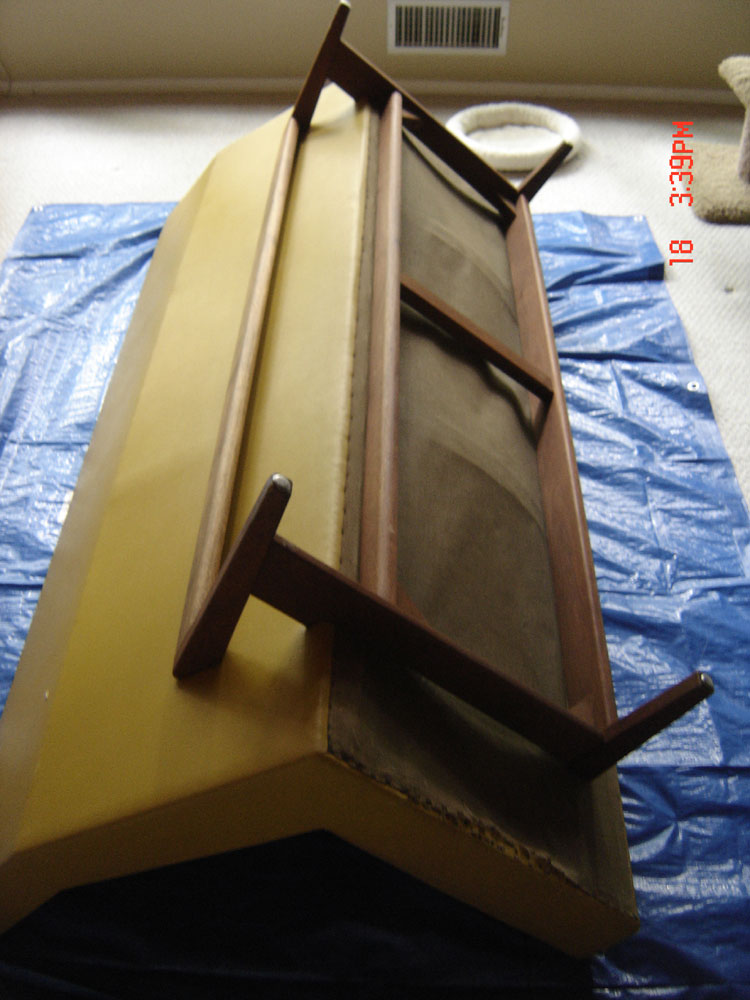
Doesn't look too bad, right? Well, now look at it in artificial light rather than daylight from the window...
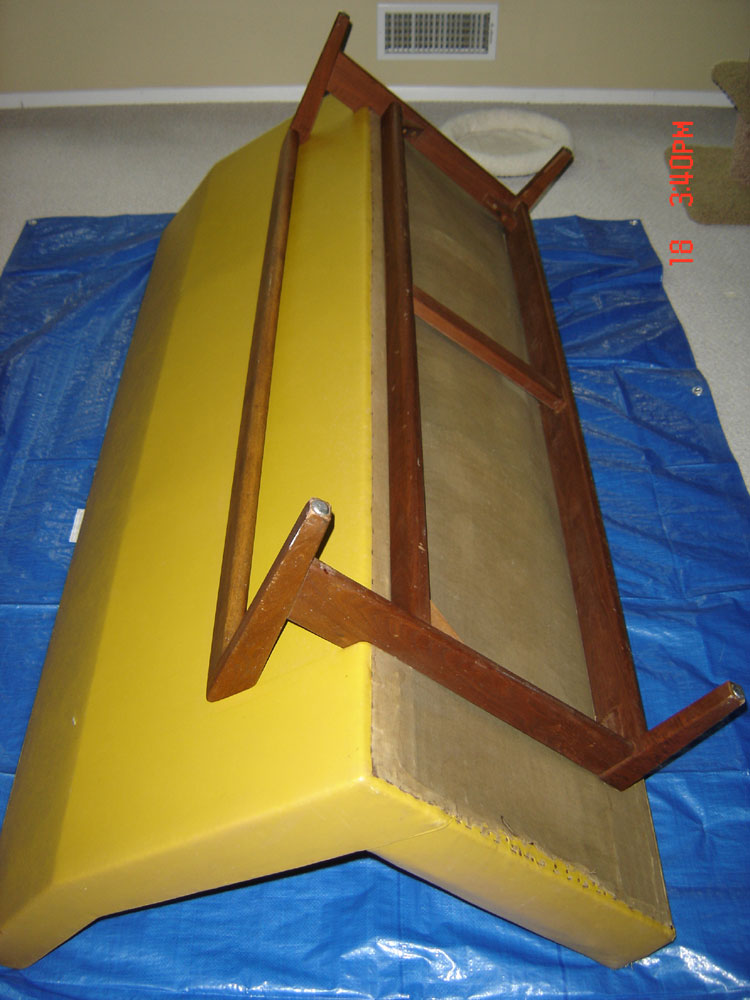
You start to see some of the flaws in the base and finish.
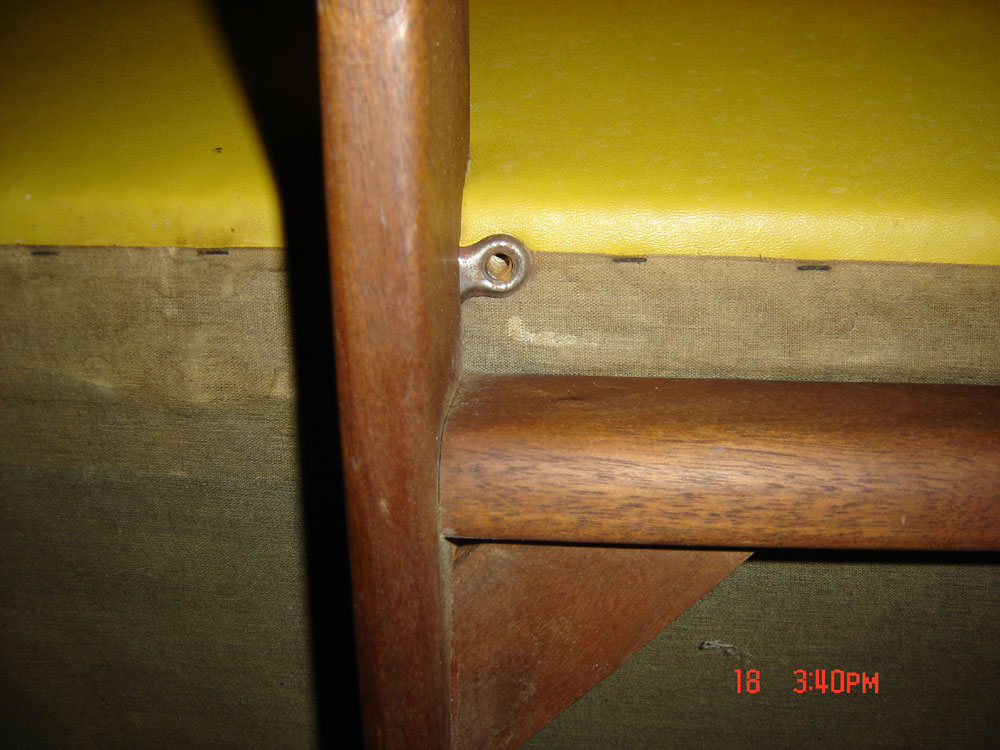
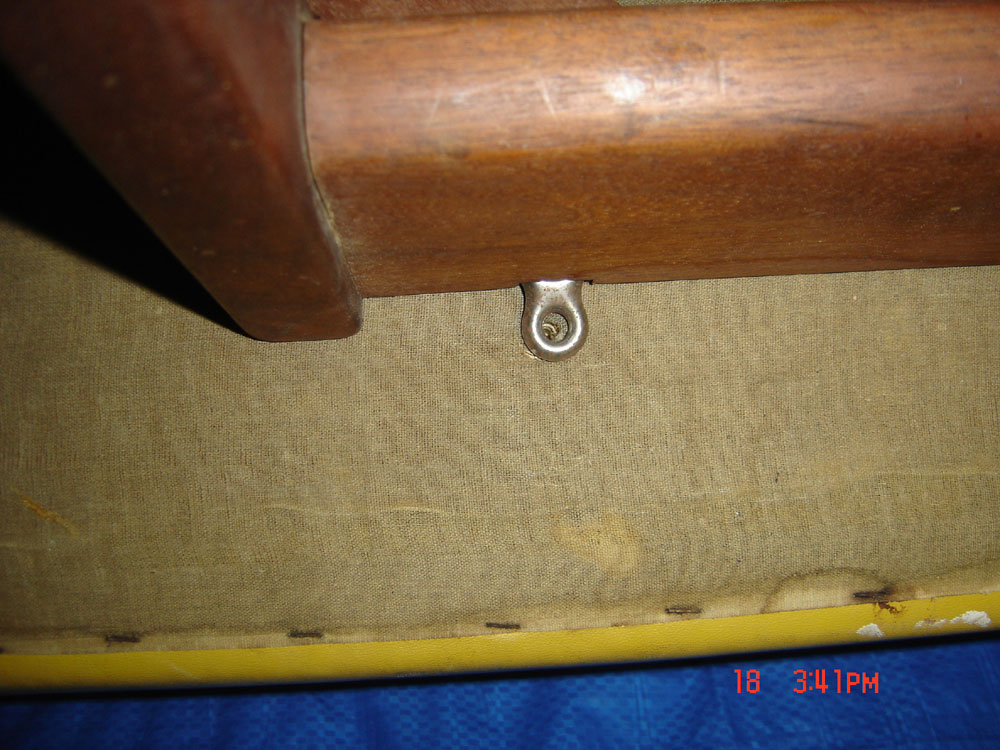
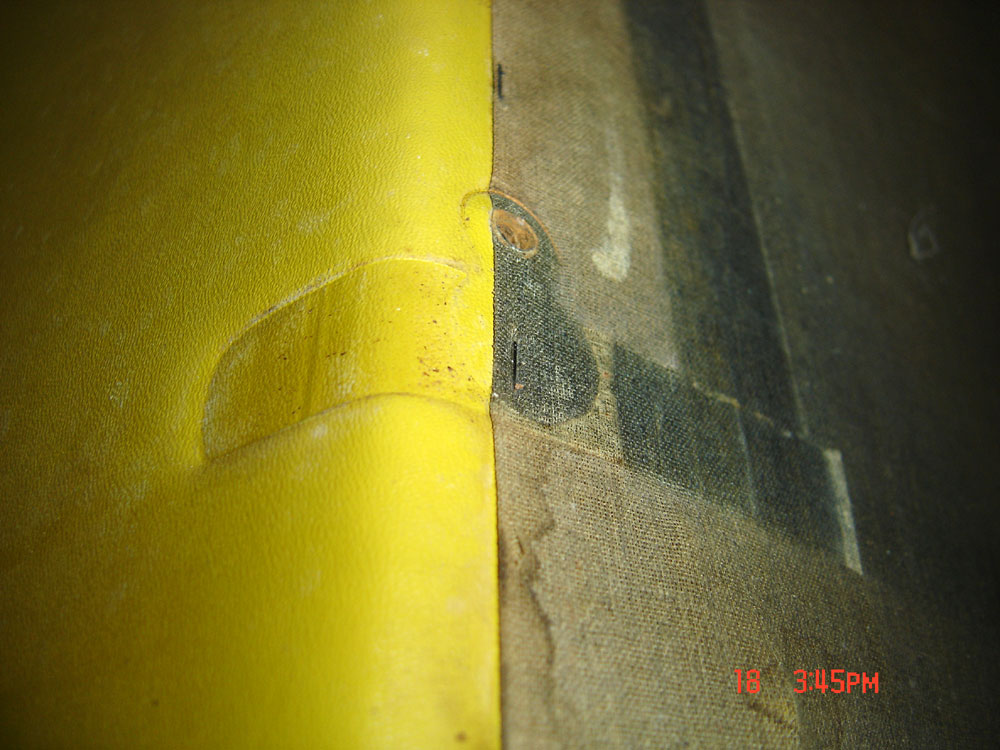
And the only thing holding the base on other than the weight, are these four tiny "figure-eight" straps (see above).
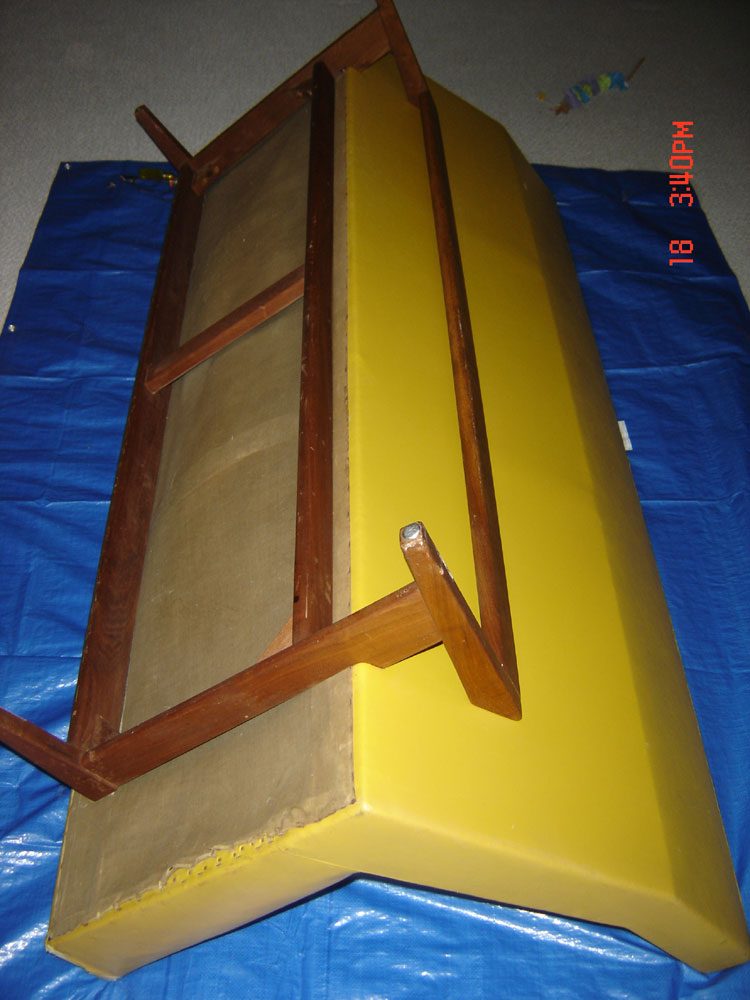
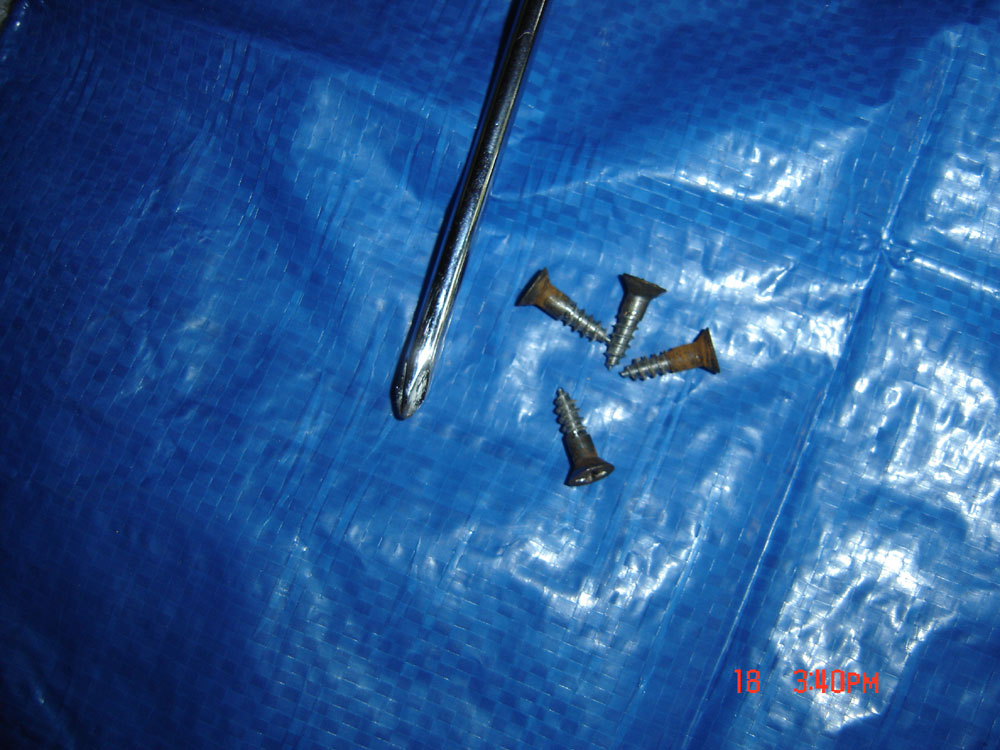
Quick work to remove the four Phillips-head woodscrews.
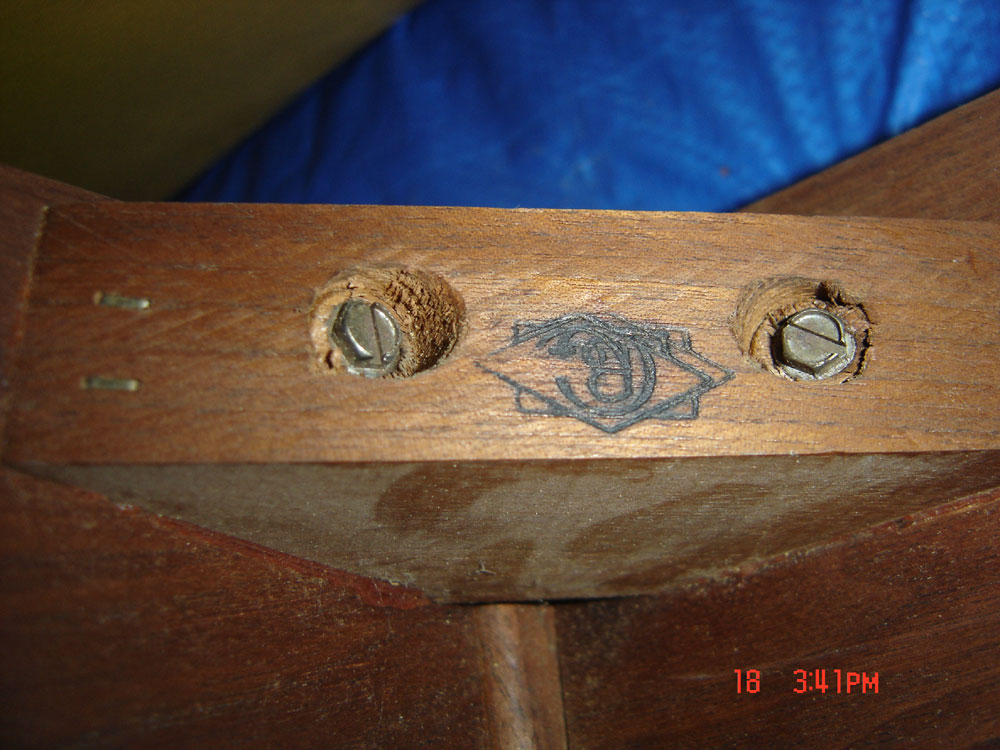
I also noted some markings used in the support blocking....
And you can see some of the other defects to the sofa itself along with the "dusty print" from the base...
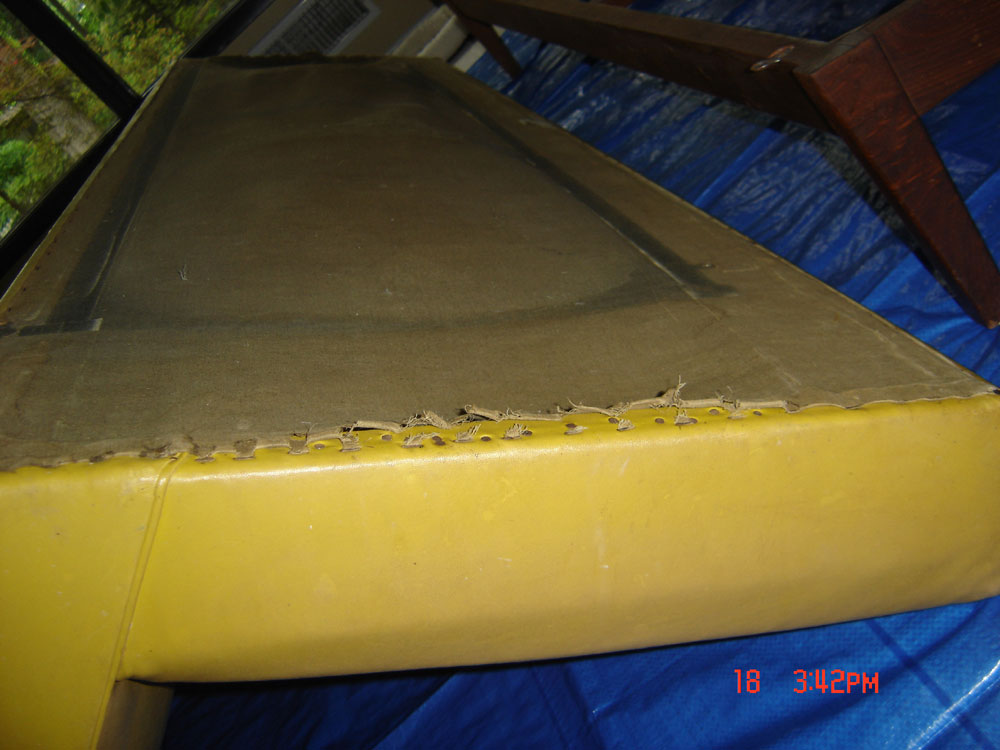
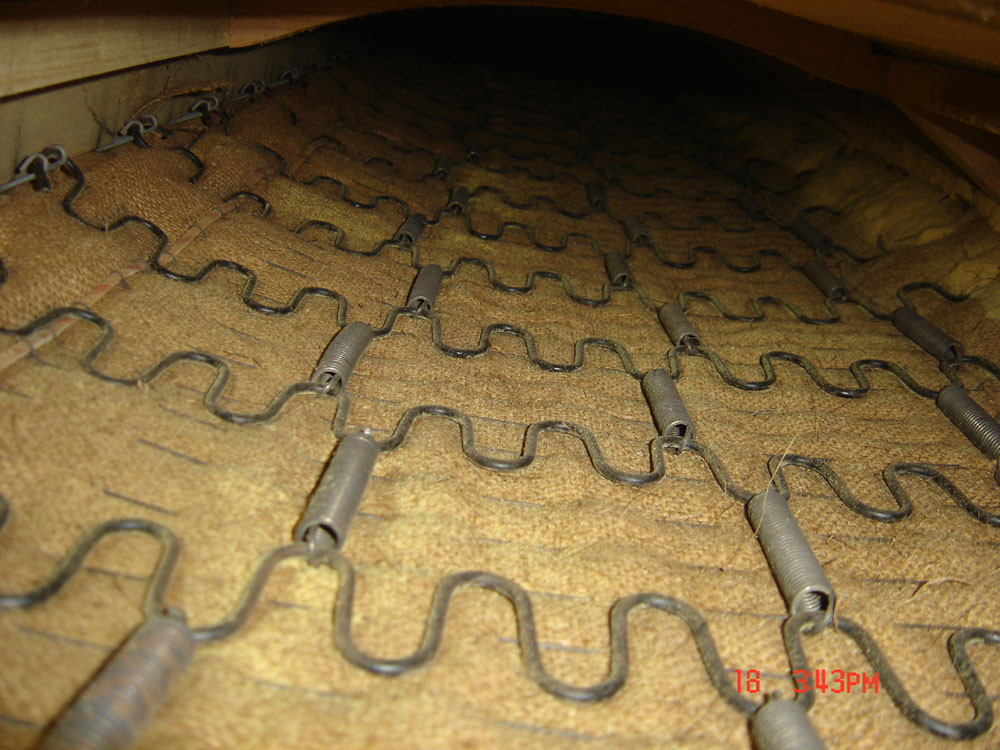
Luckily the springs were still in good shape...
So off the sofa went to our first upholsterer. The original estimate was 2-3 weeks and we were assured that it would look exactly like the original (only with the new material) - we left several photos for reference and the piping, etc. was noted on the order.
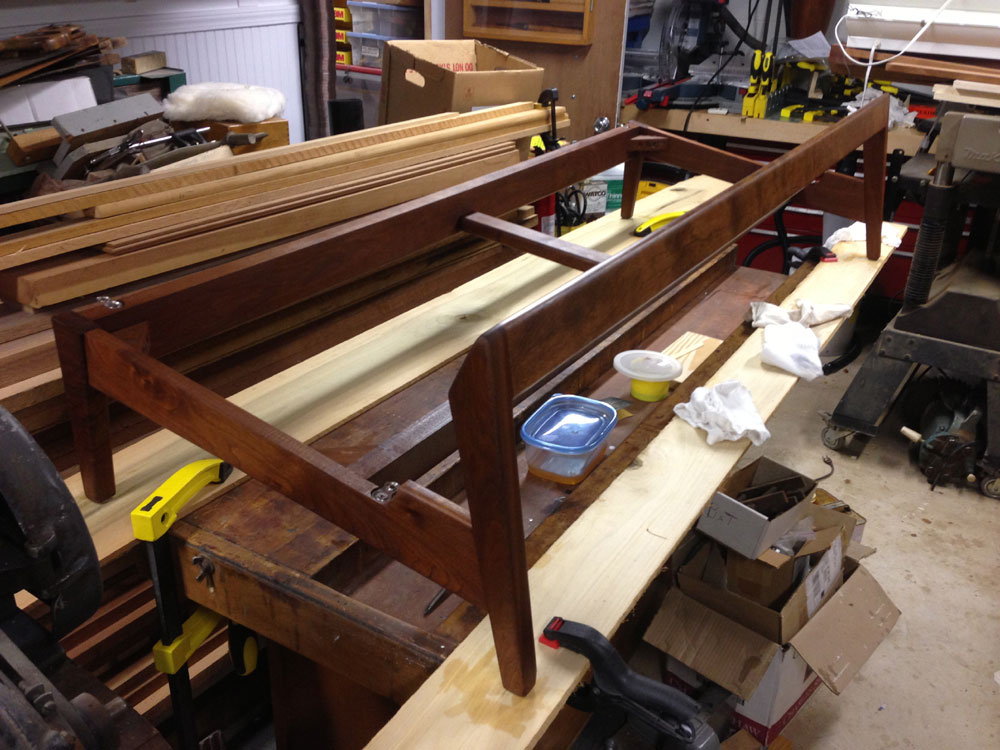
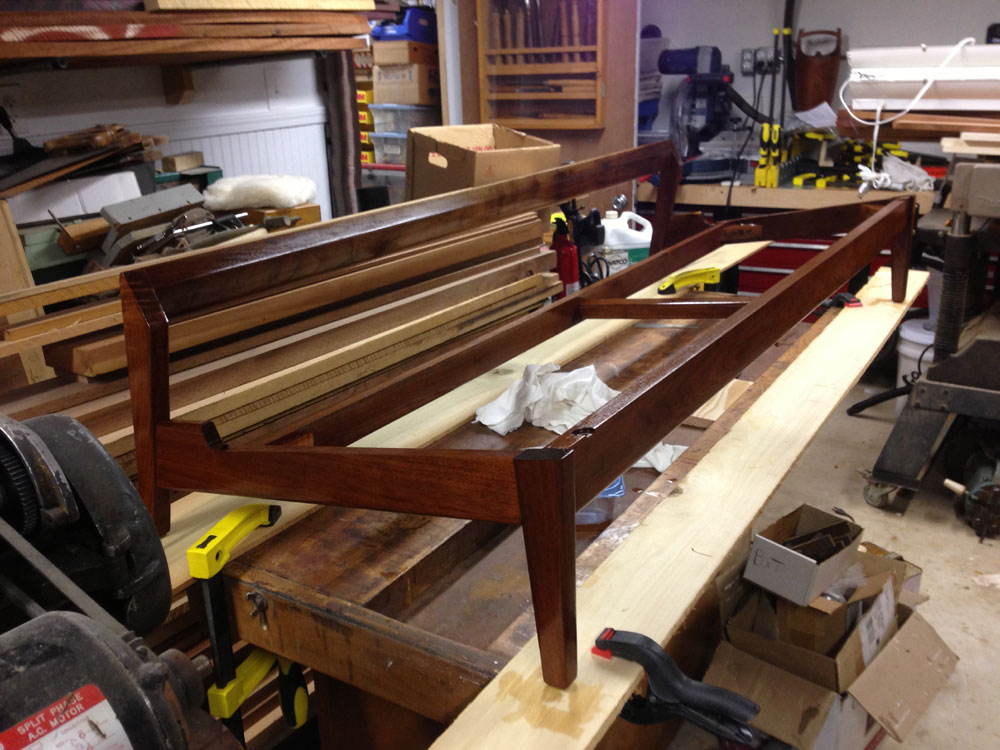
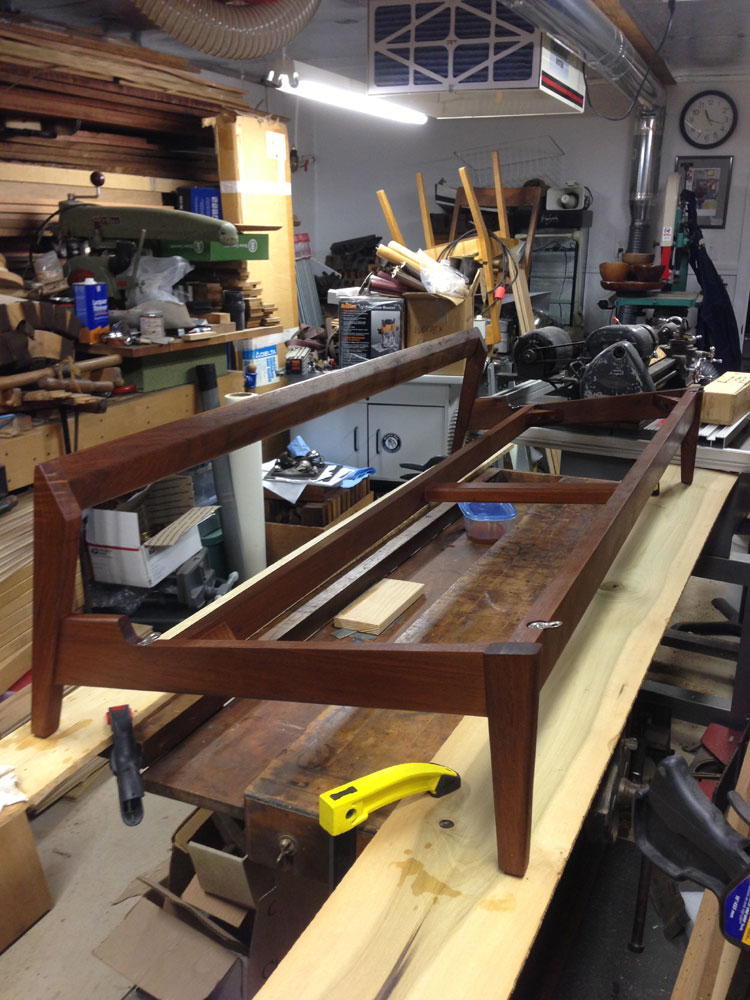
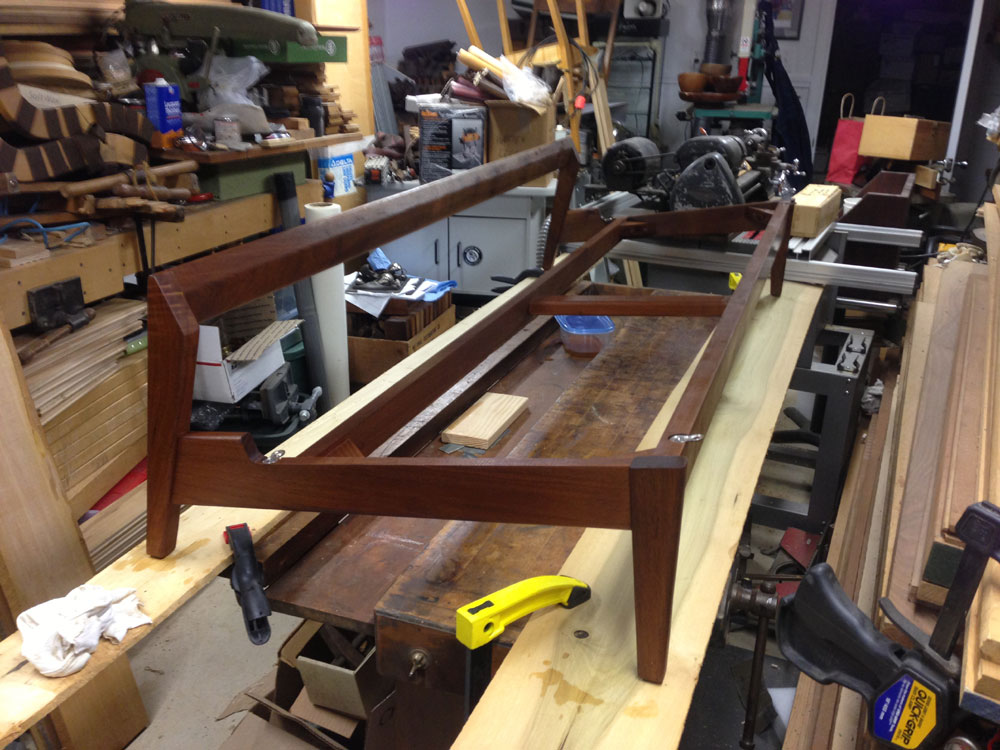
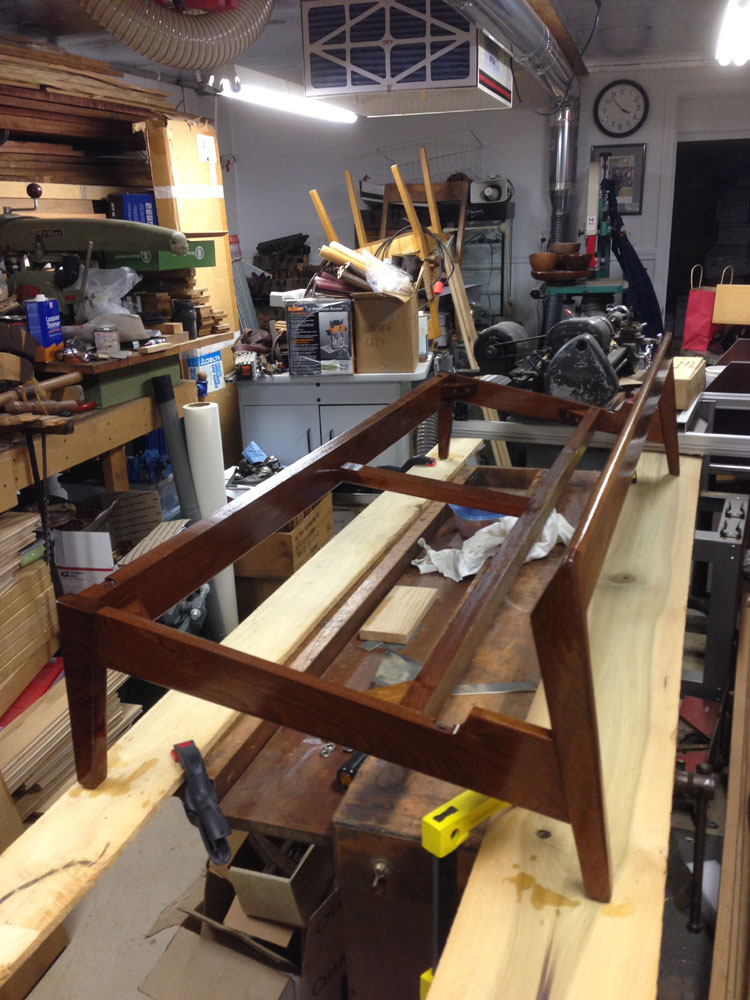
Meanwhile, I took the base into the shop to see what I needed to work with. I did a quick wash of the whole thing with some #0000 steel wool and mineral spirits, hoping that would take off the dirt and any water staining. Alas, that did very little and I had to resort to light sanding - all done by hand (to preserve as much of the original patina as possible. The cleaning revealed one issue - the corner back joint (left side facing the sofa) had failed, so I had to pry the back apart, clean up the glue and re-glue and clamp. Here's the base in my shop, repaired, cleaned and sanded.
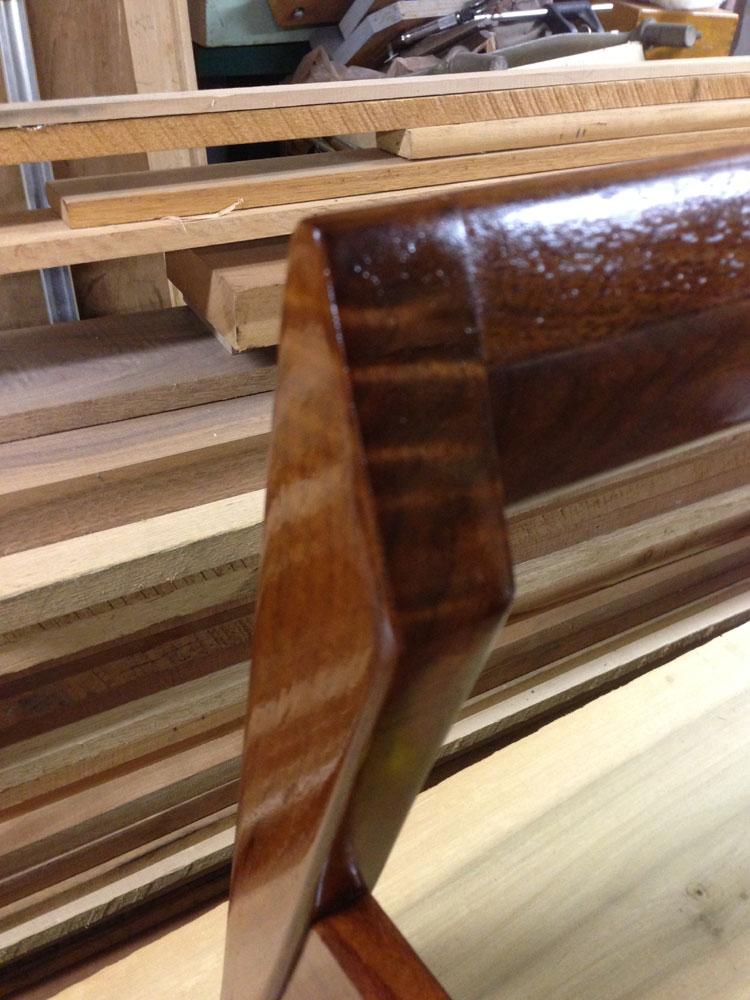
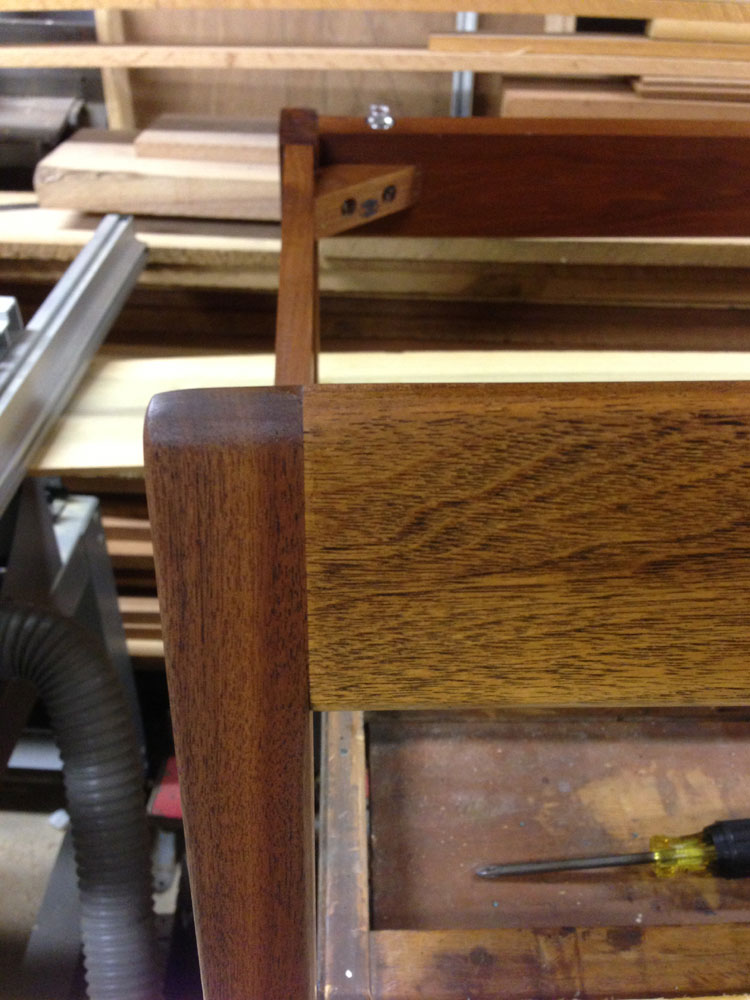
There was also one other issue, the back had exposed a large area of walnut sap-wood. I'm not sure if it wasn't common practice to steam walnut at that time (60's era) or if they simply sprayed stain to match the woods, but my sanding revealed the lighter color along about 70% of the back. You can see the two differing colors in the photo below (the spar to the right shows the lighter sap wood and the remnants of the original stain).
It's even more noticeable when viewing the entire back and will look strange with the sofa.
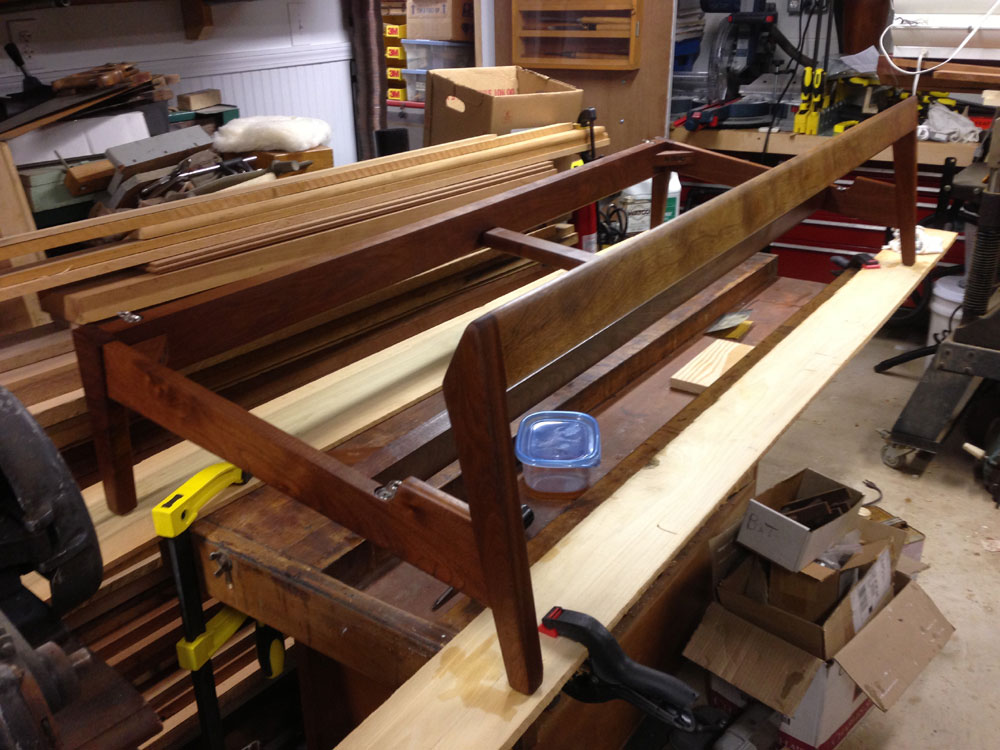
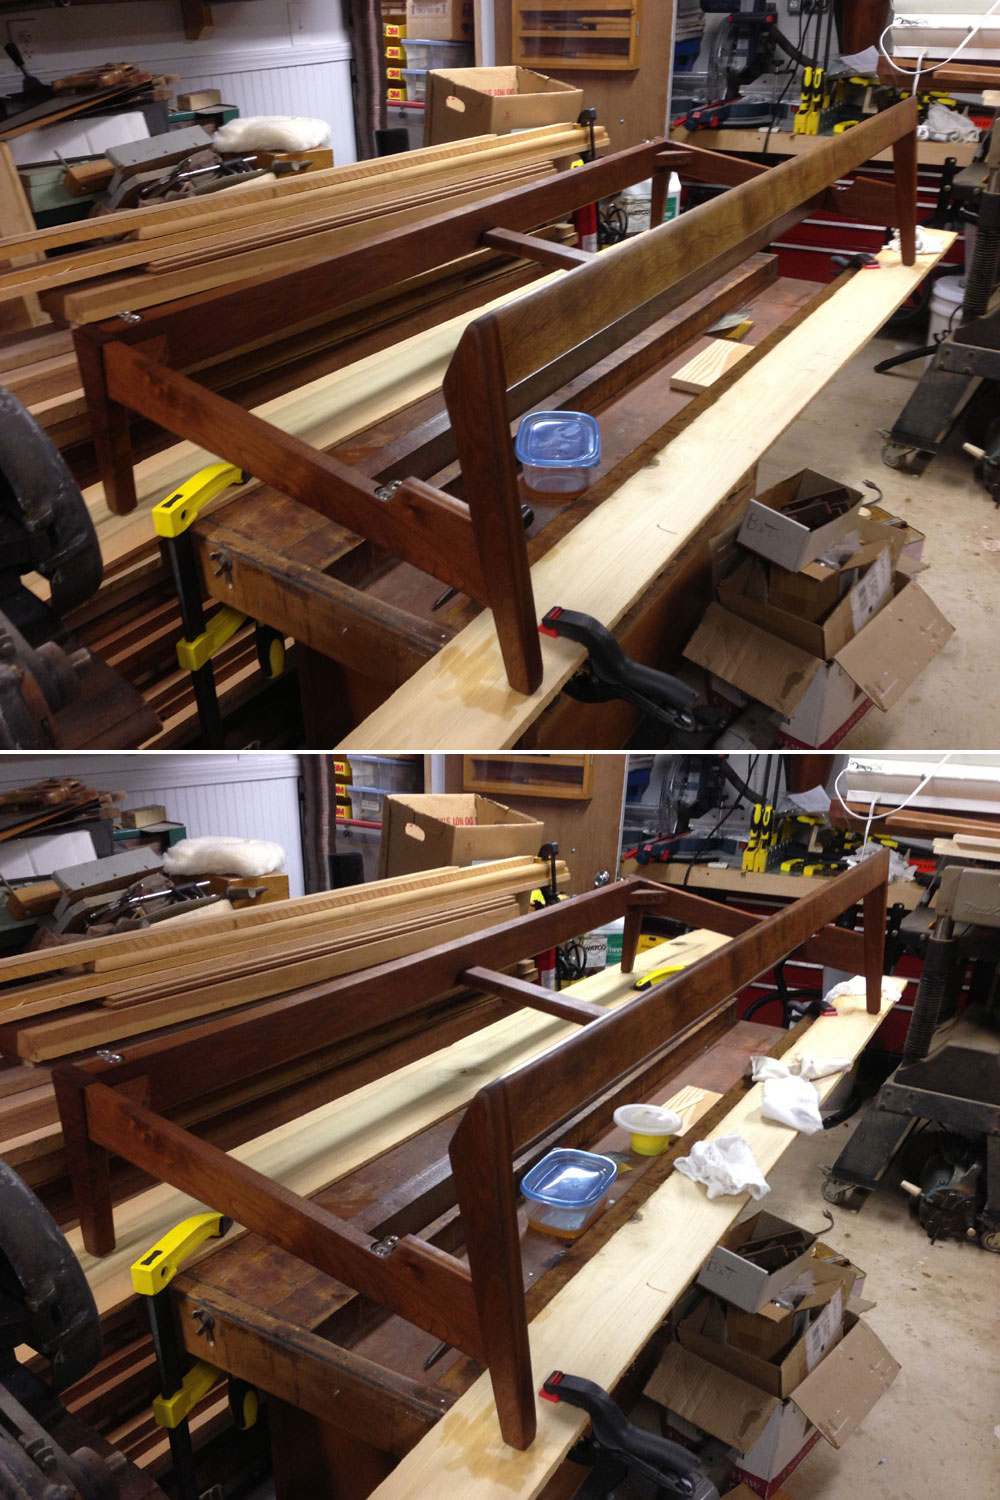
So I began the process of color matching the woods - I used dark walnut and mahogany stains as glazes and slowly brushed the mix in, allowing to penetrate and wiping off, until the colors made a good match, stopping right where the sap wood turned into the regular hardwood about two-thirds to the right of the spar. This took 4 applications until I was happy that the colors made a good match. See the results below.
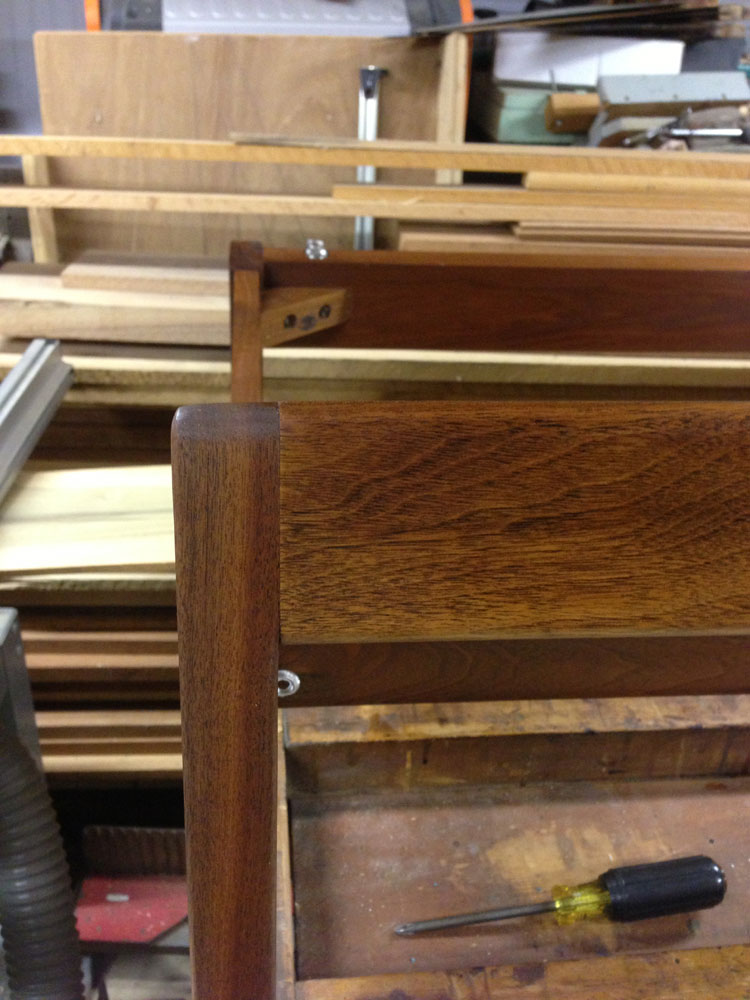
Here are some comparison shots:
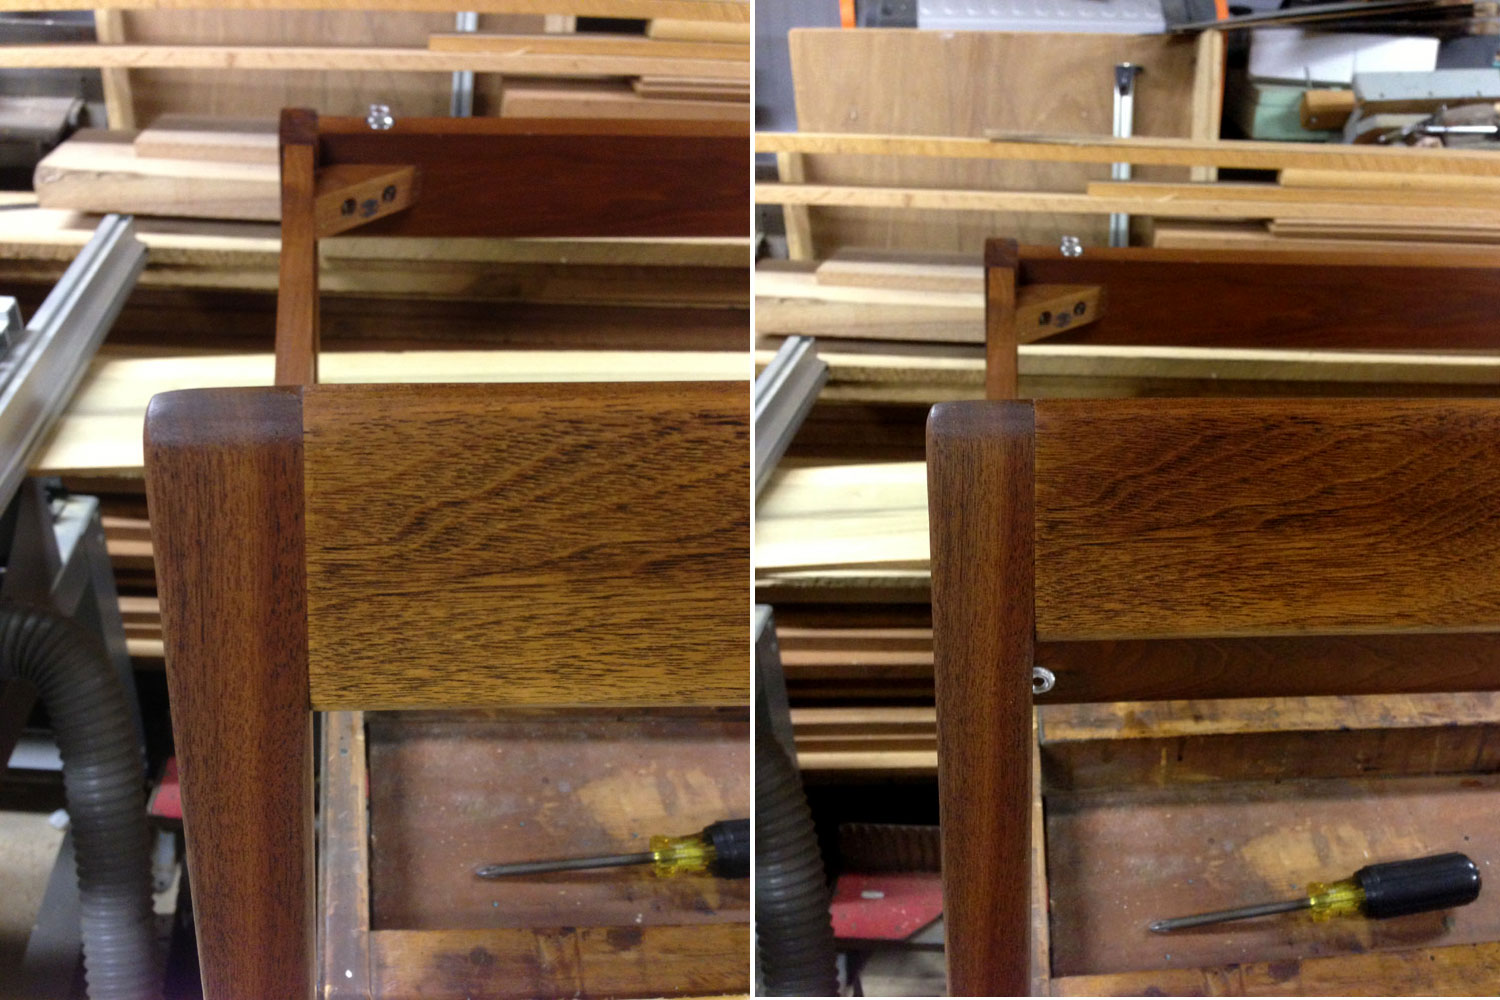
Finally, I applied a couple of coats of wipe-on oil finish (Watco Natural Danish Oil) to complete the look (slight gloss, sort of a satin finish, close to the original). Here are some images right after application so it's still "slick"...
Now for the horror story. I spent about a leisurely week getting the base right while the rest was off to the upholsterer. So the base had plenty of time to harden-up, since the first upholsterer had the sofa for 9 weeks! And when we went to look at it, it looked more like something for the boudoir of some prostitute than the original couch - just horrible. Extra padding was added to the back giving it this over-stuffed appearance, the side piping was centered with this open seam where it attached to the base, the buttons were crooked and the worst thing, the top of the back had angles along the two edges. It was really awful, and all we got were excuses that "it was the only way it could be done" etc. Basically, the first company did a rush job and ignored all the notes and photographs left as reference. After a couple of attempts at fixing the mess, this first upholsterer just gave the sofa back to us with a "good riddance" - we next took it to the larger upholsterer, Corn Upholstery in Tucker.
Corn provided some input on what they could do to "fix" the first mess and in about a week we got this back:
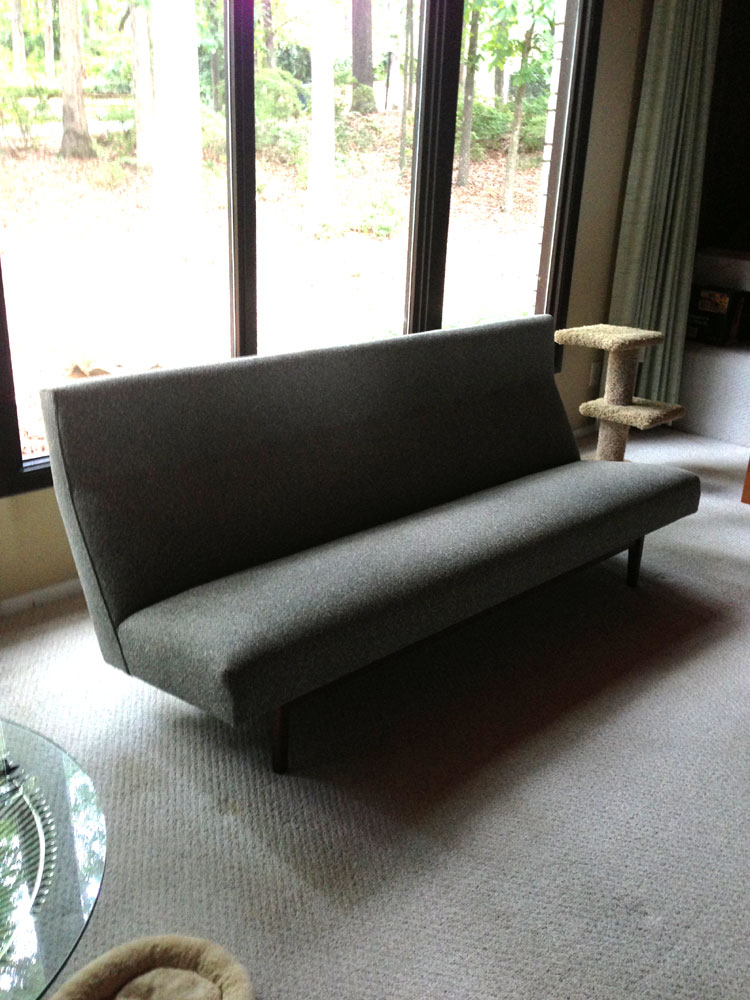
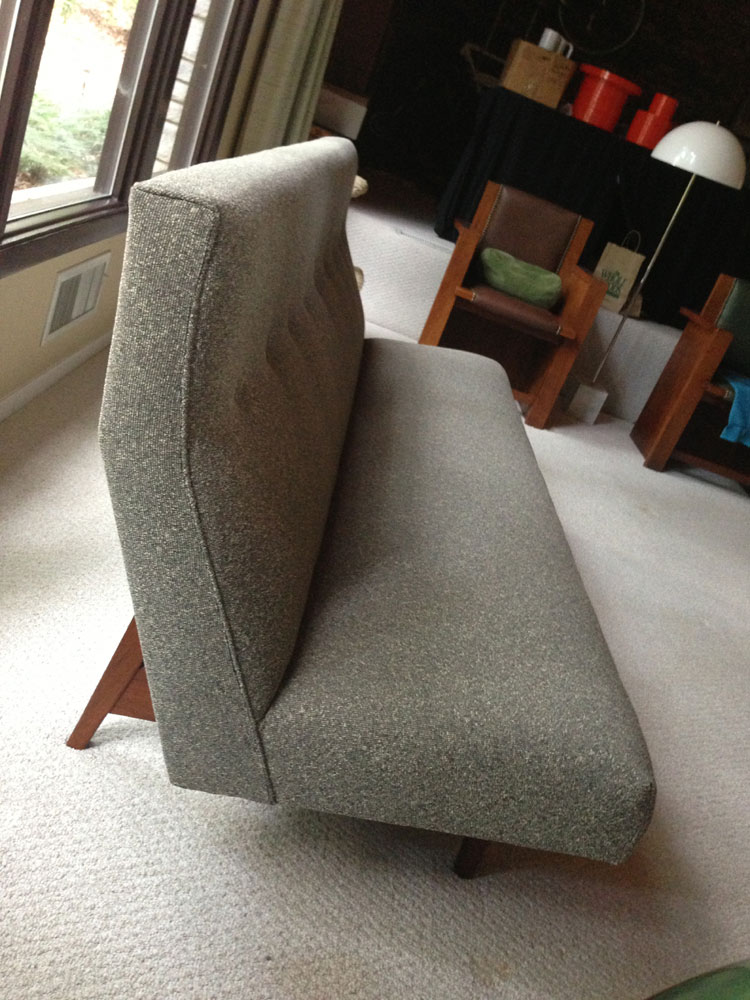
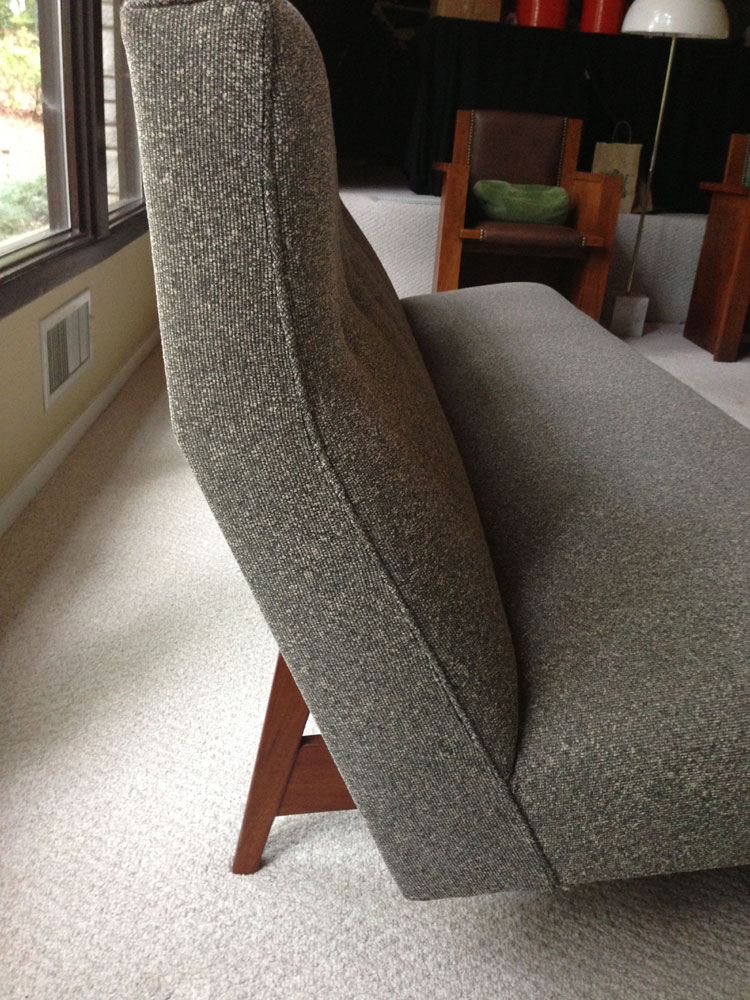
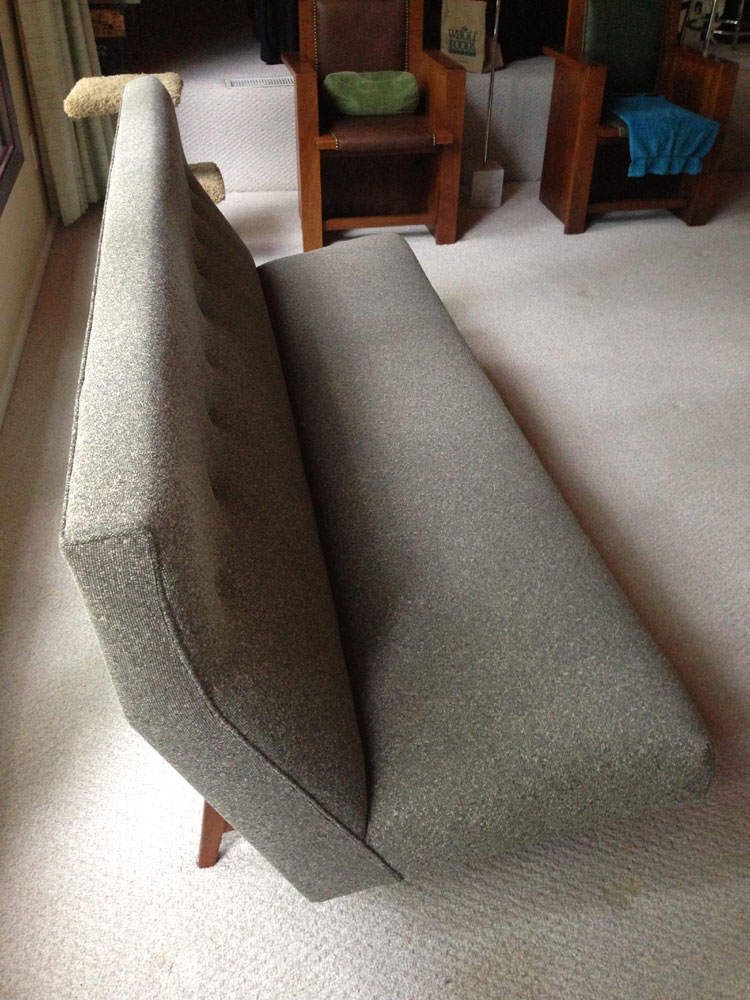
It's a vast improvement over the first upholsterer, and they were able to fix everything without patching-in any extra material. They did a really fantastic job - we won't be taking any similar projects to anyone else from now on. Now for more photos...
And here's a comparison of before-to-after...
(and that's our cat Mucha photo-bombing under the right side)....
Hope you enjoyed this first of several restovation projects.
-- John
This blog is all about my interest in woodworking, particularly in regards to modern and mid-century design. It will also house my on-going efforts in refurbing and restoring old woodworking machinery and hand tools, and may go off track occasionally as I see fit.
Showing posts with label Furniture Restoration. Show all posts
Monday, September 2, 2013
Saturday, October 6, 2012
Refinishing a Classic Lane Acclaim Coffee Table
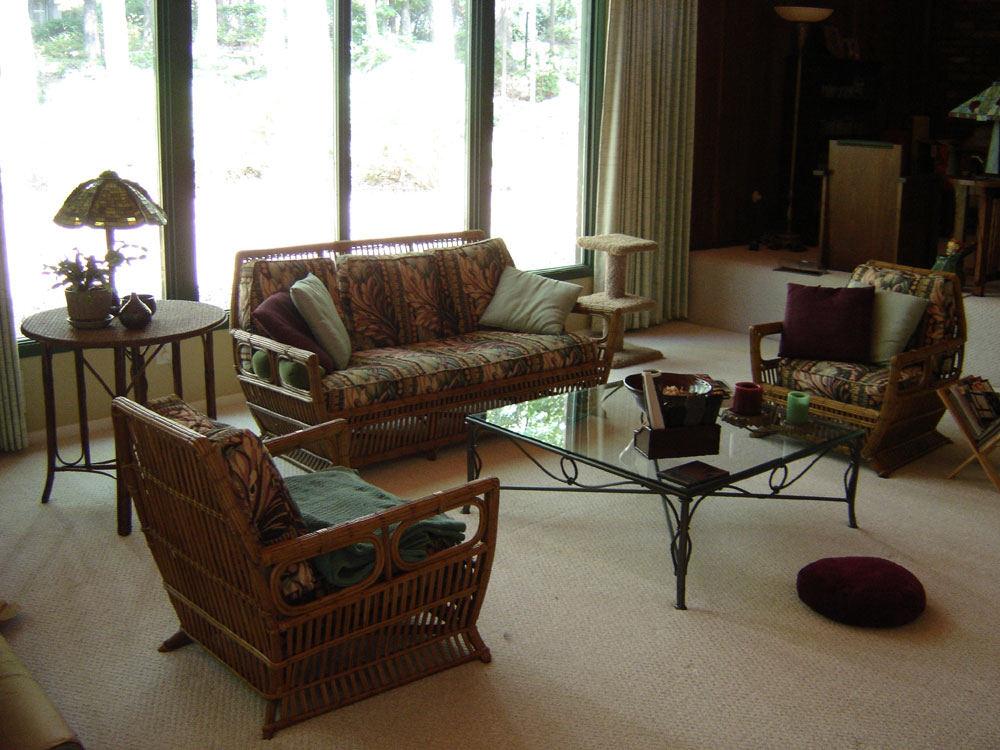
As many of you know, we're really big fans of modernism, especially mid-century modernism and we're looking to replace our current furnishings with vintage designs from the 40s, 50s and 60s. Several months ago Cindi's mom offered us her Platner designed coffee table - we had given her our 1920's reed furniture shortly after she moved to Atlanta - this was an inheritance Cindi had gotten from a relative, which she went to the expense of refinishing along with newly re-upholstered cushions. When we moved into the house on Lori Lane the furniture proved too small in scale for the jumbo-sized sunk-in living room. Here's an images I took around 2004:
The sofa and two chairs above were given to Cindi's mom after living in the den near the fireplace.
.
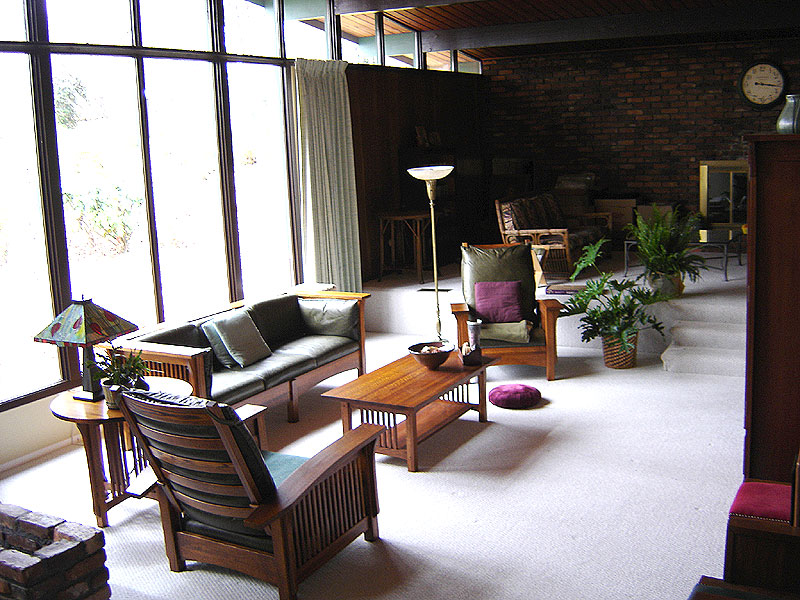
We were able to obtain a nice set of Arts and Crafts (AKA Craftsman) furniture, similar to the designs of Stickley, that was better suited to the size of the room. At that time we hadn't yet gotten the bug to go all Mid-Century Modern, so the furnishings more than sufficed for day-to-day living. You can see the reed sofa in the background.
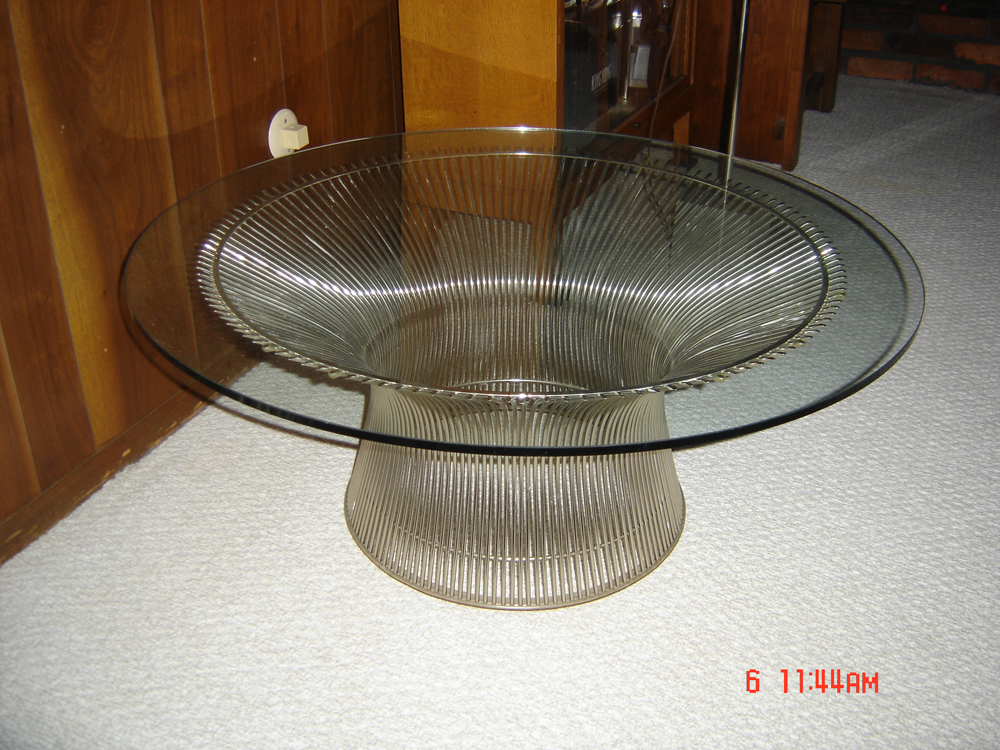
So recently I started obtaining some projects to replace the Craftsman furniture - so far, three Jens Risom Lounge chairs, two Jens Risom side chairs, a nice square Knoll table and most recently, a Jens Risom sofa. That last was the final piece we needed to basically replace what we had with a similar configuration. Here's an image of the Platner coffee table:
So I bet you're asking why I'm going through all this? The Platner table came down from New York with Cindi's mom - and it looked really odd with the reed furniture - the high-tech chrome wires didn't work with the reeds in the couch and chairs. Since we were going all modern, we were offered the table - the only problem - she needed something that could replace it. After looking for a bit, we figured out that what she needed was something more in the same scale and a bit retro - ideally of wood or something with the same brown tones. We found a structurally sound Lane Acclaim table - a bit beat up, with water and mineralization rings on top and a hammered finish (it was also quite dirty), but we paid little enough for it that it was worth getting as a potential replacement after a bit of TLC.
The things that sold me on the table: 1. It was all solid wood construction - even the flat table top was wood planks edge-jointed with the interesting walnut and oak veneers on top. 2. No racking or twisting to the legs - the end mortises into the legs and underlying supports made for a well-made, strong table. 3. Nothing in the finish looked like too large a task to re-do. 4. The veneers were all laying flat so I didn't have to worry about loosening the veneer and getting it to re-adhere (this last one fooled me a bit as I'll explain). 5. I grew up with Lane Acclaim (we had a rectangular coffee table and two end-tables) so I just like the design.
Unfortunately I wasn't very diligent in taking photos, so I don't have any of the table before I started. I literally thought this was going to be a "quick-and-dirty" refinish job so I got it into the shop and first gave it a good cleaning. I discovered that the lacquer finish had just about had it so first I tried lacquer thinner to strip it off, and eventually just carefully sanded it (there were dark spots embedded into the veneers that wouldn't clean up - fortunately almost all of it was removed with light sanding). This is the result:
A couple of things to note: 1. look at the near edge - see the spalting? That was all stained dark enough so you didn't see it before I stripped off the original finish. 2. Even being extremely careful, I managed to sand through the veneer in one corner (it's the one to the right - unfortunately out of frame) to the poplar beneath. I figured that once I stained and coated the top it wouldn't be noticeable, and for once I was right. You don't see it unless it's pointed out to you.
I did a few searches online to figure out what stain to apply - there's a Min-Wax that I found suggested on one blogger's post (pdx picker) with some photos and it seemed reasonable - the stain used was Minwax Early American. Remember, I wasn't looking for perfection here, just something I could quickly work out and deliver (note the date in the photo above is 19? That's 2012.08.19. I did want to do a reasonable restoration with colors approximating the original, along with a lacquer finish (what was originally applied).
I figured I could apply a stain and go directly into a lacquer and be done. There's only one problem - I don't like Min-Wax. Oh, sure it's a good product, but the problem I have with it is that it already has a varnish added to it - which makes it impossible to adjust if your tint isn't quite right. I know that there are alternative ways to adjust, but doing airbrushed coats layered between sealers didn't fit into my "quick-and-dirty" idea. I did manage to find a finish that approximated what I was looking for - Varathane American Walnut found at the Home Depot. Now in retrospect, there's a bit more red and less yellow in this stain so it's not quite right, but close enough for me.
Here's the table with stain applied:
One thing I noticed in some of the other Lane Acclaim refinsh photos available online - for some reason people are selecting finishes that don't bring the color of the oak down into the browns - the contrast to me is quite disturbing. In my case, except for the bit of red tint this is very close to the color of the legs.
I next appled a couple of wash coats of shellac to seal things up. This also brought a little yellow back into the mix and neutralized the red a bit:
After a bit of block-sanding to get everything flat, I applied the lacquer. Now this is where I totally hosed everything. I had always applied lacquer in the past using a sprayer, or in a pinch, a rattle can - but in my rush to get this thing done I decided to apply it via brush. The problem here is that I don't own a good varnish brush - you want something that holds the varnish and lays down a very even coat with minimal brush marks - any ridging that happens will need to be sanded down. After two coats I had something that looked obscene and it took quite a bit of sanding to get it looking right. Of course there were some imperfections but I thought, OK I'll just apply some wax. Another mistake - the wax made every imperfection glow-in-the-dark and applied a glossy sheen that wasn't appropriate to the piece. I was going to strip off the wax but ran out of time. In desperation I just hit the whole thing with some 000 steel wool and got the finish back to something close to what I was looking for. As a last step I cleaned up the legs and applied a light coat of wax with very light buffing - that brought up the old finish to the same luster as the new.
Here are some photos of the finished table before being loaded into the back of the Highlander, right after hitting it with steel wool (that was Thursday night 2012.10.04):
I'm not quite sure how it ended up being a 6 week project - I really thought I could get it done in a weekend. Lessons learned here: 1. I'm too much of a perfectionist to do any "quick and dirty" projects when it comes to refinishing. 2. Invest in the time to get the stain right and don't settle for "close" 3. Always, always apply lacquer using the sprayer - for the time it took me to block everything out I could have purchased a whole case of rattle can lacquer. 4. Know you're still taking a risk in the veneer even if the pieces are flat (I actually think that the corner where I sanded through - you can see it in the last photo, the left corner closest to you - was thin to begin with, probably from the Lane factory.
That's my story. Hope you enjoyed it and learn from my mistakes. John
| Reed Couch and Chairs |
The sofa and two chairs above were given to Cindi's mom after living in the den near the fireplace.
| Quarter-sawn oak Craftsman Furniture from Restoration Hardware |
We were able to obtain a nice set of Arts and Crafts (AKA Craftsman) furniture, similar to the designs of Stickley, that was better suited to the size of the room. At that time we hadn't yet gotten the bug to go all Mid-Century Modern, so the furnishings more than sufficed for day-to-day living. You can see the reed sofa in the background.
So recently I started obtaining some projects to replace the Craftsman furniture - so far, three Jens Risom Lounge chairs, two Jens Risom side chairs, a nice square Knoll table and most recently, a Jens Risom sofa. That last was the final piece we needed to basically replace what we had with a similar configuration. Here's an image of the Platner coffee table:
So I bet you're asking why I'm going through all this? The Platner table came down from New York with Cindi's mom - and it looked really odd with the reed furniture - the high-tech chrome wires didn't work with the reeds in the couch and chairs. Since we were going all modern, we were offered the table - the only problem - she needed something that could replace it. After looking for a bit, we figured out that what she needed was something more in the same scale and a bit retro - ideally of wood or something with the same brown tones. We found a structurally sound Lane Acclaim table - a bit beat up, with water and mineralization rings on top and a hammered finish (it was also quite dirty), but we paid little enough for it that it was worth getting as a potential replacement after a bit of TLC.
The things that sold me on the table: 1. It was all solid wood construction - even the flat table top was wood planks edge-jointed with the interesting walnut and oak veneers on top. 2. No racking or twisting to the legs - the end mortises into the legs and underlying supports made for a well-made, strong table. 3. Nothing in the finish looked like too large a task to re-do. 4. The veneers were all laying flat so I didn't have to worry about loosening the veneer and getting it to re-adhere (this last one fooled me a bit as I'll explain). 5. I grew up with Lane Acclaim (we had a rectangular coffee table and two end-tables) so I just like the design.
Unfortunately I wasn't very diligent in taking photos, so I don't have any of the table before I started. I literally thought this was going to be a "quick-and-dirty" refinish job so I got it into the shop and first gave it a good cleaning. I discovered that the lacquer finish had just about had it so first I tried lacquer thinner to strip it off, and eventually just carefully sanded it (there were dark spots embedded into the veneers that wouldn't clean up - fortunately almost all of it was removed with light sanding). This is the result:
A couple of things to note: 1. look at the near edge - see the spalting? That was all stained dark enough so you didn't see it before I stripped off the original finish. 2. Even being extremely careful, I managed to sand through the veneer in one corner (it's the one to the right - unfortunately out of frame) to the poplar beneath. I figured that once I stained and coated the top it wouldn't be noticeable, and for once I was right. You don't see it unless it's pointed out to you.
I did a few searches online to figure out what stain to apply - there's a Min-Wax that I found suggested on one blogger's post (pdx picker) with some photos and it seemed reasonable - the stain used was Minwax Early American. Remember, I wasn't looking for perfection here, just something I could quickly work out and deliver (note the date in the photo above is 19? That's 2012.08.19. I did want to do a reasonable restoration with colors approximating the original, along with a lacquer finish (what was originally applied).
I figured I could apply a stain and go directly into a lacquer and be done. There's only one problem - I don't like Min-Wax. Oh, sure it's a good product, but the problem I have with it is that it already has a varnish added to it - which makes it impossible to adjust if your tint isn't quite right. I know that there are alternative ways to adjust, but doing airbrushed coats layered between sealers didn't fit into my "quick-and-dirty" idea. I did manage to find a finish that approximated what I was looking for - Varathane American Walnut found at the Home Depot. Now in retrospect, there's a bit more red and less yellow in this stain so it's not quite right, but close enough for me.
Here's the table with stain applied:
One thing I noticed in some of the other Lane Acclaim refinsh photos available online - for some reason people are selecting finishes that don't bring the color of the oak down into the browns - the contrast to me is quite disturbing. In my case, except for the bit of red tint this is very close to the color of the legs.
I next appled a couple of wash coats of shellac to seal things up. This also brought a little yellow back into the mix and neutralized the red a bit:
After a bit of block-sanding to get everything flat, I applied the lacquer. Now this is where I totally hosed everything. I had always applied lacquer in the past using a sprayer, or in a pinch, a rattle can - but in my rush to get this thing done I decided to apply it via brush. The problem here is that I don't own a good varnish brush - you want something that holds the varnish and lays down a very even coat with minimal brush marks - any ridging that happens will need to be sanded down. After two coats I had something that looked obscene and it took quite a bit of sanding to get it looking right. Of course there were some imperfections but I thought, OK I'll just apply some wax. Another mistake - the wax made every imperfection glow-in-the-dark and applied a glossy sheen that wasn't appropriate to the piece. I was going to strip off the wax but ran out of time. In desperation I just hit the whole thing with some 000 steel wool and got the finish back to something close to what I was looking for. As a last step I cleaned up the legs and applied a light coat of wax with very light buffing - that brought up the old finish to the same luster as the new.
Here are some photos of the finished table before being loaded into the back of the Highlander, right after hitting it with steel wool (that was Thursday night 2012.10.04):
I'm not quite sure how it ended up being a 6 week project - I really thought I could get it done in a weekend. Lessons learned here: 1. I'm too much of a perfectionist to do any "quick and dirty" projects when it comes to refinishing. 2. Invest in the time to get the stain right and don't settle for "close" 3. Always, always apply lacquer using the sprayer - for the time it took me to block everything out I could have purchased a whole case of rattle can lacquer. 4. Know you're still taking a risk in the veneer even if the pieces are flat (I actually think that the corner where I sanded through - you can see it in the last photo, the left corner closest to you - was thin to begin with, probably from the Lane factory.
That's my story. Hope you enjoyed it and learn from my mistakes. John
Subscribe to:
Posts (Atom)