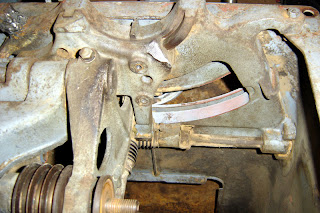


I managed to remove the trunnion assembly and brackets without pressing out the worm gear spindles. I was at the point of dissembly this past weekend where I had the guts loose, but couldn't figure out how to get them out. I basically tilted up the back trunnion bracket while jockeying the front and moving the trunnion assembly back and forth until the back bracket had room to come out. Once that was done removing the "rest" (the "tilt trunnion bracket - the piece that holds the front of the trunnion assembly up on the front bracket) allowed the whole assembly to be removed in one piece. So now I have the front and rear bracket, plus the trunnion assembly, which is where I stopped in hope of finding more info on what's needed to tear it down - I got that from a recent post on OWWM.org (Old Woodworking Machinery.org - great site with a large group of woodworkers and old machinery collectors who are great about sharing information).
As you can see in the last pic, I've already got the ring apart from the base (ended up having to cut two bolts that were badly stripped) and banged out a few dents - everything is ready for media blasting (case-wise). I hope to get more dissembled this week so I can blast this weekend. I'll follow that with some body work, primer and paint.
-- John
1 comment:
Hi John,
How did your Unisaw restoration go? It's funny I've been using a Craftsman version of the BT3000 and just recently aquired a Unisaw which I'm planning to restore. It's not as old as yours (circa 1973) but it does have the cast iron base. Please let me know if you have any info that would be helpful in my rebuild. I have been to the OWWM site and plan to use them extensively.
Thanks,
Dan Palacios
Post a Comment