(In case you missed part 1 from earlier today)
OK so now were up to yesterday, Friday (July 6) so I grabbed one of the flooring boards and cut it to length. Of course, for some reason I cut it too short by about an inch (no it wasn't a tape-measuring thing - I actually "fiddled" with my table saw and moved the reference mark - Lesson Number 2, if anyone is counting, is to finish "fiddling" before you start cutting the real material.). Fortunately I had plenty of flooring to mess with. After defining the length and making a quick sketch, I started working on the new tongue for the opposite end. I cut all the bottoms first, then the tops. This is a test fit on the floor of my shop:
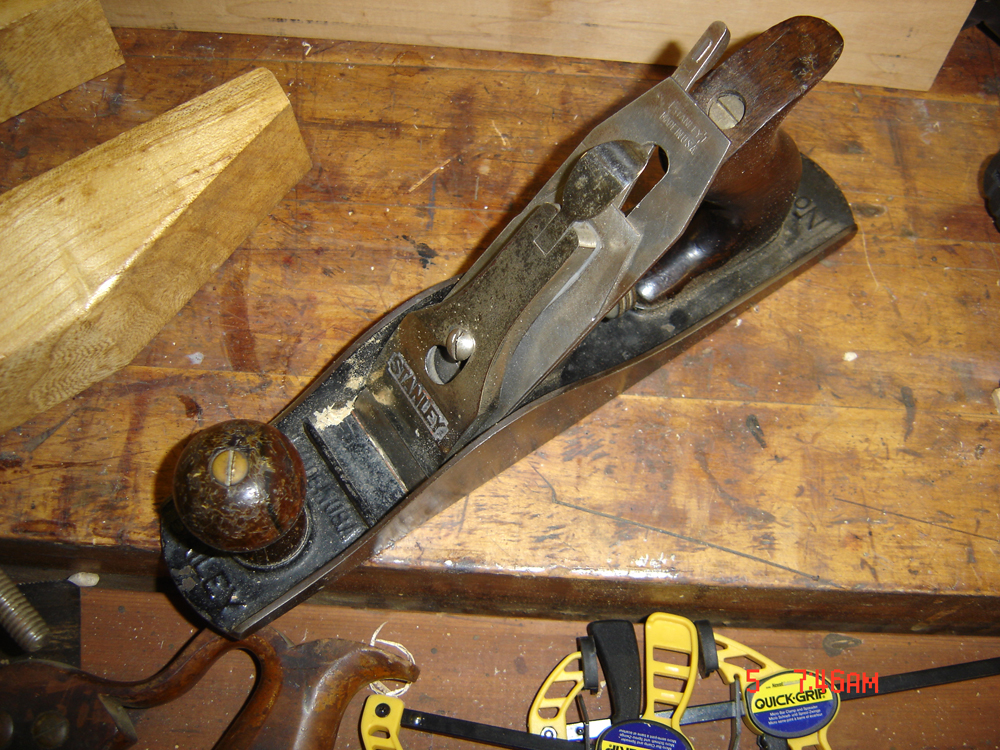
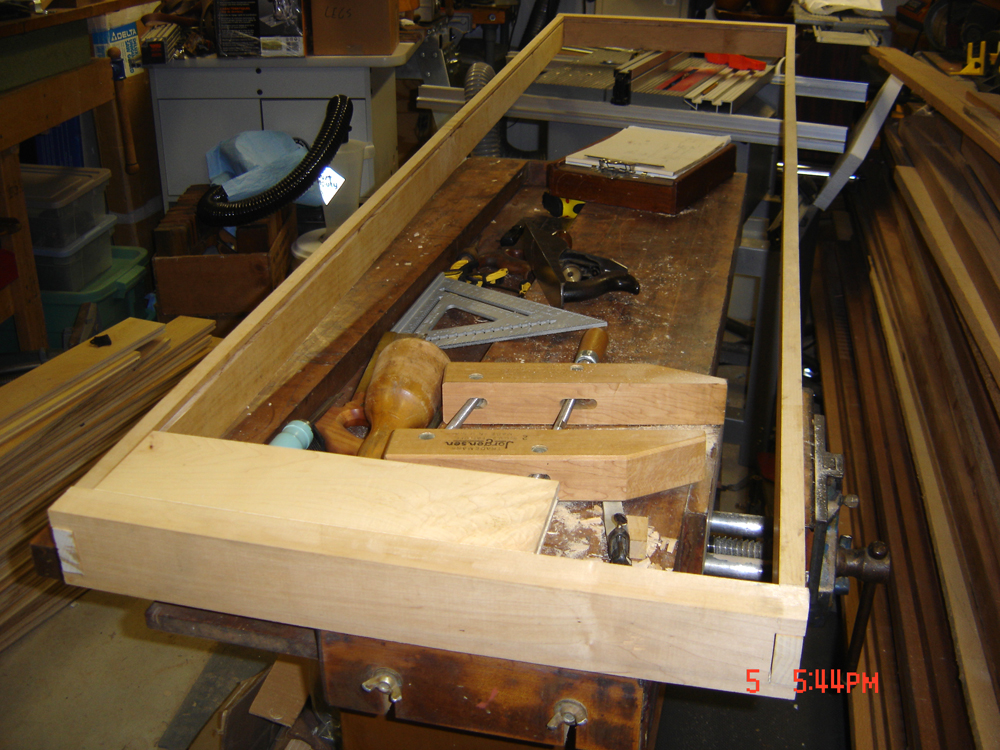
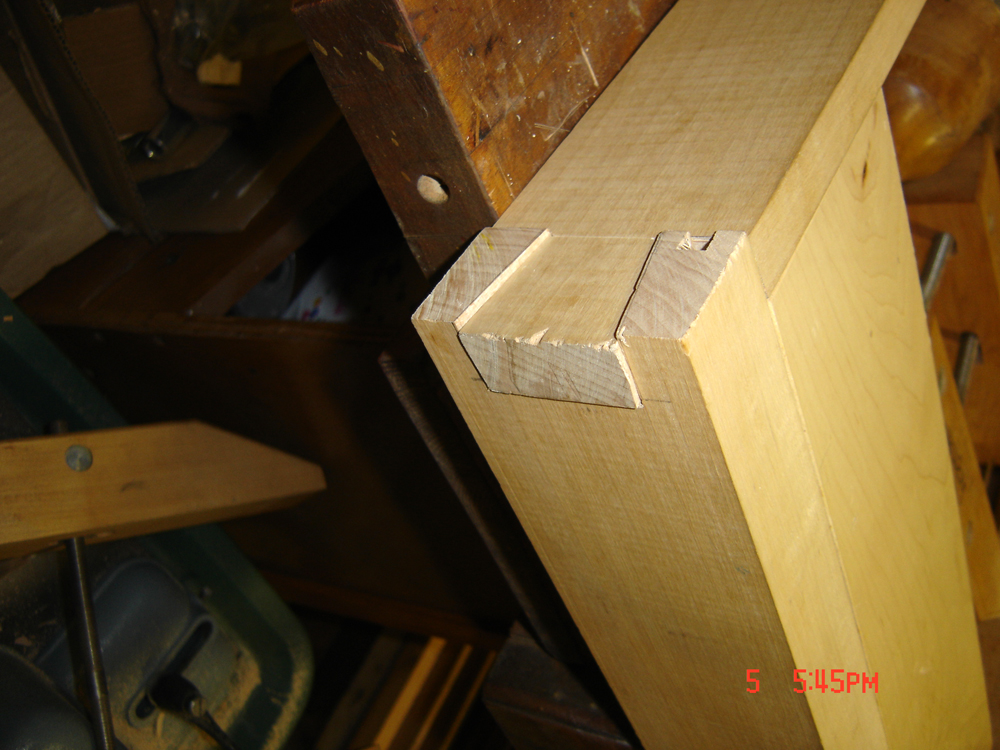
I then calculated the ripped piece for the end (came out to 2 1/2" wide) and made the rip cuts for the tongue on that side. It took a bit to get everything to line up to within an acceptable limit (still not looking for perfection here). I took the time at this point to bevel all the edges and work down the extended parts of the dovetails (used a flush trim saw and finished with the hand plane). I also worked out all the faces with a Stanley 4 1/2 smoother and hit the whole thing with some 150 grit sandpaper.
After everything was in place I clamped everything together and removed the sub-frame for a test fit. About a quarter of an inch needed to be trimmed from one end. I then marked and pre-drilled holes for 5 screws that will be used to hold the top to the sub-frame. The sub-frame was reattached and then the top moved to the top of the bench - heavy sucker, especially for one person. I also had to pull the cabinet from the wall to access the screws in the back and no, I didn't remove everything from the drawers before doing so - this took a bit of man-handling but wasn't too bad, just time consuming (Lesson Number 3 - get help from a friend before lifting a 100 lb + piece of awkward counter-top):
Next I drilled and counter-sunk 5 holes on the front, Added shims so the top would be tight to the sub-frame and screwed the top to the bench. There are also some hidden shims under the center column and right front to level the bench (no leveling feet on this unit - doesn't even have holes for them).
I hope to put a couple of coats of shellac or oil finish on the exposed wood tomorrow, but I'm calling this project done. I may still fill the holes on the front where I cut the rabbets for the flooring tongues (right now they're ugly and will probably prompt me to wedge and trim a filler strip).
Quick shot of most of the tools used:
So that's about it - not a bad project if a bit more time consuming that I thought it would be. I also got to practice my hand-cut dovetail technique AND free up some space.
-- John
This blog is all about my interest in woodworking, particularly in regards to modern and mid-century design. It will also house my on-going efforts in refurbing and restoring old woodworking machinery and hand tools, and may go off track occasionally as I see fit.
Showing posts with label Basement Shop. Show all posts
Saturday, July 7, 2012
How I Spent My Summer Vacation Part 1
OK so I didn't use all of my vacation from last year and lost a couple of days (I had 7 days roll over, but it reduces to 5 after the last day in January). This year I decided to use those days - thus far I've only taken a couple of days off and it's already halfway through the year. That was enough justification to take off the week of July 4th (so 4 vacation days) which brings me a straight 9 days off! So with all good intention, I started with a list of things to accomplish - of course I didn't get very far. The good news, is that one of those things on the list was to finally build a workbench top for the two metal Craftsman units I started on way back in December of 2010!
To bring you up to speed:
That brings us up to this week. I got out my sketchpad and worked out a few measurements. First a note - this is one of those projects where you want to create something utilitarian so it doesn't have to be perfect. That being said, I went a bit overboard. The problem was that I could have made a narrow skirt for the top using a single maple board I salvaged - the original length was about 8 feet so it was long enough for the long parts of the frame, but to make the board work the top would have looked a bit "skimpy" - last year I was given a fat piece of maple and inspiration hit - I'll rip that in two and use it for the ends, so the frame/skirt would have better proportions. So these were the quick measurements I made:
I figured on 1/8" of wiggle room - I actually just barely had enough length to fit the skirt on the bench, based on the lengths of the longest boards - they were 91" long. Oh, and did I mention that I decided to handcut the dovetails? This is where things got a bit overly complicated. I could have just done a mortise and tenon but had recently viewed a video by Paul Sellers (great blog by the way) regarding the hand-cut dovetail and decided to go for it. That was also why I needed so much of the long boards since they needed to be full lenght to allow for the dovetail.
So I got out some trusty tools like by Lie-Nielson dovetail saw.
I bought this saw with the leather holster from someone on Woodnet - it was so cheap it was hard to pass up - it's a bit dirty from the previous user - when I originally purchased it a few years ago I just used it for a few test cuts and put it away. This is the first practical use.
I won't bore you with all the initial steps, other than to say that I ripped the boards on my table saw and then edge-jointed by hand to flatten out the imperfections and burns (maple doesn't smell very good when it burns, by the way) using my trusty Stanley 5 1/4 - one of my favorite planes.
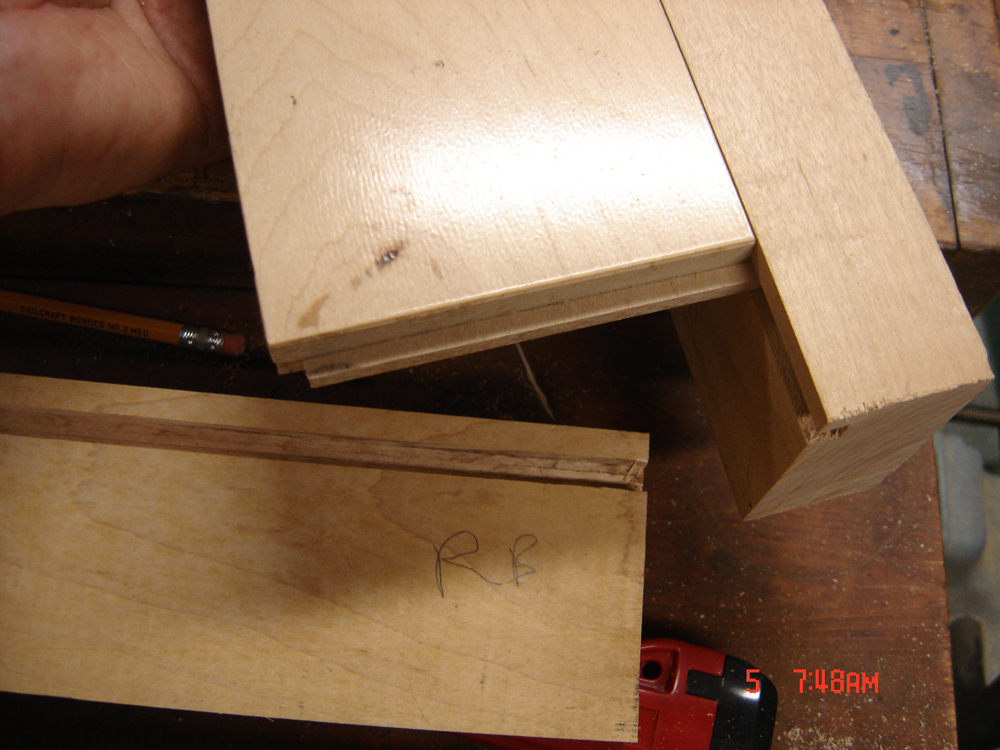
I then adjusted my fence and did a couple of passes on the table saw to cut the rabbets for the tongues on the flooring.
This is the test fit:
That's as far as I got on day one, Tuesday (July 3). Invited a few friends over for the 4th - typical cookout, etc, so I didn't get back into the shop until Thursday (July 5th). I took the above photos before continuing.
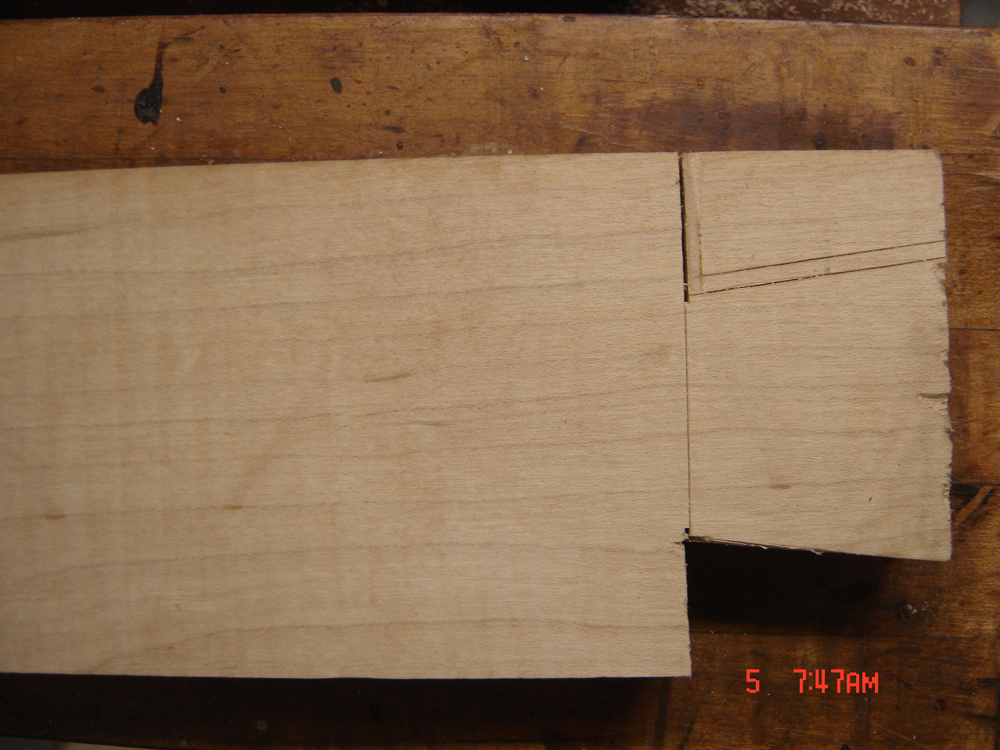
After carefully marking the dovetail, I started cutting (yup, no practice or anything). Note to self, before hand-cutting dovetails cut a few scraps to get back into the swing of things. Needless to say my first attempt was pretty bad:
The hardest part about these were the rip cuts - the boards are so long I couldn't put them in a vise, I cut these straddling the boards (no saw bench yet either).
So my first dovetail was pretty yucky - also fairly loose fitting, good thing I started in the back. Fortunately, my second dovetail was 100% better and I continued to tweek things as I moved around the frame. Here's the assembled skirt:
About that time I decided to take a break and change out the blade and cord on my Dewalt 708 12" Sliding Compound Miter Saw (this is a Type 4 with the extra amperage). I got this guy for $50 at an estate sale due to the dry-rotted cord. It's got new brushes and a new belt. I already had an unused blade. The cord was $24 at the Dewalt/Delta center up on Jimmy Carter Blvd.
I then test fitted a few boards and called it a day:
Here's a close-up of those dovetails (the better ones):
I thought that was enough to do on one day. More when I get back this evening.
-- John
To bring you up to speed:
- I have a short end-wall on one end of my workshop - the cyclone is in the right corner and there's a door on the left wall close to the corner. There's just enough room for a workbench.
- I found two rusty Craftsman metal bench cabinets full of drawers (they were $10 each, found at an estate sale in my neighborhood), which I lightly sanded and repainted in red/black. These made up the base.
- I leveled these up along that end-wall and then built a frame using pocket screws, with countersunk bolts to hold a bench top.
- At some point I had salvaged some maple flooring that had been drug to the curb - I've been kicking over that stack for over a year and was ready for it to be gone.
- I then contemplated using the stack as the top but would have to build a frame to hold everything together - this would mean ripping a tongue alone each end after trimming to length so the flooring would all interlock. The project then became home to all the pieces of my Unisaw build (also still in pieces). It was time to get some of these projects done!
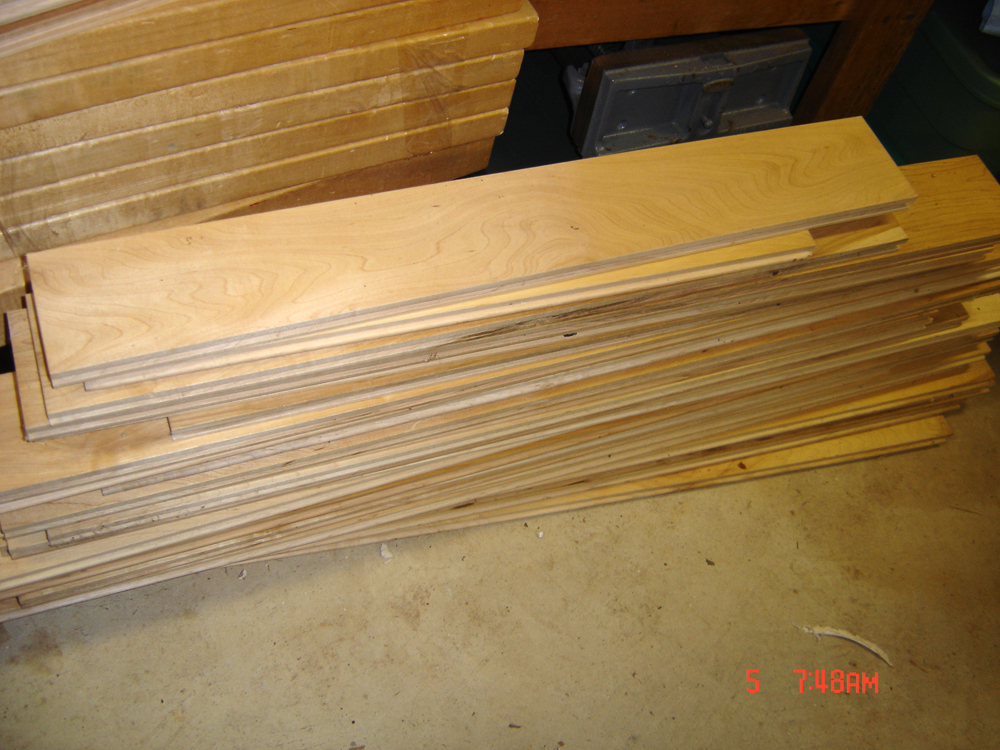
| Stack of Salvaged Maple Flooring |
| Sketch - the numbers are inside measurements - note I calculated it twice using different methods. |
So I got out some trusty tools like by Lie-Nielson dovetail saw.
I bought this saw with the leather holster from someone on Woodnet - it was so cheap it was hard to pass up - it's a bit dirty from the previous user - when I originally purchased it a few years ago I just used it for a few test cuts and put it away. This is the first practical use.
I won't bore you with all the initial steps, other than to say that I ripped the boards on my table saw and then edge-jointed by hand to flatten out the imperfections and burns (maple doesn't smell very good when it burns, by the way) using my trusty Stanley 5 1/4 - one of my favorite planes.
I then adjusted my fence and did a couple of passes on the table saw to cut the rabbets for the tongues on the flooring.
This is the test fit:
That's as far as I got on day one, Tuesday (July 3). Invited a few friends over for the 4th - typical cookout, etc, so I didn't get back into the shop until Thursday (July 5th). I took the above photos before continuing.
After carefully marking the dovetail, I started cutting (yup, no practice or anything). Note to self, before hand-cutting dovetails cut a few scraps to get back into the swing of things. Needless to say my first attempt was pretty bad:
The hardest part about these were the rip cuts - the boards are so long I couldn't put them in a vise, I cut these straddling the boards (no saw bench yet either).
So my first dovetail was pretty yucky - also fairly loose fitting, good thing I started in the back. Fortunately, my second dovetail was 100% better and I continued to tweek things as I moved around the frame. Here's the assembled skirt:
About that time I decided to take a break and change out the blade and cord on my Dewalt 708 12" Sliding Compound Miter Saw (this is a Type 4 with the extra amperage). I got this guy for $50 at an estate sale due to the dry-rotted cord. It's got new brushes and a new belt. I already had an unused blade. The cord was $24 at the Dewalt/Delta center up on Jimmy Carter Blvd.
| Thinking about placing the Miter Saw on the bench instead of a RAS |
| To get it to fit I'd need to do a sliding table so there's room enough for the guides to extend to the rear when the saw is retracted from the cut. I'll have to think about this a bit. |
| Core replacement was super easy - love working on Dewalt tools. |
| These are the shorter boards that won't be used - just for a test fit. |
Here's a close-up of those dovetails (the better ones):
| Still a little sloppy but it is for the shop. |
-- John
Thursday, June 23, 2011
Rust Hunting in Georgia - June 21, 2011
I was kept too busy last week to do much hunting for tools at tag sales - actually I only stopped at one and ended up leaving empty-handed - when the weekend came along and I was too swamped and/or tired to do much searching. Then I got "the call" - one of my oldest friends in Atlanta lives several blocks from me and is also named John - when I think about it I've known him for over 15 years, having originally met him online as we both collect Japanese toys - it was only later that I discovered that we both had an interest in Mid-Century Modern furniture and design. A few years ago he was looking for a new place to live and somehow ended up in my neighborhood, which is a haven for Mid-Century Modernists due to the architecture. Most recently he's also been setting up a small workshop so he's also developed the tool bug. In any case, late last week John called - he was in front of some items in one of our favorite junk shops and wanted to know if I might be interested in some of them. Wow - it's great having friends. When he said "Glue Pot" my ears perked up - then came the price, $5.75 - I immediately said "Buy it!" I picked it up at his house a couple of days ago...
Remarkably, the pot appears unused and is missing only the optional lid. Now I can trash the old mini-crock pot I'm currently using.
It also came with what looks to be an unused pound of hide glue.
Cheered by this fantastic find - I stopped by a small sale earlier this week and found just a couple of items.
I got the trio of basically unused cans of solvents for a total of $2. Paid $1 for the Stanley Sureform and $5 for the unused 30' x 50' tarp - now I have no idea what I need that tarp for, but considering what you'd normally pay for one that large I thought $5 a worthwhile investment. At least now if one of the huge trees all over my yard falls on the house I might be able to temporarily cover the damage...
So the next day I thought I might swing by the same junk shop where John found the glue pot, to see if there was anything else interesting. I picked up the following for a total of a little over $10:
(That's the same glue pot, just grouped with the other items). When I spoke to John about the glue pot I said something about hide glue being used by traditional veneer users - so I wasn't surprised by the veneer saw - I was surprised by the $1.50 price though - this one is lightly marked "Made in West Germany" with no manufacturer's mark.
There was also this small wood burner with additional tips and a rheostat for $3.50 - hey I know it's not a Detail Master but its not $100 or more either.
I also picked up this router letter/number template set. I don't think it's great but the $4 price sticker sucked me in.
And finally there were these 3M paper holders - I think they probably originally held sandpaper - very heavy duty and they have a cool feature that allows them to hang from peg-board.
Not really much there that would qualify for "rust hunting" - more like bargain shop tool hunting, but since I didn't expect anything last week I'm glad to get what I did. The lesson learned here is to have friend's that look out for your interests - thanks to my old buddy John!
-- John
It also came with what looks to be an unused pound of hide glue.
Cheered by this fantastic find - I stopped by a small sale earlier this week and found just a couple of items.
I got the trio of basically unused cans of solvents for a total of $2. Paid $1 for the Stanley Sureform and $5 for the unused 30' x 50' tarp - now I have no idea what I need that tarp for, but considering what you'd normally pay for one that large I thought $5 a worthwhile investment. At least now if one of the huge trees all over my yard falls on the house I might be able to temporarily cover the damage...
So the next day I thought I might swing by the same junk shop where John found the glue pot, to see if there was anything else interesting. I picked up the following for a total of a little over $10:
(That's the same glue pot, just grouped with the other items). When I spoke to John about the glue pot I said something about hide glue being used by traditional veneer users - so I wasn't surprised by the veneer saw - I was surprised by the $1.50 price though - this one is lightly marked "Made in West Germany" with no manufacturer's mark.
There was also this small wood burner with additional tips and a rheostat for $3.50 - hey I know it's not a Detail Master but its not $100 or more either.
I also picked up this router letter/number template set. I don't think it's great but the $4 price sticker sucked me in.
And finally there were these 3M paper holders - I think they probably originally held sandpaper - very heavy duty and they have a cool feature that allows them to hang from peg-board.
Not really much there that would qualify for "rust hunting" - more like bargain shop tool hunting, but since I didn't expect anything last week I'm glad to get what I did. The lesson learned here is to have friend's that look out for your interests - thanks to my old buddy John!
-- John
Tuesday, December 14, 2010
Basement Shop Progress Pics 2010.12.12
I figured it had been a while since I posted images of the shop - at this point I guess the shop is really an ongoing effort - I'm not sure if I'll ever get it to the point where I'm totally satisfied. From the last group of images, I've put in the central pipe for the dust collector and started placing my workbenches - but it finally hit me that I've got too many tools, so many of my project tools will need to go - some I'll put on CraigsList while others I'll part out an put on eBay (or list on the Old Woodworking Tools org site as sale items).
This first image shows how I tied in the Grizzly Cyclone into the over-head duct system. I tried to minimize what was overhead and did so by running a main trunk line down the center of the room with "y"s leading to each side (one exception was a duct running along one end with drops to a long bench which I'll show below). There are also two floor standing drill presses shown, both 14" Deltas (the one on the left was probably from a school shop with "DRILL PRESS" stenciled on the side. The one on the right is a very old 1937 Delta model with split-phase motor and round cast iron stand - got that one for $15 (it's in an earlier post). They both run but that older model needs a tug on the belt - need to figure out that motor soon.
Here's a shot of the duct work - note that to maximize space I've suspended my longer clamps from the ceiling using "J" hooks they sell at Home Depot - it's very effective. I added some additional "y"s for future expansion with covers mounted over them. The cover you see will go above the bench mounted on the wall to the left.
This is the main trunk looking towards the back of my shop - note the old turning tool display mounted on the door - I was given that during one of the GWA shop tours and thought it would be a cool way to display some of my older turning tools (they're old Buck, Walker Turner Driver Line and Delta - non-HSS).
Towards the other side the ducting runs next to my ambient dust collector - I got this brute during an Amazon sale for $130 - it has both a remote control and timer and works very well in clearing all the airborne dust - I can set the timer for 30 minutes and the dust is gone by the next time I come into the shop.
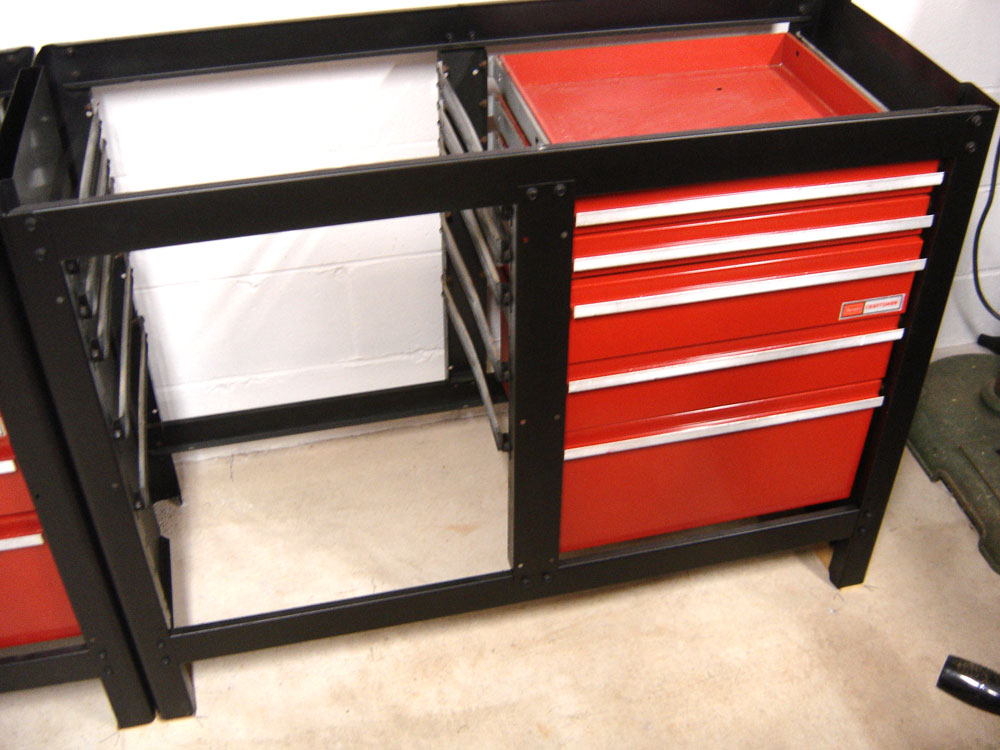
Now on to the "new" workbenches - I originally had planned to build a long bench along the far wall next to the dust collector. Last year I went to an estate sale in the neighborhood (a neighbor was relocating to Florida for a job) and got these two Craftsman all-metal workbench cabinets (no top) for $10 each - I wish I had taken a photo before I cleaned these up - they were basically a rusty heap from being stored in an unconditioned storage building outside. I treated the rust, sanded, then shot these with primer and rustoleum. I didn't spend too much time on them since they were going into the shop - I think they turned out looking nice (there is a little pitting on the lower drawers but you have to get in close to see them. Here's the left 8 drawer cabinet:
And here's the right 10 drawer cabinet:
I put a few chisels into the left to see how they would work out - all of these are users:
You can see some of the over-spray and the drawer glides - like I said previously I didn't spend much time doing these and just wanted the rust gone. I used some 1/4" nuts and bolts to mount the two cabinets together.
Next I had to figure out what to do with the top. I wanted to mount a radial arm saw in the middle but wanted a base for it, as well as some work space before elevating the ends to support stock. I was driving through the neighborhood and spotted some open cardboard boxes with wood sticking out on the curb - it ended up being two boxes of pre-finished maple flooring. The ends were slightly "dirty" and weathered - I believe they were exposed a bit to the elements and probably left-over. In any case, I'm glad the neighbor was throwing them out as I think they'll make a fine workbench. Not bad for free. You can see my Dewalt MBF on the table behind the stack - that's going in the middle of the workbench.
I spent some time getting the cabinets as level as possible - those are cedar shakes custom cut to be hidden yet provide the leveling I needed for the benches. I marked the floor in case I needed to move the unit (which I probably will need to in order to attach the top).
So I next needed to figure out the top. I decided to cut tongues along each cut end so they will fit into a groove in a skirt - the skirt will be made of maple and would attach to a sub-frame made of 1x material - I wanted to get the base as low as possible so it's just slightly larger than the cabinets. There are some holes in the top of the cabinet that are used to attach a top. This is the sub-frame with a piece of maple flooring to illustrate the overall idea. Each board will extend from back to front.
I built the sub-frame using pocket screws - it's amazing how well those guys work - each joint is also glued with Titebond 1:
Since I wanted to be able to take everything apart if needed, I had to devise an assembly/disassembly plan. Bolts would come up through the cabinet and into nuts/washers in the sub-frame. The top will be one unit held together with the skirt, then screws would be used from the skirt to attach to the edges of the sub-frame. To pull this off, the sub-frame needed to have counter-sunk holes. I did these using a forstner bit in a hand-drill. Note, to start I first marked the holes using the actual hole placement from the cabinets then drilled for the bolts with the frame upside-down - that way they would align from the bottom. I next flipped over the sub-frame right-side up and used a spade bit to start the counter-sunk hole (if you've ever tried to hand-hold a forstner you'll know why I did that first) - once the hole was started I switched to the forstner and drilled down to a depth that would allow the bolt to clear and still have room for a washer and nut. Here's what that looked like.
I'll take additional shots when I finish the top - the weather was nice this fall so I got back on my Unisaw restoration, media blasting parts and getting primer, and in some cases some finished coat on them. More pics soon.
-- John
This first image shows how I tied in the Grizzly Cyclone into the over-head duct system. I tried to minimize what was overhead and did so by running a main trunk line down the center of the room with "y"s leading to each side (one exception was a duct running along one end with drops to a long bench which I'll show below). There are also two floor standing drill presses shown, both 14" Deltas (the one on the left was probably from a school shop with "DRILL PRESS" stenciled on the side. The one on the right is a very old 1937 Delta model with split-phase motor and round cast iron stand - got that one for $15 (it's in an earlier post). They both run but that older model needs a tug on the belt - need to figure out that motor soon.
Here's a shot of the duct work - note that to maximize space I've suspended my longer clamps from the ceiling using "J" hooks they sell at Home Depot - it's very effective. I added some additional "y"s for future expansion with covers mounted over them. The cover you see will go above the bench mounted on the wall to the left.
This is the main trunk looking towards the back of my shop - note the old turning tool display mounted on the door - I was given that during one of the GWA shop tours and thought it would be a cool way to display some of my older turning tools (they're old Buck, Walker Turner Driver Line and Delta - non-HSS).
Towards the other side the ducting runs next to my ambient dust collector - I got this brute during an Amazon sale for $130 - it has both a remote control and timer and works very well in clearing all the airborne dust - I can set the timer for 30 minutes and the dust is gone by the next time I come into the shop.
Now on to the "new" workbenches - I originally had planned to build a long bench along the far wall next to the dust collector. Last year I went to an estate sale in the neighborhood (a neighbor was relocating to Florida for a job) and got these two Craftsman all-metal workbench cabinets (no top) for $10 each - I wish I had taken a photo before I cleaned these up - they were basically a rusty heap from being stored in an unconditioned storage building outside. I treated the rust, sanded, then shot these with primer and rustoleum. I didn't spend too much time on them since they were going into the shop - I think they turned out looking nice (there is a little pitting on the lower drawers but you have to get in close to see them. Here's the left 8 drawer cabinet:
And here's the right 10 drawer cabinet:
I put a few chisels into the left to see how they would work out - all of these are users:
You can see some of the over-spray and the drawer glides - like I said previously I didn't spend much time doing these and just wanted the rust gone. I used some 1/4" nuts and bolts to mount the two cabinets together.
Next I had to figure out what to do with the top. I wanted to mount a radial arm saw in the middle but wanted a base for it, as well as some work space before elevating the ends to support stock. I was driving through the neighborhood and spotted some open cardboard boxes with wood sticking out on the curb - it ended up being two boxes of pre-finished maple flooring. The ends were slightly "dirty" and weathered - I believe they were exposed a bit to the elements and probably left-over. In any case, I'm glad the neighbor was throwing them out as I think they'll make a fine workbench. Not bad for free. You can see my Dewalt MBF on the table behind the stack - that's going in the middle of the workbench.
I spent some time getting the cabinets as level as possible - those are cedar shakes custom cut to be hidden yet provide the leveling I needed for the benches. I marked the floor in case I needed to move the unit (which I probably will need to in order to attach the top).
I built the sub-frame using pocket screws - it's amazing how well those guys work - each joint is also glued with Titebond 1:
Since I wanted to be able to take everything apart if needed, I had to devise an assembly/disassembly plan. Bolts would come up through the cabinet and into nuts/washers in the sub-frame. The top will be one unit held together with the skirt, then screws would be used from the skirt to attach to the edges of the sub-frame. To pull this off, the sub-frame needed to have counter-sunk holes. I did these using a forstner bit in a hand-drill. Note, to start I first marked the holes using the actual hole placement from the cabinets then drilled for the bolts with the frame upside-down - that way they would align from the bottom. I next flipped over the sub-frame right-side up and used a spade bit to start the counter-sunk hole (if you've ever tried to hand-hold a forstner you'll know why I did that first) - once the hole was started I switched to the forstner and drilled down to a depth that would allow the bolt to clear and still have room for a washer and nut. Here's what that looked like.
I'll take additional shots when I finish the top - the weather was nice this fall so I got back on my Unisaw restoration, media blasting parts and getting primer, and in some cases some finished coat on them. More pics soon.
-- John
Monday, September 29, 2008
Basement Shop Progress Pics 2008.09.28
The ceiling is finally sealed up - next on the list is finishing the ducting for the DC. I managed to move all the rest of my lumber (temporarily stored in another are of the basement) onto the existing racks - looks like I have room for about another couple hundred feet before it's at capacity - as it is what's on the racks is probably close to being unmanagable.
I also got the ambient duct collector up - got this Jet unit when it went on sale at Amazon last year. It works well filtering down to 1 micron with multiple speeds and a remote control (it can be set with a timer as well).

One of the ways I was able to manage the project was to move all my mechanics tools and metal working items into another area of the basement. I picked up a metal rolling workbench with wood top for $10 at a neighborhood yardsale (bought it and rolled it two blocks to the house - I bet that was an odd sight). I've yet to mount the swivel radial vise as I didin't have long enough nuts/bolts, but you get the idea. I also moved my HF Drill Press by the bench as a dedicated-to-metal driller. I'm either putting a cabinet or some peg-board above the bench - haven't decided yet. Across from the bench is another short cabinet with my 3 Ton arbor press and two metal roll-away tool boxes. I'm still looking for at least a 20 Ton Hydrolic press to add to the mix as well and a small metal lathe. Here are some pics:


Finally I used the aisle leading into my workshop as a place for storing files and reference books. This was put together with scrap Standards and Brackets I've had banging around in my rat-hole for years, along with some salvaged pine shelving. Beneath is a metal barrister's bookcase housing binders with a complete collection of Woodsmith and Shopnotes. The cardboard magazine holders have a complete run of Wood Magazine and Fine Woodworking (some left-overs are in a box on the floor - have to figure out a way to get those on the shelf). The bookcase also haa a shelf full of small motors on it as well as an original vintage red Swingline stapler.

I've started placing some equipment but haven't gotten anything "in stone" yet. May reconfigure depending on how things lay out.
-- John
I also got the ambient duct collector up - got this Jet unit when it went on sale at Amazon last year. It works well filtering down to 1 micron with multiple speeds and a remote control (it can be set with a timer as well).
One of the ways I was able to manage the project was to move all my mechanics tools and metal working items into another area of the basement. I picked up a metal rolling workbench with wood top for $10 at a neighborhood yardsale (bought it and rolled it two blocks to the house - I bet that was an odd sight). I've yet to mount the swivel radial vise as I didin't have long enough nuts/bolts, but you get the idea. I also moved my HF Drill Press by the bench as a dedicated-to-metal driller. I'm either putting a cabinet or some peg-board above the bench - haven't decided yet. Across from the bench is another short cabinet with my 3 Ton arbor press and two metal roll-away tool boxes. I'm still looking for at least a 20 Ton Hydrolic press to add to the mix as well and a small metal lathe. Here are some pics:
Finally I used the aisle leading into my workshop as a place for storing files and reference books. This was put together with scrap Standards and Brackets I've had banging around in my rat-hole for years, along with some salvaged pine shelving. Beneath is a metal barrister's bookcase housing binders with a complete collection of Woodsmith and Shopnotes. The cardboard magazine holders have a complete run of Wood Magazine and Fine Woodworking (some left-overs are in a box on the floor - have to figure out a way to get those on the shelf). The bookcase also haa a shelf full of small motors on it as well as an original vintage red Swingline stapler.
I've started placing some equipment but haven't gotten anything "in stone" yet. May reconfigure depending on how things lay out.
-- John
Tuesday, September 23, 2008
Basement Shop Progress Pics 2008.09.18
Got the brackets on the John Sterling standards loaded up with a Walnut tree I've had stored in the carport for 2 years. This tree was taken down over 20 years ago and cut up into about 50 boards (at least by the time I got it there were 50 - I'm not sure how much was actually produced as some had been used and there are missing pieces of the stack when aligned). The nice thing about having all the wood from the same tree is most of the color is the same once finished. There are also some interesting figure where the tree split into two trunks. I think it sat on the ground for a while as there are pin-holes along some boards where various insects had eaten into the sap - anything that was suspicious was cut away. Another interesting aspect - most of the wider and thicker boards were the straightest and had minimal checking and splitting - there's evidence of stickering on those - the smaller boards were probably just piled up with weight, I suspect. I also had some red oak and the rest of that haul of sapele in the carport so it's now all on the wall.
I also managed to get another length of the ceiling sealed up. Next up is the Jet ambient dust collector.
-- John
Subscribe to:
Posts (Atom)