Monday, March 15, 2010

Drills and Drivers, Screws and Screwdrivers

I got to thinking about this last night - yesterday I was driving some Phillips head screws using an impact driver - if you haven't had a chance to use one then you don't know what you're missing. I was at a friend's shop when I spotted his Makita driver and asked him about it - wanting to demonstrate, he quickly grabbed the driver and a 4" decking screw, threw a 1" board on top of a 4x4 chunk of pressure treated and drove the screw in just a few seconds, without stopping or doing short bursts (which is what i usually do) - the screw went in like butter. The difference is the super short ratcheting that the impact driver supplies (just like an pneumatic impact wrench) - the clutch for the ratcheting doesn't kick in until the drive feels resistance - then it ups the torque value exponentially (my own Dewalt driver delivers 2700 lbs of torque according to specs). The result is that the screw drives very smoothly and the tip doesn't strip (at least it doesn't if the tip is 'fresh'). Other advantages of these impact drivers: they're lightweight (not needing the other functions of a drill they don't have multiple clutches or mechanisms for drill, hammer, clutch, etc); they have shorter barrels so your hand is closer to the work and they fit in smaller spaces; they have a built in light that shines on what you're driving (many newer screw-guns and drills now have this feature as well). Disadvantages include: you're more apt to break a screw off in your work (extreme torque can work both ways); one can't use these to drill holes very well (the chuck is a locking type for a hex-shaped shaft, that doesn't include any type of Jacobs style gripping action for round drill bits); non-impact bits pretty much disintegrate with use.

Another reason I thought of all this has to do with my having to remove some hinges and latches from some old cabinet doors - these doors had about upteen coats of paint on them so it was quite a task - it was also away from my shop so I was wishing I had a brace with me. Why a brace? One sort of forgotten advantage of the brace is for the amount of torque that can be applied to a slotted screw using a flat-tip screw brace bit. Using a large brace (12" swing), plus with the amount of pressure you can exert on the pad, you can worry off just about any slotted screw - which is what these old hinges had under all the paint. As it was I managed to remove them all but it took much more time than it normally would have had a brace and flat-tip bit been involved.

So last night the thoughts of the day ran through my head and I started thinking about drivers and screws - this naturally (at least for me) got me thinking about different types of screw head-types and what I knew about the flat tip, Phillips and square drive. So this is what I knew (through anecdote, discussion, etc):

  1. The square drive and screw was actually patented by a Canadian named Robertson – thus it’s called the Robertson drive in Canada and it’s ubiquitous in use north of our borders – this drive actually pre-dates the Phillips drive and screw in the US.
  2. The Phillips drive and screw was invented by someone in the US who sold the rights to a company who marketed it under the Phillips name. Initially there wasn’t a good way to manufacture the screw heard (and there are variations with up to 6 or 8 vanes/slots) so the patent pre-dates the actual manufacture by some years. I had also heard that the Phillips bit was developed for the manufacture of airplanes (something to do with the attachment of the aluminum skin – the recessed head discouraged drag and the shape of the slots allowed for the head to “cam out” rather than the screw being over-torqued and the threads being stripped).
  3. According to what I’ve heard, the Phillips screw and drive owes its use in the US to Henry Ford, who wanted to use a product in his vehicles that was patented and owned by a US company rather than one outside our borders.
  4. It’s obvious in retrospect that the Phillips drive is inferior to the Robertson’s drive due to the built-in design (the desire to cam out instead of stripping). Strange that it’s used on everything and has pretty much replaced the slotted screw and driver – well it is easier to register and use than a slotted fastener. But why has it taken so long for the Robertson drive to gain popularity among US users? I first saw the Robertson screw being used by outdoor deck builders – makes sense as the drive head doesn’t strip – the worst thing about a stripped head when building decks is that it takes off the coating that prevents rust – once the head starts to go the coating causes rusty spots that are very un-slightly, in a very short time.
So what of the above is true and what isn’t? Doing a little research it appears that these same stories are found and accepted all over the web. A bit more research will be needed before anything conclusive can be ascertained – however one thing is indeed certain – the Phillips drive and bit for most woodworking is indeed inferior for many reasons.

Next topic: the Monkey Wrench!

-- John

Sunday, January 17, 2010

More Chisels Than You Can Shake a Stick At...

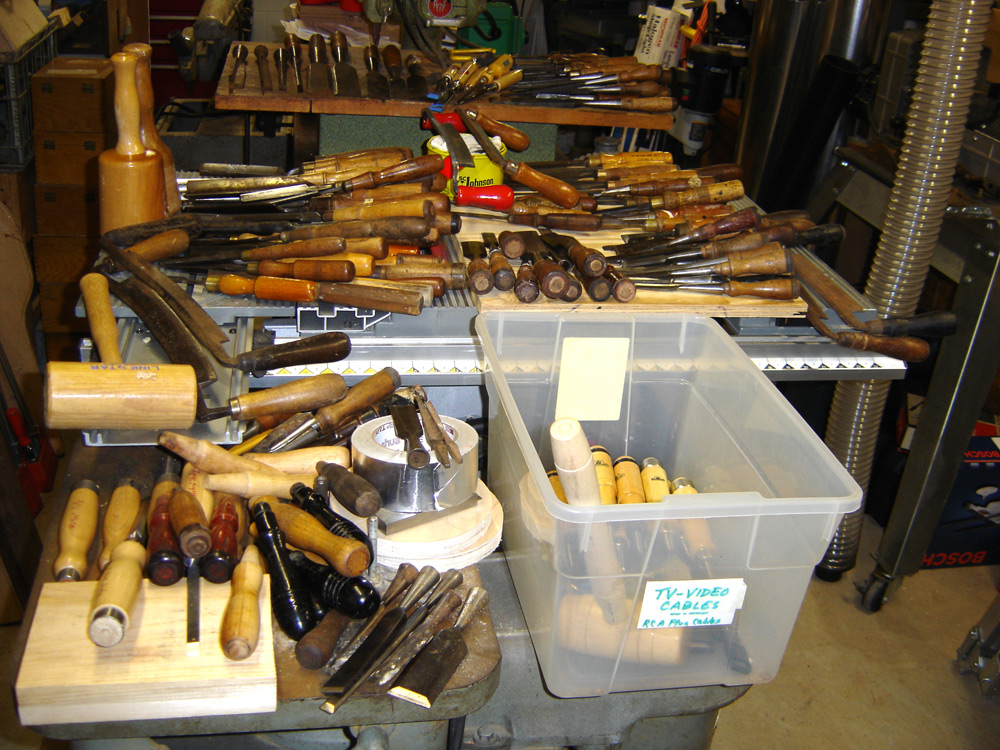
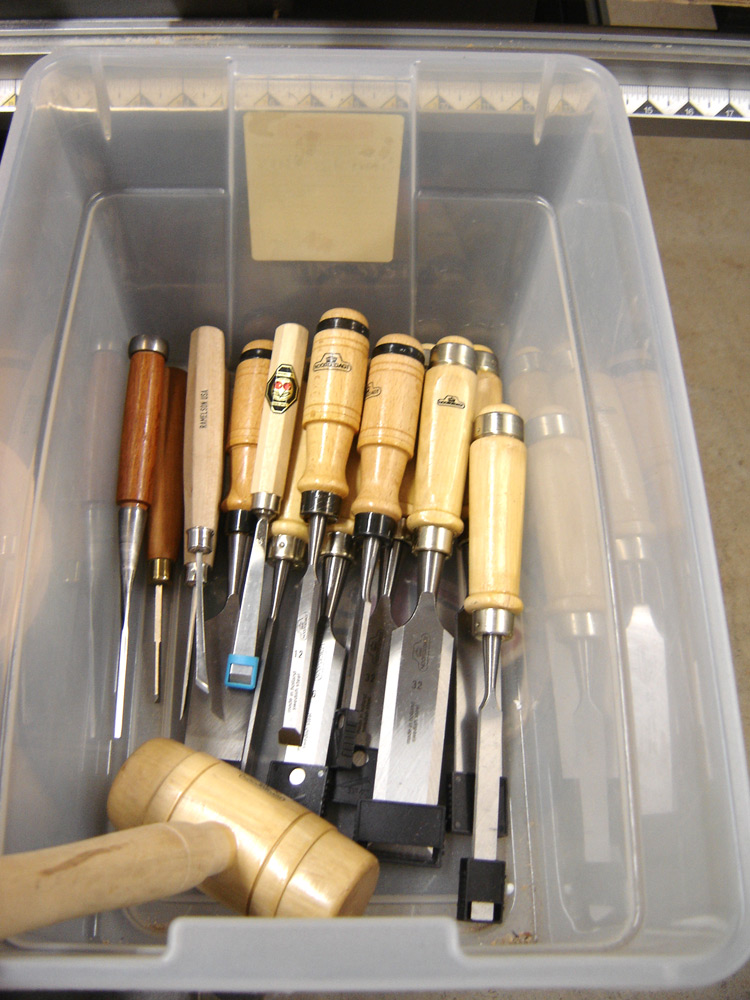
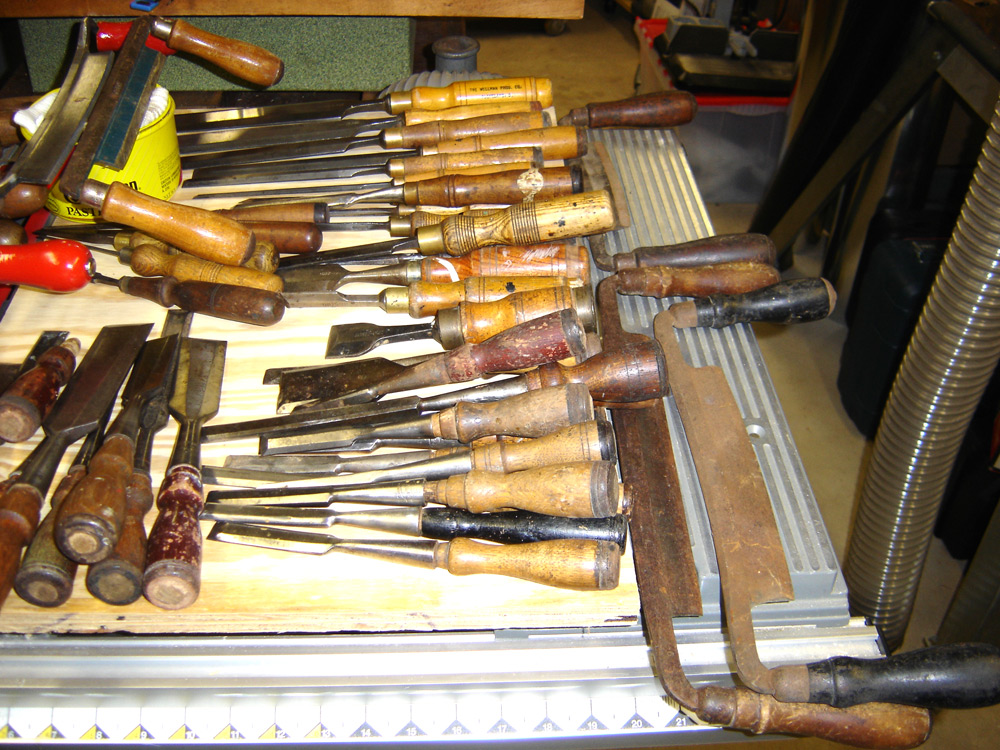
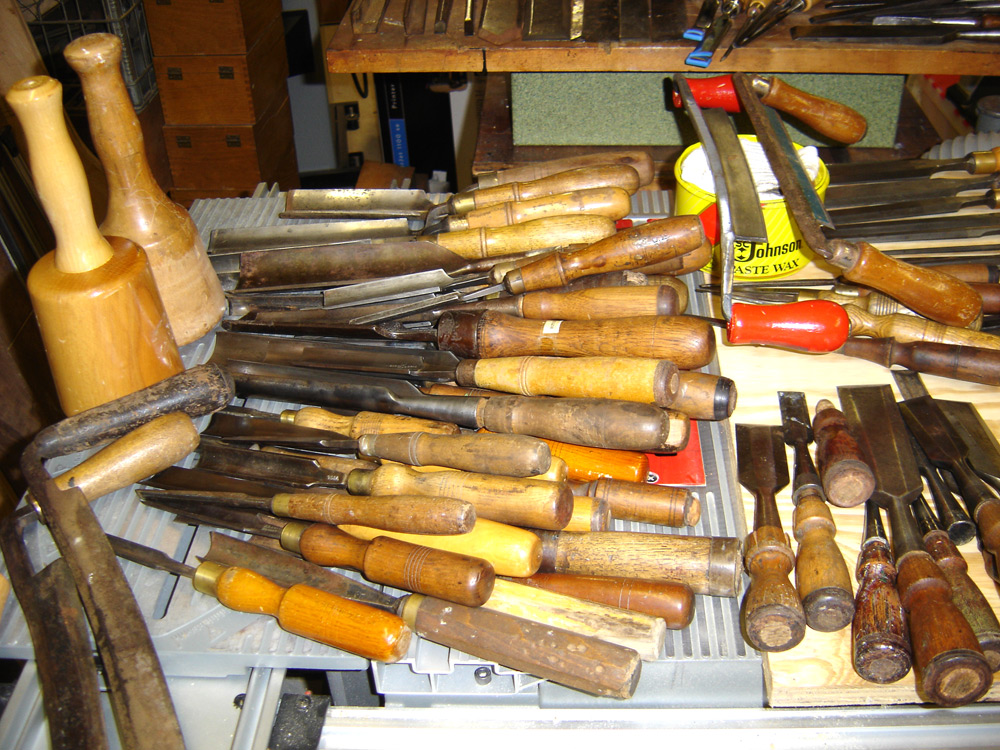
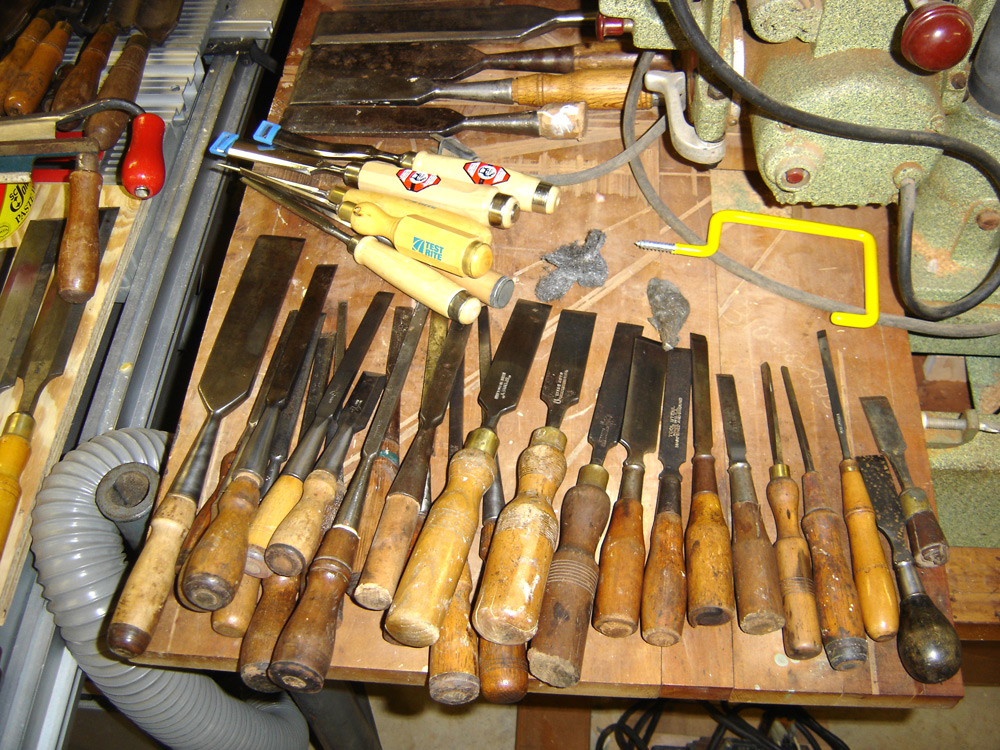
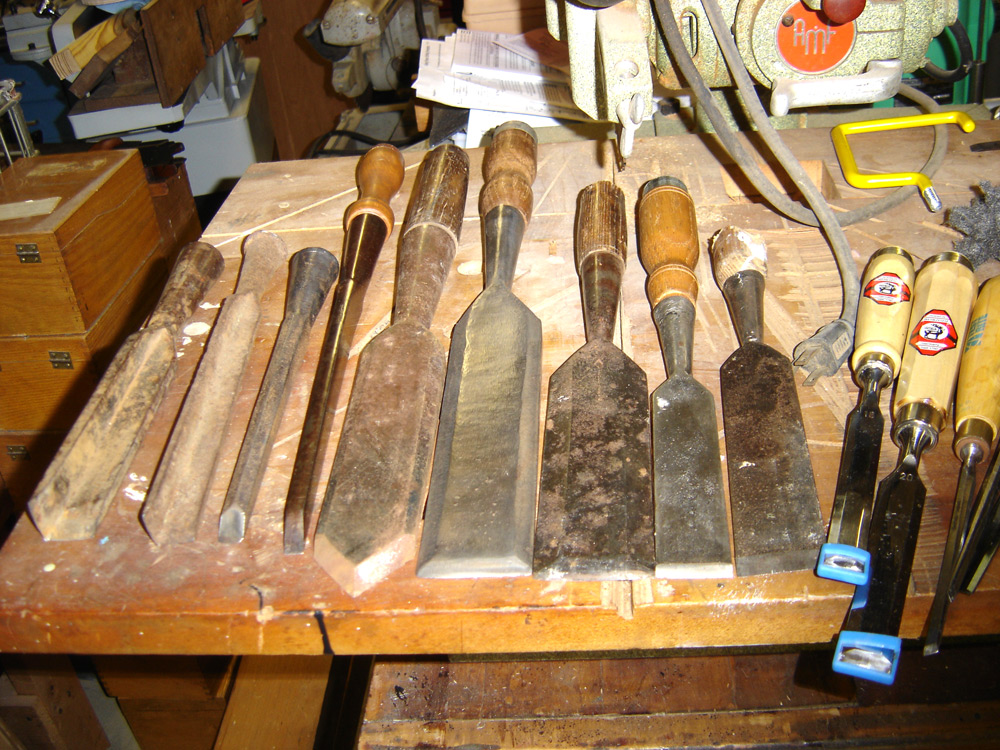
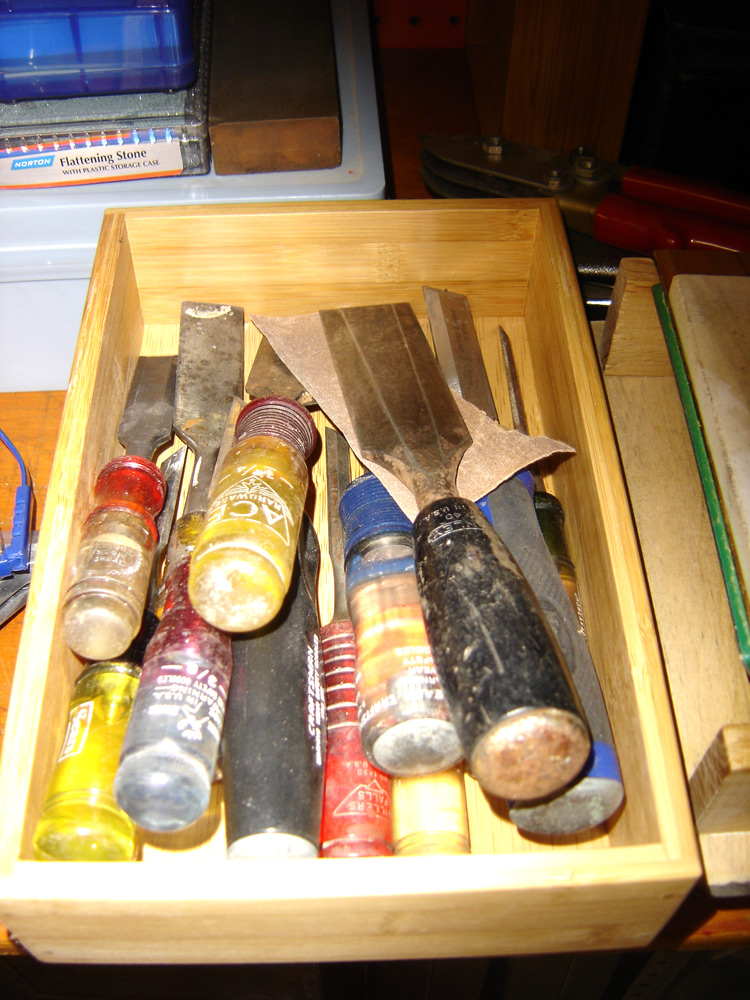
I recently was asked to teach a hand-tool class for the Gwinnett Woodworking Association, my local woodworking club - I choose to focus on Chisels, Gouges and Draw Knives (that last I justified purely to the form of a Draw-knife, resembling a chisel with a handle on either end, sharpened along the end). To prepare, I gathered up what I had that qualified in those categories - it's funny how you accumulate things. I didn't realize I had so many - I'm not even sure this is everything, as I'm sure I have some stuffed away in boxes.


In case you're wondering, here's the lesson plan:

Wood Chisels, Gouges and Draw Knives


What are these and how are they used?
These are bladed, cutting or shaping tools, usually with an extended handle for striking or leverage for prying. They are used to shape wood by removing material. They’re primarily used during the fitment of wood parts into project components, or for decorative carving.

What is a Wood Chisel?
Wood Chisels are hand tools used to shave or chip wood. Wood Chisels can be operated by striking them with a hammer with some care. There are two main types of wood chisels – those used by carpenters and those used by woodworkers.

Carpenter chisels are broken into types by size and usage:

 
• A butt chisel has a short blade that ranges from about 2 1/2" to 3" long. It is used by pattern-makers, cabinetmakers, carpenters and do-it-yourselfers for carving, paring and similar work. It can be used with hard-faced hammers. These usually have tang handles and often have metal plates on the end to aid in striking with a hammer. Butt chisels generally have 30-degree bevels.

 
• The firmer chisel usually 3 ½” to 6” and is meant to be lightly stuck or used for hand work. .which is used mainly for cutting deeply into wood. It should be used with soft-faced hammers or with hand pressure alone. Firmer chisels are usually the same length as bench chisels (see below) but of thicker, heavier steel, usually straight sided. For paring and striking with 30-degree bevels and socket handles.

 
• Stanley also had a chisel that fit between the butt and firmer that they called a pocket chisel – it had a 4 ½” blade with their firmer chisel at 6” – these also have a 30-degree bevel.

 
• Framing Chisels are larger, longer chisels usually an inch or larger wide. Some were designed for paring with beveled edges and 20-25 degree bevels and some for striking with square edges and 30-degree bevels. Framing chisels usually have hooped, socket handles.

 
  • Framing corner chisels are framers forged into a 90-degree angle to clean out corners. Generally 30-degree bevels. Usually with hooped, socket handles. 
  • Millwright or Factory mortise chisels are very long, very heavy mortise chisel designed for heavy striking with heavy, hooped handles. Many were 16” long and often made by manufacturers like New Haven Edge Tool who specialized in large chisels. Always with hooped, socket handles and a 35-40 degree bevel.
• English “Pigsticker” mortise chisel is a short, stubby, fit-in-the-tool-chest, tang-handled mortise chisel with un-hooped handle designed for striking with 35-40 degree bevels.

 
• Slicks are large, very heavy 2-4” framing chisels with long handles up to 24” designed for paring large timbers with 20-25 degree bevels. Never struck. Always with socket handles.

Woodworking chisels are broken up into types by usage:

 
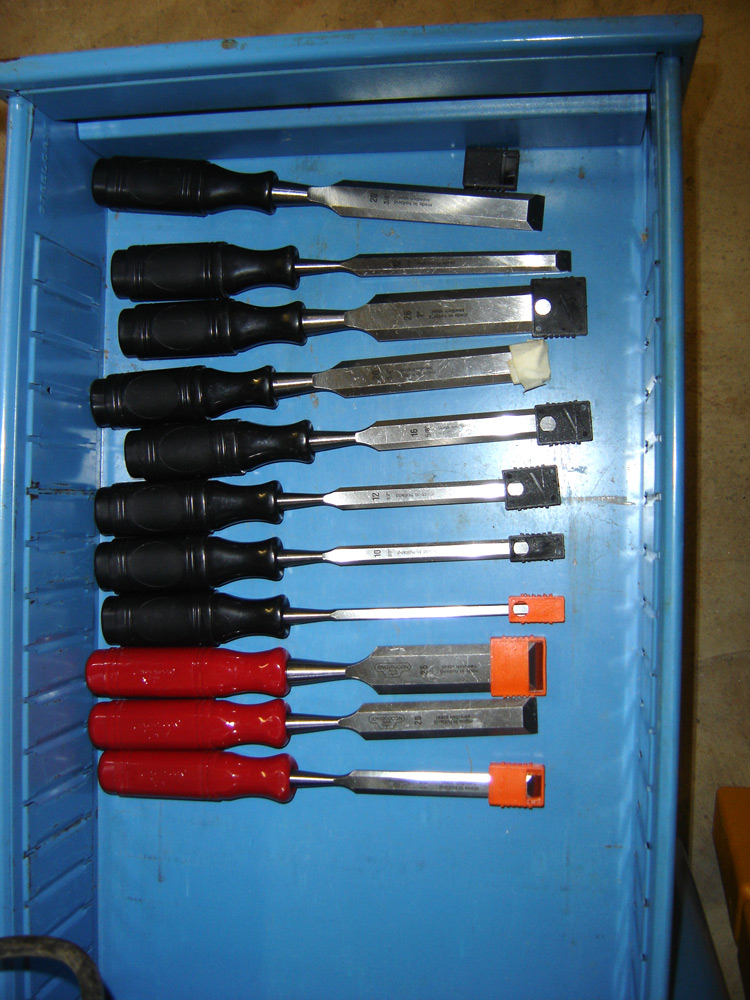
• A bench chisel has a longer blade, usually 3 ½” to 6” and is meant for workbench use, lightly stuck or used for hand work. It generally has a 30 degree bevel and beveled edges.

 
• Paring chisels are long, thinner chisels not designed for any striking, only paring with 20-25 degree bevels. Some have "cranked" handles for clearance and were primarily used by pattern makers making negative patterns in soft pine. Others are skew cut to reach into corners, and a “dovetail” chisel is diamond-shaped to clean female sliding dovetail sockets. Paring chisels usually have tang handles.
  • Cranked Paring Chisel – the blade is offset so the handle is above the surface of the work. These are mostly used by pattern makers to get into areas that are below the surface of the work piece.
  • Skew Paring Chisel: has a 60 degree cutting angle and is used for trimming and finishing.
  • Dovetail Paring Chisel – these have nearly a diamond shape to clean female sliding dovetail sockets. 
• Sash Mortise Chisel is a medium length mortise chisel for bench use, generally with un-hooped handles. “Sash” comes from window factories, and there is some confusion describing medium length and long length mortise chisels as factories generally used the longer chisels but the medium ones are often called “sash” chisels.

  
Blade types are generally divided into registered and beveled.

 
• Registered Chisels have sides that are square to the back – the extra metal provides more blade strength for really tough jobs where the handle is struck to remove large chunks of wood

 
• Beveled Chisels – have sides that are beveled to make it easier to fit the chisel into corners. These days the beveled chisel is much more common than the registered chisel.

 
Chisels have wood or plastic handles. Wood handles are available in both tang (the end of the blade or tang fits into the handle and is reinforced with a metal ferrule) and socket type (a projection from the handle fits into a socket in the blade). Plastic handles fit only tang construction.

  
Quality woodworking chisels have large, ergonomically shaped handles for a comfortable, sure grip and better control. Blades should be of high-quality carbon, heat-treated steel with precision ground cutting edge. In addition, carpentry chisels should have crowned steel strike caps to help center the blow (why these are often called “pounding” chisels).

  
Japanese Chisels

 The better quality Japanese wood chisels are made from laminated steel. There are different types of metals used in each chisel. The better ones are laminated by hand, over a charcoal fire. The combination of the metals makes a chisel that takes a very sharp edge, and is hard enough to maintain the edge for a long time. This technique produces a tool that have a harder edge, usually a hardness rating of Rockwell 64, compared to their western counterparts of around 62 on the Rockwell scale. There are two basic metals used in these chisels, white steel and blue steel. The names come from the color of the paper the steels are wrapped in. White and blue steel come in various grades that vary in carbon content. Both have low levels of impurities. White steel is a simple carbon steel. Blue steel contains alloying elements, and sacrifices some sharpness for edge retention, toughness, and corrosion resistance, although it is not stainless.

  
Japanese chisels have hollows in the back side, the wider ones having as many as four hollows. These are intended to help in the flattening of the back of the chisels.

  
Wood Turning Chisels

 A lathe tool is a woodworking chisel designed to cut wood as it is spun on a lathe. These tools have longer handles for more leverage, needed to counteract the tendency of the tool to react to the downward force of the spinning wood being cut or carved. In addition, the angle and method of sharpening is different, a secondary bevel would not be ground on the tool.

  
Woodworking chisels range from quite small hand tools for tiny details, to large chisels used to remove big sections of wood, in 'roughing out' the shape of a pattern or design. Typically, in woodcarving, one starts with a larger tool, and gradually progresses to smaller tools to finish the detail. One of the largest types of chisel is the slick, used in timber frame construction and wooden shipbuilding.

  
What is a Gouge?

 A gouge, one type of chisel, is used, particularly in woodworking, woodturning and sculpture, to carve small pieces from the material. Gouges are most often used in creating concave surfaces. A gouge typically has a 'U'-shaped cross-section.

 
• If the angle of the plane of the blade is on the outer surface of the curve the gouge is called an 'incannel' gouge, otherwise it is known as an 'outcannel' gouge.
• Gouges with angled rather than curved blades are often called 'V-gouges' or 'vee-parting tools'.

  
Types of gouges

 • Straight Gouge

 • Fishtail Gouge

 • Spoon Gouge

 • V-parting Tool - used for parting, and in certain classes of flat work for emphasizing lines.

 • Veining Gouge - a specialized deep gouge with a U shaped cutting edge

 • Framing Gouge – a large (2” or wider) gouge used to scrub wood for fitment in timber framing construction.


 Gouge Parts:

 • Sweep – The curvature of the cutting edge of a carving gouge. A lower number (like #3) indicates a shallow, flat sweep while a high number (like #9) is used for a deeply curved gouge.

 • Bent – the curvature of the gouge length –

  • Long Bent – A gouge, chisel or V tool where the blade is curved along its entire length. Handy for deep work.
  • Short Bent or Spoon – A gouge, chisel or V tool where the blade is straight with a curve at the end, like a spoon. Use for work in deep or inaccessible areas.
  • Back Bent – A spoon gouge with a reverse bent end. Used for undercuts and reeding work.

 • Cannel – the curved inner surface of a gouge

 
Besides wood carving, gouges have a place in woodworking and timber framing. Gouges can be used to quickly wear down the surface of wood that is hard to reach with other tools – much like a scrub plane. Large gouges were used by timber framers in this manner in conjunction with the slick chisel to fit mortise-and-tenon joints.


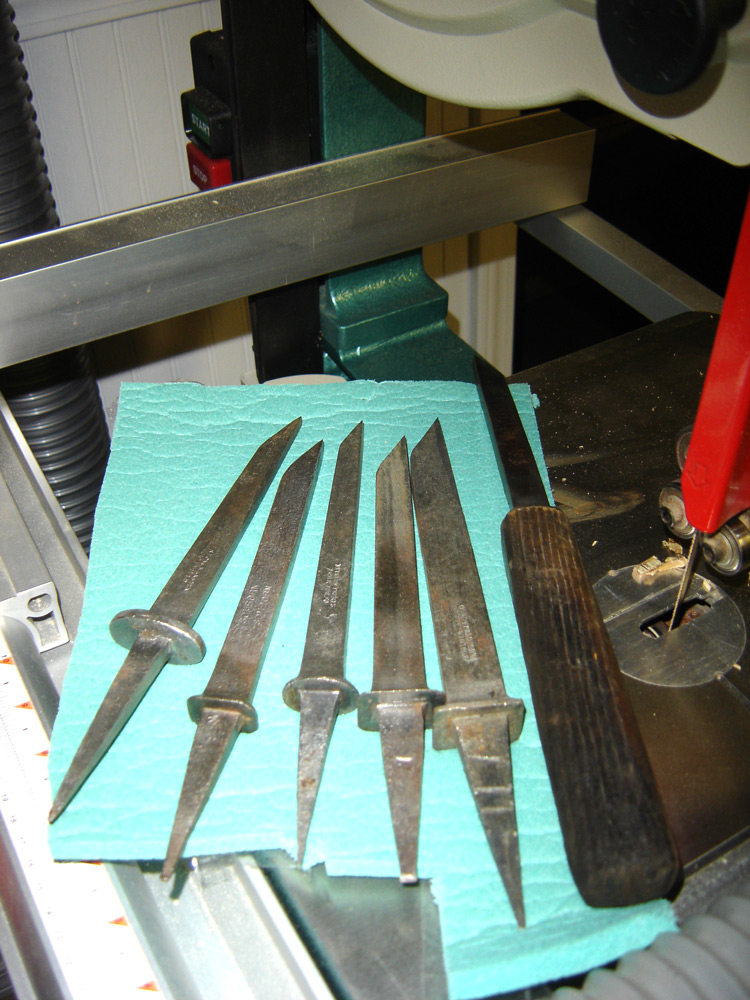
 What is a Draw Knife?

 A drawknife is a traditional woodworking hand tool used to shape wood by removing shavings. It consists of a blade with a handle at each end. The blade is much longer (along the cutting edge) than it is deep (from cutting edge to back edge). It is pulled or "drawn" hence the name, toward the user. The draw knife provides a quick and simple way of removing large amounts of stock from timber billets. Much loved by the green woodworker, these tools have been with us since the very dawn of woodworking. There are two or three styles with variations, the most common are:

  
• Straight-bladed with handles set at ninety degrees to the line of the blade, also known as the English pattern

• Curved bladed style, with handles in line with the cutting edge, also known as the continental pattern.

• Folding-handles that allow the user to adjust the angle to gain maximum leverage
• Scorp - Also commonly called an inshave, is a deeply curved drawknife that has the perfect regular sweep and handle angles for rapid, aggressive shaving to finish the shaping job begun with the adze. Its deep sweep takes heavy cuts without excessive effort and without tearing at the edges of the cut.

  
Generally draw knives have a 20 degree bevel with a 5 degree or so back-bevel. The trick to draw knives is mastering reading the grain of the wood.

  
Who uses Chisels, Gouges and Draw Knives?

• Everybody that works with wood will at some point need at least a single chisel and the techniques to use it.
• Traditional furniture makers
• Timber Framers
• Wet Wood workers.
• Carvers

 
Buying
• Retail Stores
• eBay
• Yard and Estate Sales
• Craig’s List
• What to look for
  • Look for all the parts (iron, handle, *ferrule, *strike plate)
  • Look for cracks or chips, especially around the ferrule
  • Look at the length for stress and condition of the edge for bluing
  • How flat is the back? Convex back = bad (takes too long to knap)
  • Look for excessive pitting due to rust
  • Cheap pot-metal or sheet metal materials and soft plastic in general = bad
  • Metal striking plate is more of a carpenter’s chisel
  • Anything marked "Stanley", "Witherby", "Winchester", “James Swan”, "Chas Buck" or "L&IJ White" is generally going to a collector for too high a price unless they are part of large, handle-less lots.
  • Good brands include older (not newer) Greenlee and Buck Bros, New Haven Edge Tool, Ohio Tool, Crossman, DR Barton, Underhill, Union Hardware, Jennings, Sargent, GI Mix, Shapleigh Hardware, Eric Anton Berg, Dickerson, Gillespie, Wye, Dixon, PS&W or PEXTO, Robt Duke, Fulton, Merrill, Butcher, Stiletto, Hibbard OVB, Simmons Keen Kutter, Lakeside and several other old makers and hardware store brands are every bit as good as the collector prizes and are much less expensive. Most unmarked chisels of that era were usually made by one of the above makers for a hardware distributor and are also generally excellent.
To avoid:
  • Stanley Defiance
  • Eclipse
  • Newer Greenlee, Buck or Stanley socket chisels made in the 1960's and later
  • Any chisel with a vanadium finish like used on today's mechanic's tools

 
Tuning

 Flattening, Grinding and Filing - ,

 • Flattening the back - the first step in sharpening a chisel. Once the back side is perfectly flat, and polished to the required degree, the front and side edges need to be addressed.

 • Hollow Grind of the blade or chisel edge

 • Stones or Scary Sharp method

 • Micro bevel

 • Stropping

  
Removing Knicks
• Flat Grinding perpendicular to the back past the knick.

 
Rust Removal
• Evaporust or Electrolysis
• Phosphoric Acid (Parkerizing)

 
Rust Prevention
• Waxing
• Bluing

 
Safety
A sharp chisel gives you great control and allows you to remove paper-thin slices of wood, but it can be dangerous if you’re not careful.

 
• Never chisel toward your body or place your hand in the path of a chisel
• Clamp small projects.
• Cover the chisel blade when it’s not in use.
• Store chisels in a safe place, away from children.
• Wear safety glasses when striking a chisel with a hammer.
• Wear close-toed shoes (nothing like spearing a toe)

 
Demonstration

 Short demonstration of chisel, gouge and shave use (paring, mortising, gouging)

  
Web Resources
http://www.wkfinetools.com/
http://ruckus.law.cornell.edu/mailman/listinfo/oldtools  (email list)

  
Credits:
• Bob Smalser
• Scott Grandstaff

(my notes were liberally taken from materials written by the above and from the web resources  listed).
 
-- John


Wednesday, December 23, 2009

Deltacraft: 19 Charming Chairs

This is a cross-post to my Magazine Scans blog - up for grabs is a scan of the 1940's Deltacraft publication "19 Charming Chairs" - this one includes measured drawings.

Deltacraft: 19 Charming Chairs

-- John

Saturday, November 7, 2009

Tools Explained: Definition of Tool Terms

This was posted to the Old Tools list (I think I've seen it on OWWM.org as well - not sure but this list has been going around for a while and I thought I'd make it part of my blog).

Tools Explained

DRILL PRESS: A tall upright machine useful for suddenly snatching flat metal bar stock out of your hands so that it smacks you in the chest and flings your beer across the room, denting the freshly-painted project which you had carefully set in the corner where nothing could get to it.

WIRE WHEEL: Cleans paint off bolts and then throws them somewhere under the workbench with the speed of light. Also removes fingerprints and hard-earned calluses from fingers in about the time it takes you to say, "Oh, shit!"
SKILL SAW: A portable cutting tool used to make studs too short.

PLIERS: Used to round off bolt heads. Sometimes used in the creation of blood-blisters.

BELT SANDER: An electric sanding tool commonly used to convert minor touch-up jobs into major refinishing jobs.

HACKSAW: One of a family of cutting tools built on the Ouija board principle... It transforms human energy into a crooked, unpredictable motion, and the more you attempt to influence its course the more dismal your future becomes.

VISE-GRIPS: Generally used after pliers to completely round off bolt heads.
If nothing else is available, they can also be used to transfer intense welding heat to the palm of your hand.

OXYACETYLENE TORCH: Used almost entirely for lighting various flammable objects in your shop on fire. Also handy for igniting the grease inside the wheel hub out of which you want to remove a bearing race..

TABLE SAW: A large stationary power tool commonly used to launch wood projectiles for testing wall integrity.

HYDRAULIC FLOOR JACK: Used for lowering an automobile to the ground after you have installed your new brake shoes, trapping the jack handle firmly under the bumper.

BAND SAW: A large stationary power saw primarily used by most shops to cut good aluminum sheet into smaller pieces that more easily fit into the trash can after you cut on the inside of the line instead of the outside edge.

TWO-TON ENGINE HOIST: A tool for testing the maximum tensile strength of everything you forgot to disconnect.

PHILLIPS SCREWDRIVER: Normally used to stab the vacuum seals under lids or for opening old-style paper-and-tin oil cans and splashing oil on your shirt; but can also be used, as the name implies, to strip out Phillips screw heads.

STRAIGHT SCREWDRIVER: A tool for opening paint cans. Sometimes used to convert common slotted screws into non-removable screws and butchering your palms.

PRY BAR: A tool used to crumple the metal surrounding that clip or bracket you needed to remove in order to replace a 50 cent part.

HOSE CUTTER: A tool used to make hoses too short.

HAMMER: Originally employed as a weapon of war, the hammer nowadays is used as a kind of divining rod to locate the most expensive parts adjacent the object we are trying to hit.

UTILITY KNIFE: Used to open and slice through the contents of cardboard cartons delivered to your front door; works particularly well on contents such as seats, vinyl records, liquids in plastic bottles, collector magazines, refund checks, and rubber or plastic parts. Especially useful for slicing work clothes, but only while in use.

Son of a Bitch TOOL: Any handy tool that you grab and throw across the garage while yelling "Son of a bitch" at the top of your lungs. It is also, most often, the next tool that you will need.

-- John

Thursday, September 17, 2009

Using Evapo-Rust for Tool Restoration

I've been using Evapo-Rust for about a year to clean up rusty tool parts. I've had a gallon that I would re-use and it's finally died on me - what happens is that it gets to the point where it's not getting into the pits (if the metal is pitted) and after wiping the part flash rusts pretty quickly. Looking back over the documentation it states that a gallon will treat 300 pounds of metal. I can attest that I've put way over that amount in the gallon I've been using (I filtered the liquid when there was too much sediment). When it starts to fail it creates a yellowish/greenish slimy sludge that sits on top of the part in the bath - this stuff wipes off and I'm assuming that it's a mildly sulfurous compound (no eggy smell though).

Some tips:

1. Make sure you have enough to submerge the part completely or you get a watermark from the dip - this is almost impossible to remove.

2. When not using, reseal in the container as I believer there is some dilution with exposure to air.

3. My process is to dip, usually overnight as most of the parts are heavily rusted, remove next day and wipe down - if there's a lot of rust I'll hold it next over a garbage can and scrape a bit, which removes the heavy stuff - use a wire brush, sandpaper or razor blade. If it's still rusted put it back in the wet. When you're satisfied that the rust is off, re-dip and let air dry - it keeps it from flash rusting (says 2 weeks but it actually lasts longer).

4. For irregular shaped objects I place 4 mil plastic in a plastic over-sized tub, then shape the plastic to conform closely to the part - put a couple of blocks of wood underneath so the plastic isn't sticking to the part or you'll end up with water marks areas not derusted.

5. Best price I've found is at Harbor Freight - they have gallons for $20 and you can use a coupon (I get 20% off coupons in the mail or via email).

6. More info here: http://www.evaporust.com/

-- John

Thursday, July 30, 2009

Wine Rack for Joe and Kathy Black

Wine rack based on some dimensions taken from racks at Winter Haven's Bean and Grape. Design changes include back panel (original had vertical rails on front and back) and addition of reinforced face frame (desire to add doors at a future date needed the reinforced face frame). Also original only held 10 bottles per shelf, this version holds 11 ("Mine goes to 11!" - Spinal Tap) for a total of 110 bottles.

Dimensions are 84 3/4" Tall, 48" Wide and 12 1/4" Deep. If I were to build anohter I would have spaced the shelves slightly further apart (1/4") to accomodate larger bottles.

Saturday, April 18, 2009

WoodpeckerHouse1


WoodpeckerHouse1
Originally uploaded by johnnyapollo
My woodworking club was having a bird house contest. I started thinking about a bird house I built with my dad as a kid - he came home one day with a few cedar shakes someone had given him and we built a small bird house together that hung in the yard for many years. I looked through my collection of old magazines and found one that I liked in a 1940's issue of Home Craftsman. After deciding that I hadn't done anything worth showing lately, I thought it would be something I could bang together quickly but wanted to add the challenge of building the whole thing using hand tools.

All the cuts were made using a short stanley tool box handsaw - I found the teeth too aggressive for all the cuts so I also used a cheap pull saw with finer teeth (this inspired me to find and begin learning more about handsaws and techniques - I'm still in process there). Everything was assembled using wood glue and small brads and it's very close to what I originally built with my dad, other than this design being "stretched" upward for a woodpecker. The hole was drilled using a brace and adjustable bit.

If I were to try doing this again I would figure out a way to remove the bottom for easy cleaning - otherwise the whole thing was very quick to build - took about an hour to cut into pieces (had to re-cut a few things - I also drilled the hole in the wrong place the first time so the front was made twice - second time I got a chip out on the back as I was getting impatient to finish). The main pieces were glued and clamped over night and small brads added the next day - no pre-drilling on the nails and you can see where I got splits on the roof shingles (those shakes are a lot more brittle than I remembered). The only sanding was done to round-over the hole a bit. I did some light planing on the edges.

So anyway, nothing super special about this but it was all done with handtools and surprisingly I got second place in the "most functional" category. The contest was held on 3/21 and I built this the two days previous in the evenings.